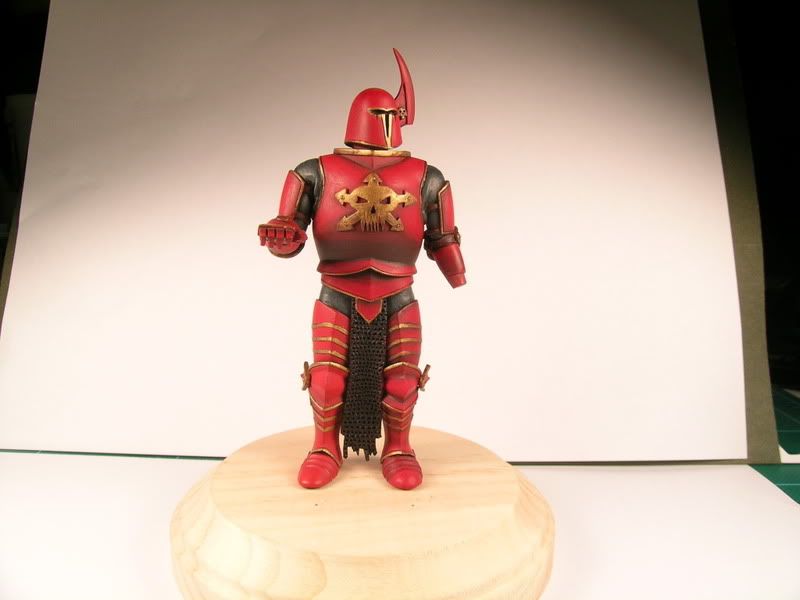
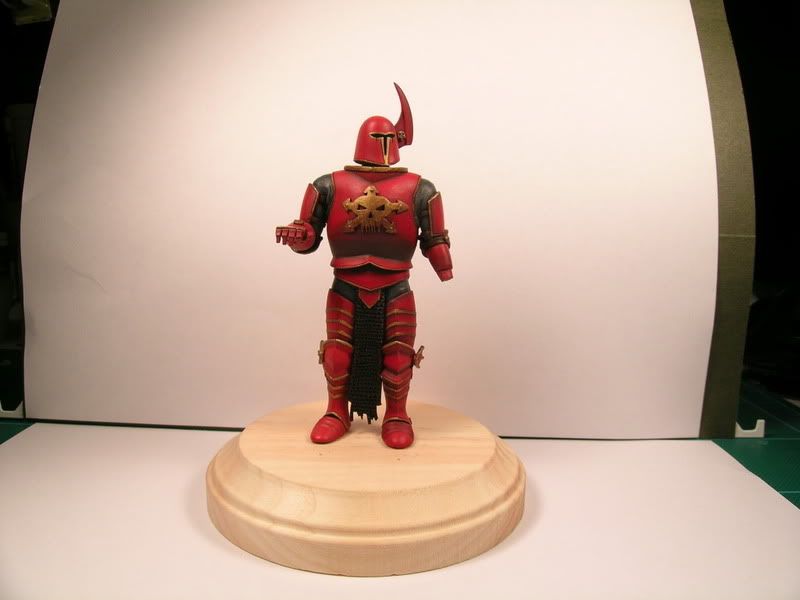
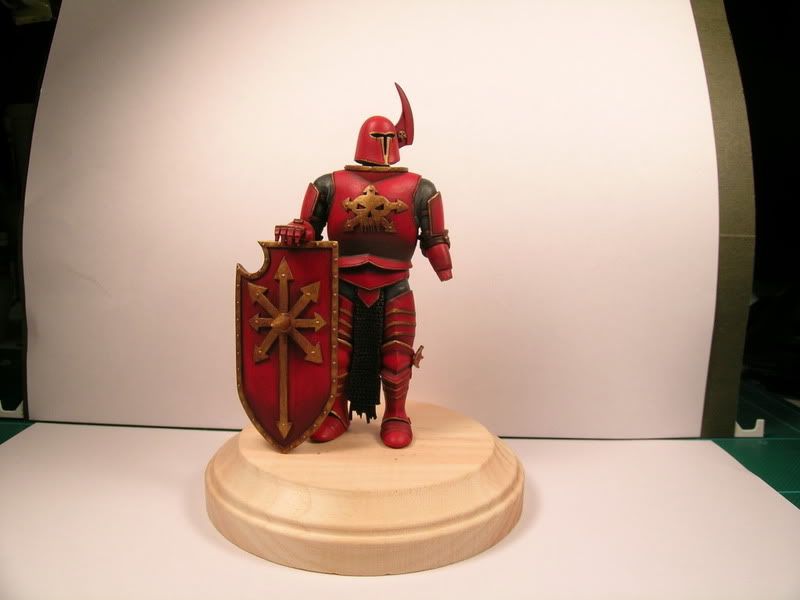
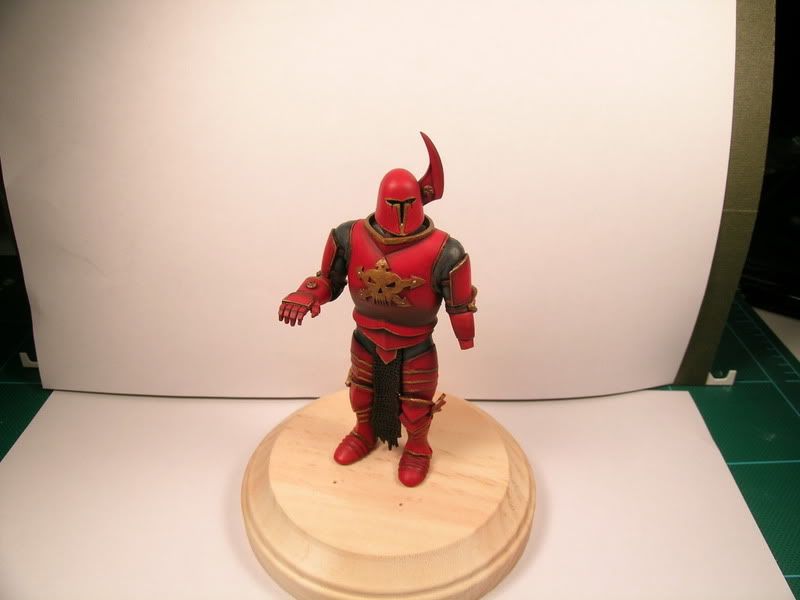
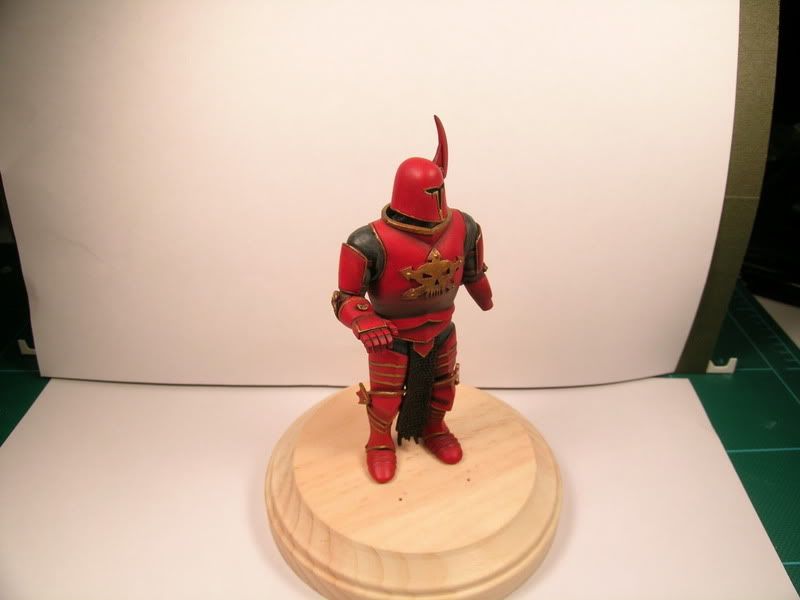
90mm Chaos Warrior

kathrynloch

New member
Thanks Stew! Really appreciate it!
So Sunday, I got the brushes out to start working some shadows for the red. After seeing a thread on a red Bloodcrusher in the painting forum from War0827, I realized that my red was quite simply put...too flat and plain. I think it looks absolutely horrible.... Once I get some highlights and do the leg I started, I might sow some pics before I strip it and start over....MIGHT. If I do show some pics, I plan on leaving one leg untouched to show how much of a change there is. As he is right, the armor is overall very dark, which I'm kinda ok with. If I can get the highlights on and looking halfway decent, it might keep me from stripping it. I just had some issues of the color becoming sort of mottled is the best way I can describe it. Not the finish or texture, just the color.
Anyways, more work to be done before I take any more pics of it and maybe I'm being too critical of myself. Shading this much is completely new to me. My old way of mini painting was quite basic in comparison.

Till next time!

It takes practice but the basics aren't that difficult. What War is doing in his thread is similar to what I did on the red leather tack on my horse. The inks, and shine, along with the paint and knocking down certain areas of the shine also help to add depth. So in this case, you're not only using color but the matte and gloss to aide you as well. Textures, colors - not just light and dark - and graduations, all help in the perception so try to look at it from as many possibilities as you can.
 

armornv

New member
Thanks for the tips Kath. It's just that the way things are going, it's a bit disheartening and makes me feel like I've never even picked up a paintbrush. It has been quite a while since I've painted anything so maybe I'm just waaaay out of practice. :)
 

kathrynloch

New member
Oh believe me, I understand that! I feel like an idiot trying to paint NMM and I can't hit the broad side of a barn. lol!
 

armornv

New member
Well thanks for the encouragement you two. After a few days away from(bareley looking at it) and LOTS of reading through the articles post in the paintin' section, I think I'm gonna try and improve the areas that look bad(almost all of him lol) instead of stripping and starting over. Not sure how any kind of stripping stuff would affect Magic Sculpt anyways and I don't want to destroy it trying since it's a one of a kind! :) So, I'll try and get started when I get home from work. Updates to (hopefully) follow soon enough!
 

kathrynloch

New member
That's a good point armor. My Dawn Power Dissolver method eats Apoxie Sculpt after a bit. You've got a little while before it does though. I'm not sure but I think it's gentler than the oven cleaner or other methods. So I'd be scared to try any stripping technique on all Magic Sculpt. I was able to strip a resin model horse with significant Apoxie work without touching the Apoxie at all but I was checking it every 10 minutes and got lucky that the model wasn't sealed well. The paint came off completely in under 20 minutes. This was my repair nightmare so it's a good thing it wasn't something I sealed. lol!
 

armornv

New member
Yea, the last thing I want to do is destroy this figure. I would probably throw all my tools and paint away after that lol!

I feel I made some progress on him last night. I have managed to even out some of the transitions from shadow to midtone. Still a few places that nmay need some love but I think I'm about ready to start the highlights. I'll try to get some pics before I start that tonight. I may not be good at it yet, but I think I'm at least starting to understand how and why the whole layering thing works....I think :)
 

armornv

New member
Ok, since most of the leet painters here are prepping for GD tomorrow, I'll go ahead and throw these pics up now so I don't get laughed off of the intrawebz lol. (as if they won't be able to see them for the forseeable future)......Anyways......
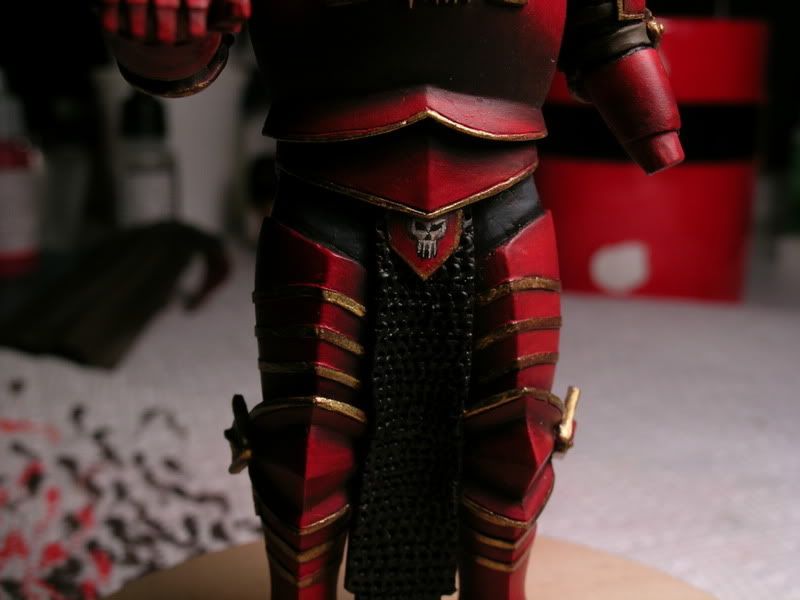
The pictures once again are drowning out some of the shading. I think it's an improvement or at least a step in the right direction. A few explanations are in order I believe. First, His right leg, our left, has been left untouched as I said to show what the difference is. Not sure if you can tell that in the pics or not. Second, the pics have shown me that there are a still some transitions that need yet more attention. Specifically, the one under the chest emblem. Third, this is just shadows and midtones right now, haven't added any highlights yet other than what little I did with the airbrush at the very beginning.
Also, I will be going back over all the trim. The entire reason it was even painted already is because I had thought the shading I had done with the airbrush was enough....Boy was I wrong!!!!! Therefore, it has to be retouched in some places. The shoulders and other hand are about as far along as the rest of him. The shield looks a little....splotchy? but I'm ok with that because it kinda looks rain streaked and dirty which is kinda sorta the overall look I'm going for :)
I think some of my transitions have turned out fairly well all things considered. I have decided that stripping and starting over is out of the question, so if I can't "fix" any of the paint "issues", then I will simply have no choice but to call it a lesson learned and move on. :(
I'm sure that I'm forgetting to point some other things I wanted to bring to your attention, but I'm sure you all will point them out and jog my memory! :) I hope you do anyways!

And please, honest opinions, worded as nicely as possible lol. I won't get any better if people are blowing rainbows and unicorns up my tail lol! I'm not sure I would want that anyways come to think of it...........but I digress.
In no specific order, herez sum pikz:
DSCN5789-Copy.jpg

DSCN5791-Copy.jpg

DSCN5792-Copy.jpg

DSCN5793-Copy.jpg

DSCN5794-Copy.jpg


Thanks for looking peeps!
 

kathrynloch

New member
Great job armor! Give yourself a pat on the back for leaping up a couple of rungs on the ladder. You are getting a good grasp of the shading. After looking at the first pic, I was going to suggest following the curve of the metal so the shading makes a triangle, but then in the very next pic, I see exactly that! So good job getting different angles in there. And don't be afraid to go at a 45 degree angle from front on the sides. Even if you don't post the pics, they can still help you spot problems. The camera is an unbiased, unflinching eye.

It looks to me like you've been working the shading upward and that's great. Just don't forget the downward too, although the color and intentsity will be different, but you probably just haven't gotten that far yet.

I love the shield! You've got a great start on it!

On the legs especially, or at least on the one you have started, think about wrapping that shading around the sides a bit more. Mayb go from the inside toward the middle of the plate where it comes to a peak so the transitions are in the inside of the thigh. The outside of the thigh, put a little bit on, just so it doesn't stick out like you didn't touch it at all but where the thigh starts to cover toward the knee, hit the outside a bit darker.

Basically on relatively flat surfaces like armor, if it curves away think about shading it with that curve. You really nailed it on the torso! So do that on the legs and arms too.

But very very well done! So no sunshine and rainbows here. I hope you don't mind the suggestions.

Cheers!
 

armornv

New member
It looks to me like you've been working the shading upward and that's great. Just don't forget the downward too, although the color and intentsity will be different, but you probably just haven't gotten that far yet.

I think I know what you mean.... So I should add more shading on areas such as right below the collar where it would create a shadow on the chst?

I love the shield! You've got a great start on it!

Thanks, that is actually one of my favorite parts so far!

On the legs especially, or at least on the one you have started, think about wrapping that shading around the sides a bit more. Mayb go from the inside toward the middle of the plate where it comes to a peak so the transitions are in the inside of the thigh. The outside of the thigh, put a little bit on, just so it doesn't stick out like you didn't touch it at all but where the thigh starts to cover toward the knee, hit the outside a bit darker. Basically on relatively flat surfaces like armor, if it curves away think about shading it with that curve. You really nailed it on the torso! So do that on the legs and arms too.
This was tough for me. I was adding going from light to dark in between the gold "stripes", but it sounds like what you are saying is to go from inside on the entire leg out to the peak, then the peak back around the outside. So from dark(inside leg) to the peak(highlight) back around the side( dark again) Dark------>Light------>Dark and do that for the leg as whole?

But very very well done! So no sunshine and rainbows here. I hope you don't mind the suggestions.

Thankws a bunch! I do not mind the suggestions at all! They are greatly appreciated!
 

kathrynloch

New member
I think I know what you mean.... So I should add more shading on areas such as right below the collar where it would create a shadow on the chst?

Kinda...let's see if i can explain this - shadows don't just go up and down. Because of ambient light, they come from the sides too. Just because something isn't in direct lighting doesn't mean it doesn't have a shadow.

Here, I hope you don't mind, but I snagged a copy of your dude and put an arrow specifically where I'm talking about. That lip of the armor and the one below it needs more shading. Plus, on the leg, I shaded the areas I'm referring to - but my editing skills are terrible so it doesn't look that great. Still, it will give you an idea of what I mean.

That's another thing I do, if I'm not sure how something will look, I try getting a general idea by pulling it into Corel and messing around with a photo. Since you're dealing with a "no stripping" option, editing a photo before you try painting might be helpful for you as well.

View attachment 7196
 

armornv

New member
Sweet, I see what you mean. There actually is shading in most of the spots you pointed out so I'll just go back and beef it up some so to speak. :) The lip with the arrow pointing to it, are you saying I need to bring the shading sort of around the side more?
Thanks for the help so far!
 

kathrynloch

New member
Not a problem! Happy I can help! And yes, that lip of the armor, bring the shading down and around just a bit more. :)
 

armornv

New member
I'll give it a shot!.................


Ok, I gave it a shot and while I think it's a smidge better, I think I've gone as far as I can go without going backwards. As far as shading and highlighting goes that is..... I would have taken some pics but A: It really doesn't look that much different and B: Well, I just didn't feel like dragging out my camera, tripod, extra light, and clearing off a spot on the bench.... :)
The good news is, that I can now retouch all the trim and other booboo's and start the fun stuff!!!! This is the part that may or may not make you say(if you haven't already) eeew....what's he doin to that thing? In other words, these next few steps could turn it into crap on a base...... WTH is he talking about you may ask? I'm going to wear out the armor. Haven't decided how worn yet, but I'll know when I get there lol!

And a question for the masses....uh, assuming the "masses" are still remotely interested in this DIP.(That would be Disaster In Progress in case you were unsure) :) Only kidding. Oh right the question..... Color for the cloak??????????? I'm completely open to suggestions.... Ready, set, discuss!!!!

That is all for now.
 

Meph

Cat-herder Extraordinaire
Or a very dark burgundy, almost black? Oh, oh! Or a dark green?

But you're progressing well man. The reason I haven't added many constructive comments is because Kat is being a good coach already. She can teach anyone a good 'wax-on/wax-off' voodoo for large models.
 

kathrynloch

New member
lol! Thanks Meph!

Sounds good armor! For the cloak I vote for dark brown. You'd have to get the green really dark to keep him from looking like an armored Chaos Claus.
 

armornv

New member
Thanks for the thoughts folks! Meph, I completely agree, Kath is a great teacher! I had been thinking along the lines of brown for the cloak. Sounds like it might be a good choice and should simple enough for me. I have to say though, I'm not sure I was meant to paint these biggie sized guys. I'll see if I can get some paint on it tonight though.

Thanks!
 

armornv

New member
So I was looking at my ref pics to get an idea of where to start on the "weathering", and I immediately saw something that I forgot to do( wether I intentionally forgot I may never know) :)
It seems that he has a few different skulls painted onto his armor. The waist plates, the nut cover, and one shoulder..... I've "attempted" one the nut cover, which I probably shouldn't have as it is the smallest possible area to try it on. The other three are larger and "should be" a little easier to work with. They are more like animal/demon skulls than a human type like this one.
Anyways, for a first attempt at anything like that.......I guess it's not.....bad? But I'm wondering if I should keep going with the rest of them?
I have to touch up his lazy eye and do a little clean up but.....? Also keep in mind that once the weathering is all finished, this and the other three will be relatively faded and dull looking. So...opinions?

DSCN5806-Copy.jpg
 
Last edited:

kathrynloch

New member
And thank you as well, armor! I'm so glad I'm able to help and you've been doing great. He looks fantastic! I lol'd at nut cover - I always heard them called cod piece but hey, nut cover works too. The skull looks great and I think you should definitely keep going. The shading looks very nice in the different lighting too.

I don't know...you may be cut out just fine to paint these big guys. ;)
 
Back To Top
Top