Hi Shawn Classroom #1 for OSL... TAB

Shawn R. L.

New member
Originally posted by SirJD
will do :) just one question, what brown do i start with? scorched brown? if you could let me know what brand of paints it would help a little.

thanks in advance,
SirJD

I use regular \'artist\' paints - the ones in the tubes so I dont know the gamming names for the colors. The brown I would start with is burnt umber. It\'s a chocolate brown that leans toward the warm, red/orange side when diluted.
 

SirJD

New member
YAY finally, i find someone who uses regular artist paints like me :) thanks for the info, i actually have all the paints you mentioned, so ill set to work now.
thanks again for all your help, i cant wait to see him finished :)

SirJD
 

SirJD

New member
Hey again,
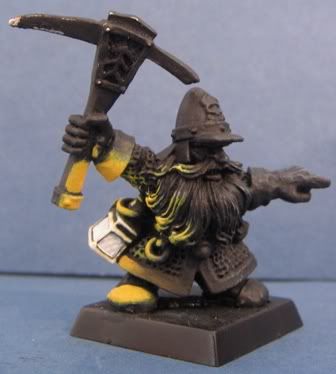
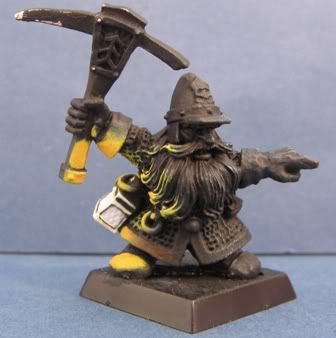
I\'ve finished the blending of the front rim. I might blend it again, depending on how you think it looks.

SirJD

Dwarflightblending003.jpg
 

Shawn R. L.

New member
Your ability to blend is fine, what I see on my monitor is it going from yellow right into brown. It needs to go from yellow to burnt sienna (rust color) to brown (burnt umbre). Dont crowd further into the yellow. Do the addition to where the brown now blends into the yellow and go towards the brown side..........mmmmm\' k?
 

SirJD

New member
Thanks for that :) ill keep working on him now with your tips and post WIP pics in an hour or so.

SirJD

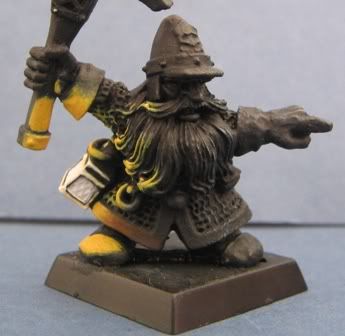
EDIT: Hi again, ive tried it again and its looking more like how you describe now. Ive posted the pics below. As i dont have burnt sienna im mixing colours to get them just right so any tips you have to mix burnt sienna would help :)

Dwarfblending.jpg
 

Shawn R. L.

New member
Brown + orange or orange + a TOUCH of black. You want to end up with simply a rust color. Brick red would suffice also.
 

SirJD

New member
Im back again :)
heres the wip pic after blending it with the colour mix you suggested, it looks a little more orange irl.


Dwarfblending1.jpg


SirJD
 

Shawn R. L.

New member
Good enough. Do the rest of the areas the same way......BUT with an area that is by itself and far away from the light source, there will be no yellow. Refer to one of the last pictures in the OSL tut. and not the pic with the coencentric circles around the model. If something is far enough away it may only go from orange to brown or even farther away, only brown. The hem is unique that it, in one continious band, goes from bright light all the way to dark. This may be a bit abstract so if it\'s not clear, let me know.
 

Shawn R. L.

New member
Because it\'s far away from the light, the tip of the moustache would be burnt sienna and brown. The lock of hair in the beard furthest from the light would be burnt sienna also...no yellow due to them being far from the light. Get this step done and it all can be adjusted. There can be a bit of back and forth.
 

SirJD

New member
Hi again,
thanks for the instructions, i fully understand what you mean. Ill get to work on him now.


SirJD

PS: I re did the hem after looking at it for a while and it looks perfect now, thanks for the help.
 

XeO3

New member
it looks to me like the bottoms of the fingertips should have a little highlight, but i could be worng...
 

Shawn R. L.

New member
Originally posted by Modderrhu
Apologies for the lack of WIP\'s, Shawn. But, I look at this mini and lose all confidence. :(

Rubbish...you can do it. Just go step by step and it will happen.

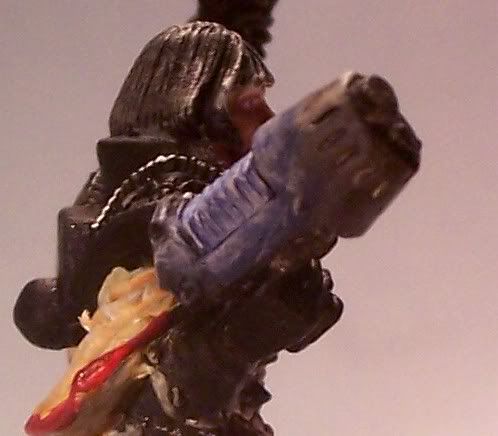
@ Thecadian - hard to tell from the photo what\'s happening there. If that\'s one you want to have a go at, I\'d say to strip it, prime it black and we can start.
 
Back To Top
Top