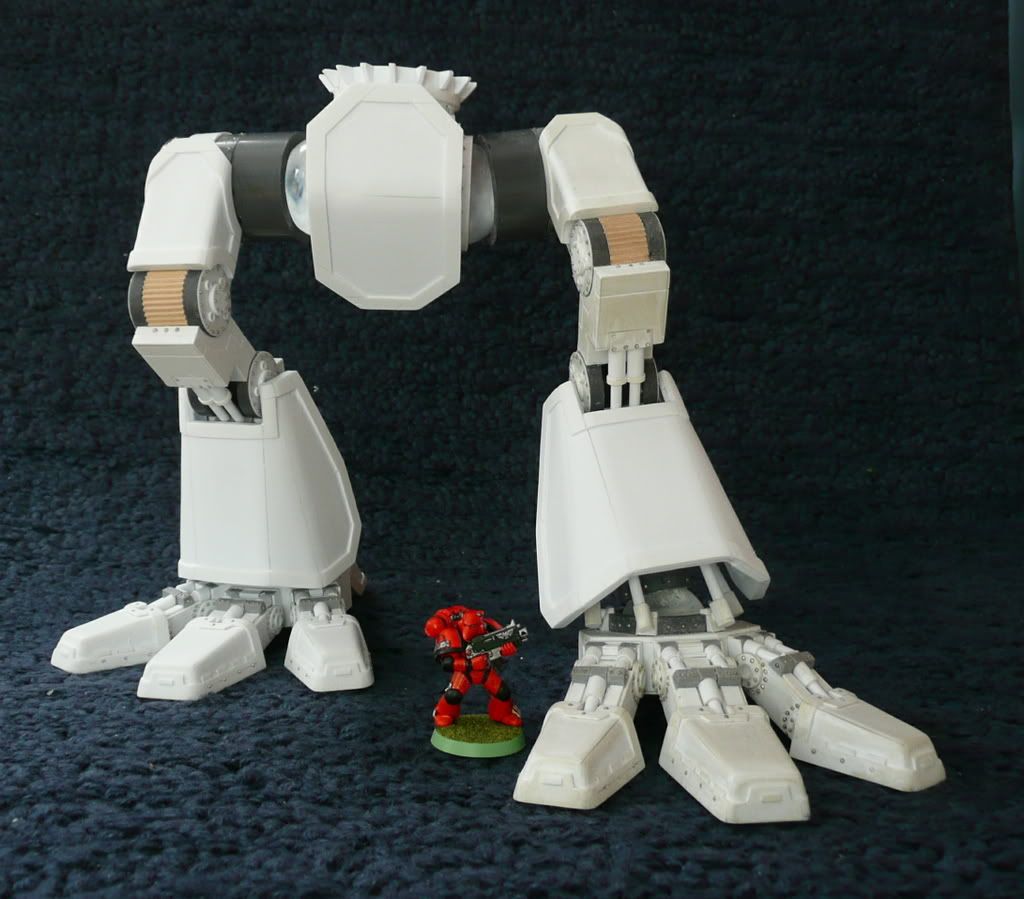
a TITANIC undertaking

fiesta0618

New member
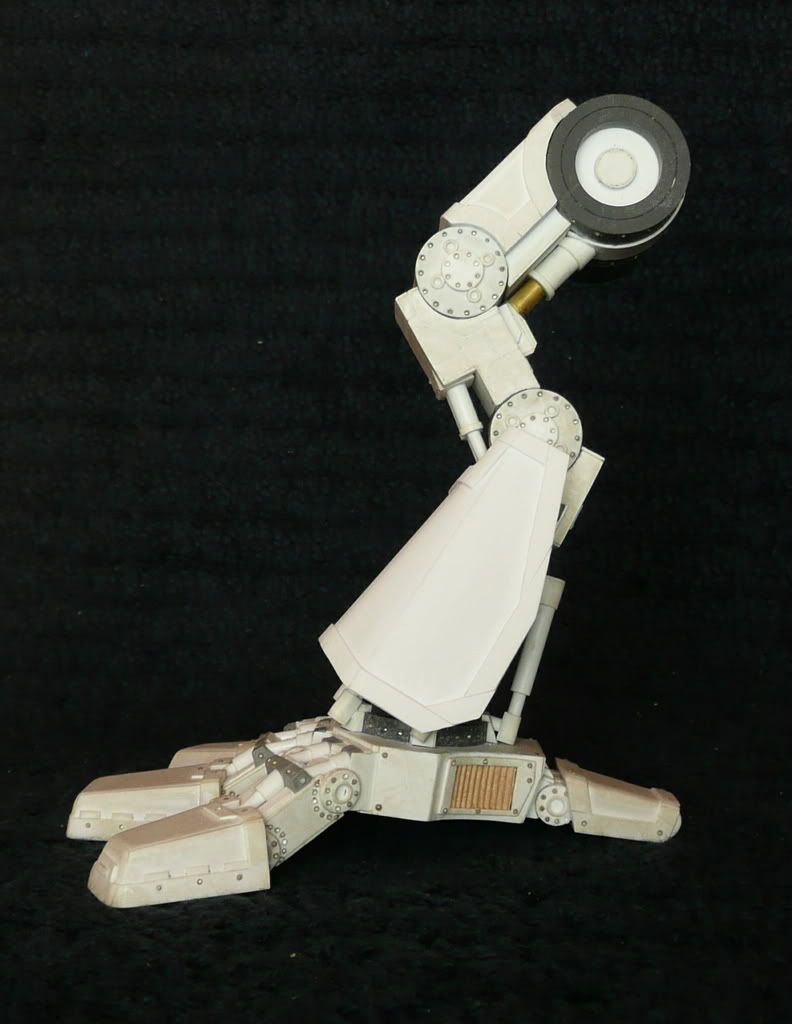
Profile shot? I can do that...
cmonphotos023.jpg


--Fiesta
 

fiesta0618

New member
HALFWAY!!!!!!!!!!!!!!!!!!!!!!!

Got the leg armor done, and that means...TORSO TIME! Anyway, here\'s the damage:
cmonphotos029.jpg

cmonphotos030.jpg

I ended up not changing the shin armor; I showed this to some of my buddies, and they echoed freakinacage. One of them even said \"Dude, there\'s so much detail under there, why try so hard to hide it?\" So I kept it as is. I like the result on both legs a lot, and I\'m pretty psyched to get started designing the uppers. Oh, a note: technically it isn\'t 100% done because I don\'t have any pistons conecting waist to hips, but I\'m waiting to have a rough shape of the body first so I can figure out the waist angle. And also, I\'m looking for suggestions on cosmetic details--where to put more rivets, some skulls, Mechanicum iconography, Imperial Eagles, whatever you guys think would spruce up the stylishness.

As always, you find any niggling, bothersome errors, do please let me know!

--Fiesta
 

The Trooper

New member
the raised borders of the armor plates could use some heavy duty rivits imo

but other then that....holy fudge balls man, this beast is amazing!
 

mud duck

New member
Two cents
half imperial eagles on the sides of the toes, facing forwards?

And the thing that I all ways thought but never have seen, frag launcher (ie the Crucader Land Raider model) or some other type of anti personal/boarding device on the shins/second knee joint.

and if I may (and of course the gents names are lost to me, some help! please!) over on Bolter and chainsword are \'decking out\' a FW warhound, maybe a couple of idea to help you could be found in their labors.

other then that. WOW.....
 

fiesta0618

New member
Torso structure

OK, so I\'ve got the shape of the upper body roughed out--no details, no armor plates, no nothing, just the shape. I\'m more or less satisfied, except I\'m not sure if the waist joint is too long and thin. I\'ll let you judge for yourself:
3355660372_319edaa41d.jpg

3354853277_5244a21866.jpg

3355660896_52366bd8cf.jpg

3354841349_3dfc313176.jpg

3355661820_470136f190.jpg


There is still one part missing...there will be a large block of exhaust and cooling systems in the center of the top hull, but I need to make the the mechanical details before I add that block because it has a grate over it.

The legs are now, for the first time, glued, and the promised pistons added. For all intents and purposes the legs are 100% complete, except for massive riveting--thank you, Trooper, I agree with you--on the armor trim. However, I\'m holding off until I know what I\'m doing for a design. It may affect my \"rivet density,\" and the rivets are simple anyway.
Originally posted by mud duck
And the thing that I all ways thought but never have seen, frag launcher (ie the Crucader Land Raider model) or some other type of anti personal/boarding device on the shins/second knee joint.
A worthy idea, but one that I believe fits much better on a Reaver or Warlord. Scout Titans are supposed to be speedy and elusive and if you look at the model their armor is actually pretty sparse. I thought about this for a while, and realized two things: first, if someone gets close to the Warhound then it\'s in trouble anyway; just look at all the exposed mechanisms. Second, frag launchers on the shin or knee could muck up the unprotected foot joints. So I\'ll pass on it here, but I\'ll keep the idea in my pocket for the upcoming Reaver ;) But in response to your other comment, I do plan to get some FW Brass Etch Imperial Eagles and scatter them about...where exactly, I do not yet know. I\'m just sorta handling each step as it comes with this project.

ANYWAYS, I thank you all for the encouraging words, and please advise me on size and scale of this lad\'s torso!

--Fiesta
 

Acheron666

New member
verry nice man

well I have been working on a chaos warhound titan and your WIP is beyond awesome!
right on with the legs and body man,have you thought of a chaos version?
anyway~~
 

dogfacedboy uk1

New member
Yep, this is going to be the most awesome scratchbuilt titan i ve seen when painted i reckon. How the hell do you ge those corners so perfectly aligned together man, it looks perfectly sharp. what thickness of plasticard is it as well? Share you secrets damn you!!!
 

hestan101

New member
well me giving YOU advice is sacrilige of the highest order but here goes:
1. i think the joint is a little thin, maybe bulk it up with some pistons around it
2. i think that the torso maybe extends forward a little to much, but that could just be the angle
 

fiesta0618

New member
Thank you, everybody, for your feedback.

First off: Sorry, Acheron I\'m a die-hard Loyalist, no Chaos for me! However, I\'d not mind handing over my design and see what a Chaos man could make of it. (that\'s not to mention, this project has been so involved it\'s tough to imagine doing THE SAME THING YET AGAIN...)

Second: Hestan, thank you for convincing me that I\'m not crazy. I don\'t think pistons are the answer here, though, because the waist is a rotate-only joint. I\'m thinking either add a layer around the topmost ring to thicken it OR set the body a bit lower to decrease the waist length. The good news is, because the waist is not and will never be glued, I can do all that MUCH later and see how things take shape around it first.

And you, dogfacedboy, want my trade secrets? Alright then! Begin lengthy explanation!

I use three thicknesses of card: .06 (about 1.5 mm), .03 (half that), and .01 (half that again). The thickest stuff I use for load-bearing bits and armor plates, and in order to have it join neatly (as on the shoulder guards) I simply bevel the edges with coarse sandpaper. The thinnest one I only use for detail work, because it\'s essentially plastic paper, so the bulk of the structure is made from the middle size. That\'s too thin for beveling, so I use a technique I call \"capping.\" It\'s pretty simple; I just glue into place a piece that is much too big, then cut it down to size (the Dremel is God for this, let me tell you). Of course, no matter how careful I am I still get little gaps with both these techniques, so I fill them liberally with liquid superglue (Loctite Control Liquid is my preferred adhesive) and once that sets I sand it back down to flatness with the coarse sandpaper, then finally with extra-fine finishing sandpaper to obliterate the scratches. I have to say, it isn\'t very material-efficient at all, but I sure don\'t get any unwanted lines in my paint job afterward! :D

End lengthy explanation! There\'s no magic to it, just a couple extra steps beyond simply constructing.

Back to work with me...I\'m adding armor plates now...

--Fiesta
 

hestan101

New member
this may sound unpleasant, but i reckon the finished pics ned mailing to forgeworld, with the worda:how\'d you like that! and ive still got enough cash to eat tonight!
 

goalie4hire

New member
Titanic Undertaking

Fiesta,

Awesome work! I too am making a Warhound out of plasticard, but sadly, after seeing your work I am no longer pleased with my work. I won\'t even bother taking pictures. You said you wouldn\'t mind sharing your designs with others. Is that an open invite for others to glean your expertise? I would like to re-start my whole Titan and if you don\'t mind, I\'d like to use your design (lack ofbetter\'s is good, but I absolutely love your design).
I look forward to every update on this thread. Keep up the awesome work.
 

fiesta0618

New member
Hello goalie4hire, and welcome to the forum-posters\' club! Yes, I am openly inviting others to try building this monster--I want to see more display-level Titan scratches out there, with further improvements and embellishments and changes beyond mine. So sure, if you want to give this project a go I\'d be more than happy to provide you with my templates. A few caveats, though...for one thing, I\'m not done with them. I have only the leg designs finalized. Second, they need to be whipped into shape so that someone other than myself can make sense of them. Give me a day or so to neaten this thing up and I\'ll happily send you what I\'ve got. Go nuts with it!

--Fiesta
 

goalie4hire

New member
That\'s great!
I was trying to design a better warhound than the one in the plans, and I WAS happy with the way it was coming along, but after I saw your legs, I knew that I wanted to spend the time, and make mine to look like yours.

I finished a Reaver Titan out of paper, but it is just that, a paper titan... Not really good for anything but looking at.
 

Jamaica Slim

New member
This is amazing!
I don\'t dare to think of the work hours you\'ve put into it!

Can\'t wait to see it finished and painted.
Really, really amazing work!
 
Back To Top
Top