Hi Shawn Classroom #1 for OSL... TAB

dauber22

New member
Originally posted by vincegamer
Someone did Tiriel for the last chick challenge with the shadow of a dragon cast on the wall behind her. It was awesome, but I can\'t find it and the chick challenge website seems to be gone.

I imagine you mean this one, vince:
http://www.coolminiornot.com/84943
by our own inimitable EricJ. :D YOu\'re right: awesome! :wow:
 

Shawn R. L.

New member
I will always be watching for this thread, so at your lesiure post questions and WIP\'s. Know this. I\'m REALLY into this subject and look forward to helping.

Eric is no slouch. Great OSL. I\'m sure he could have good input also.
 

Shawn R. L.

New member
Originally posted by funnymouth
should i photograph pieces with osl on a black background?

It depends on how much you want to show off the effect and the setting you are thinking of the mini being in.

Black will make a much more dramatic effect IF you have painted the dark parts of the mini very dark. My two that I linked to and Eric\'s fellow holding the blue flame.

You can also do the OSL trick in lighter settings and get a good lit effect. Have the whole mini be simply darker than the lit area but not necessarily black. Here is one I did that way and it works without the background being black.

http://www.coolminiornot.com/114300

Paint the piece and then try different backgrounds. The first two I have links to I did with a black background in mind and the one above I intended to be for a lighter background.

ANDDDDD as I will keep saying - POST WIP\'s.


Now that I wrote all that I re-read your question and realised I kind of missed the point you were getting at. Shoot it with a background that is going to be easy to seperate with photoshop from the mini. Avoid using white or colors that may cast too much ambient light. Try to light it from many angles so there wont be too many REAL shadows. It\'s a delicate thing. Light it but not so much that there are harsh shadows or shiny spots. Use a good matte finish.
 

Shawn R. L.

New member
Originally posted by vincegamer
Shawn, you haven\'t answered yet where that base came from.

I\'m not sure which base your talking about but I almost always scratch built the entire base for whatever I do. Eric did the one with the big shadows on the wall. Not sure how he did that.
 

vincegamer

New member
The one you linked to in your last post - the SpaceHulk terminator. My comment there included asking where the base came from.
 

Shawn R. L.

New member
I thought I had PM\'d you about the base a while ago. Mabey not. I took a piece of 1/4 inch thick styrene, cut a groove around the edge, scribed the panel lines and round hatch covers in with the sharp end of a compass and using the end of a mechanical pencil (the ones where you click the end and real thin led comes out the other end) I stamped in the rivets.
 

vincegamer

New member
I checked, and you had PMd me but you just said it\'s made of styrene.
Thanks for the details here. I know this is off topic, but what is styrene and where do you get it? I looked up styrene and that can\'t be what you used as it\'s liquid at room temperature, so it must be shorthand for something else.

p.s. I\'ll get back on topic soon. I just got an old 1988 terminator (shoulders, marvin the martian head) that would look great with glowing eyes.
 

Shawn R. L.

New member
Styrene - Like the old supreme court justice said: dont know how to describe it but I know it when I see it.

Styrene is a very common plastic. It\'s what most plastic model\'s are made of. It\'s not too soft or too brittle, it sculpts well and is easy to glue. Go to any Tap Plastic store and they will have gob\'s of it. The 1/4 inch thick I got is a bit of an oddball. 1/8 or 3/16 is the thickest it comes in normally. I believe you can get it through Evergreen Hobbies. At Tap I get pieces from their scrap bin for a dollar or so for a piece 6 inches by 1 foot. Sometimes I get it for free. Hope that helps.
 

TAB Studio

New member
Sorry Shawn

Hi Shawn
I am coming back with pictures
I took the Dwf. crew to the ATL GD but with the new job, getting MOT certified and the trip to Grumbs and back all the base was rushed as well as I did not sleep much really.
I am doing some overtime this week at work and all the plans to get pictures have not been good to go. I have a bunch to take and the dwarfs are in line.
I will get them so you can check....I want to rework the base in total but the figures themselves came out nifty, need more highs and lows but I think I am getting there.
 

Shawn R. L.

New member
Originally posted by TAB Studio
Sorry Shawn

Hi Shawn
I am coming back with pictures
I took the Dwf. crew to the ATL GD but with the new job, getting MOT certified and the trip to Grumbs and back all the base was rushed as well as I did not sleep much really.
I am doing some overtime this week at work and all the plans to get pictures have not been good to go. I have a bunch to take and the dwarfs are in line.
I will get them so you can check....I want to rework the base in total but the figures themselves came out nifty, need more highs and lows but I think I am getting there.

WOA!!! NOTHING to apologise for. No pressure or hurry. If I bring this thread up it\'s because I enjoy it. Life takes precedence over little army men.
 

Shawn R. L.

New member
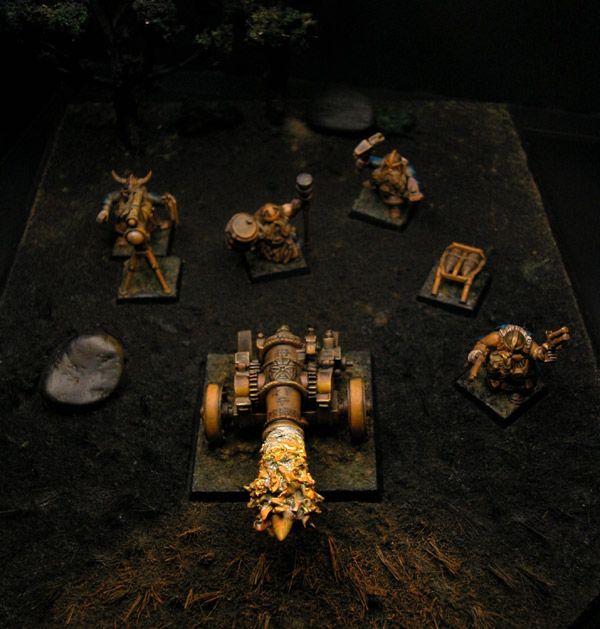
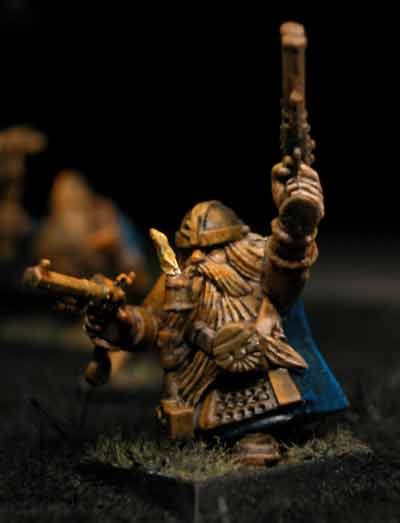
I\'m just heading off to bed, but at a glance, what I would say is you are well on your way. There appear to be some dark area\'s in the muzzle flash. Paint ALL the crevices white. Post some pic\'s of one or two mini, with the same (real) light source, from multiple angles.
 

TAB Studio

New member
Hi Shawn
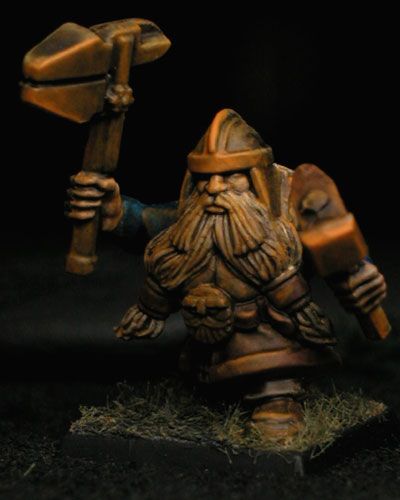
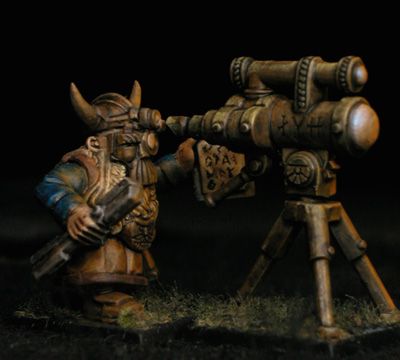
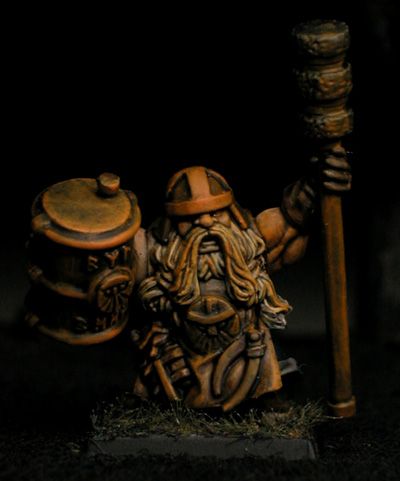
I hosted some up on Photoshack for ya, I will be able to get some done this weekend so, fire away with suggestions.
Thanks again for all your time and help on these.
cannonsgroup.jpg

cannon-2.jpg
cannon-3.jpg

cannon-4.jpg
Engineer-1.jpg
 

Shawn R. L.

New member
@TAB - The color\'s you are using are my favorites. That oldworld, Rembrantish coloring.

I like what you have going so far but now take what you have on the lit side of everything and \'up the light\' a fair amount. It still looks like there is some dull color in the crevices of the muzzle falsh. Paint those areas white. One thought that comes to mind is to do a medium density drybrush of white on the lit side to get the tone levle worked out THEN go over that with a thin wash of the colorscheme your using.

It would help to see one of the fig\'s photographed front, side, 3/4, and back. I\'m having a hard time seeing what is painted and what is the effect of the lighting you are using.

edit - One way to save yourself alot of back and fourth hassle is to take just one mini and you and me work it till it\'s just right, THEN do all the rest in like manner.
 
Back To Top
Top