Zombie Miniature Painting Question from a Non-painter

Skittlebrau

New member
For a first time dipper, these are good! A little too much dip left on I think, but that's hard to tell from just these pictures. A few more shakes wouldn't hurt next time.

Markus, the key to dipping is getting the starting colors right. Everything needs to be brighter than how you want them to end up. These started out a little dark, and I think the camera flash is making them look more washed out because of the gloss finish. Dipping is all about a little trial and error to find the exact shades and colors you like for the end product.

View attachment 13548
 

Markus_Berger

New member
That looks better now ;-)))

Ok I think my Dragons from GW (Cave Drake and Smaug Dragon) and my Balrog are very big models where I will not uise a dipping technique ;-))))

The Cave Drake, the three Smaug Dragons (Ice Dragon, Fire Dragon and last one not decided) as well as my two Kankra (Shelob) spiders plus my 2 more Balrogs - Which are still not all completly assembled at home will require more detailed work ;-)))

1 Smaug, Cave Drake, 2 Kankras and 1 Balrog are assembled yet ;-)

So lets see. I have some Hollidays during the next week ;-)
 

Niranth

New member
I think they are looking good! Do you like the results? One concern about not painting the yellow plastic is it will also not have primer. I think that is why Army Painter has so many colors of primer. Please let us know how it works out. If you want to go a little lighter in shade, try the Pecan finish. Classic Oak is lighter yet.

I like the darker shade as it seems to hide more mistakes. :)
 

Skittlebrau

New member
Those pictures make them look even BETTER! Excellent job for a first time dipper! Those skellys look....MOLDY! I love it! The zombies came out pretty nice too! The abundance of blood splatters are a BIT distracting to my eyes, but if you like them, then that's all that matters! But whatever you did on those skellys...do it again! I That's an awesome "rotting grave dead" look!

You can dip without a primer just fine if you use the minwax. It make a nice hard coat that doesn't need anything under it. I've dipped plastic where I only touched up the detail areas and relied on the molded colors to show through. Works great. Army Painter "dip" is more of a watery paint though, so I would make sure there is at least some sort of primer on anything with those products.
 
Last edited:

KingZombie

New member
I'm thrilled with the results! o.

Well... I understand the primer issue. I primed in black and painted yellow over top, which did give the texture and different places for the dip to take hold. Which I think made it look cooler. So I am curious as to how it will look unpainted.

Maybe a really, really dark dip would work. Like black. That might give a really striking detail filling in all of the little crevasses...so maybe I can get out of priming the skeletons.


I do think some of the "human" figures would benefit from a lighter color. I may have to go and buy a few different shades and experiment.


This weekend, I will be moving on to some zombies. That'll be interesting.


Oh... as a side note, I raided my kids blocks for small, round piller blocks to be used to mount figures on while painting. :curl-lip:
 

KingZombie

New member
The zombies came out pretty nice too! The abundance of blood splatters are a BIT distracting to my eyes, but if you like them, then that's all that matters!

Yeah....those zombies were painted by my 10 y.o. I told him he needs to tone it down on the blood. Even if someone exploded next to you, you wouldn't be that covered. All sides (front & back) have about the same amount of blood.

He'll learn.
 

empinchen

New member
Good job on those minis. Kinda gives me some hope that my zombicide minis will look acceptable even without painting skills.
 

Archon Shiva

New member
Awesome! That's exactly what I was going for with the horrible tutorial: getting people painting who normally wouldn't, and let them be amazed at their own results.

These skeletons are really nice, btw! Keep at it!
 

KingZombie

New member
These skeletons are really nice, btw! Keep at it!

Thanks! :clap:

I will probably paint up a bunch for my 6 y.o. He's been talking about wanting to paint some of his toy knights. So I figure I'll give him a brush and some silver paint and let him rock! Then dip in satin black polyshade (which I just picked up) and it should be pretty cool.

Thank you for the Archon (and Cornbread) for the encouragement. :guitar:
 

Scorpion0x17

New member
DAMN! I missed all the excitement!

For an amateur, and first time dipper, the skellis are the dogs rocks! You should find a bone, or white, coloured paint and try dry-brushing one of them next - there's an 'art' to that though (the key being to get not too much paint on the brush in the first place, and then wiping the brush back and forth on some paper towel until it looks like no more paint will come off the bristles, and only then rapidly brushing back and forth over the mini (this will deposit pigment just on the raised areas of detail)).

And, I'm loving the blood-spattered zombies! You can tell, just by looking at them, that your son will have had fun doing it - and that's the most important thing with painting mini's - to have fun, and enjoy the process!
 

Scorpion0x17

New member
You should find a bone, or white, coloured paint and try dry-brushing one of them next

Actually, have thought about this some, and if you do want to give this a go, what you should do is find your local Games Workshop, go in and ask for "a Small Drybrush", "a pot of Tyrant Skull", and "a pot of Necron Compound" - that will get you 2 pots of drybrushing paint - a grey metallic, and a bone colour - and a brush to apply them with.

Oh, and to avoid awkward questions, you may wish to make out that they're a present for your son, or a nephew, or some such (trust me, if you even hint at the fact that you might want to use them yourself, you'll get asked something like "OH, what army do you play?" and then, if you try and bluff your way out of it, by mentioning say "Oh, Orks", or "Space Marines", or whatever (should you even know enough to know what to say), they'll then follow it up with "Oh, have you seen X, Y, & Z", and then proceed to go a get Z, Y, X, W, V, U, T, & S, all off the shelves and pile them into your arms! (and saying "Oh, I don't, I'm just painting some figures" is just as bad - they still come back with "OH, what army?" or "what's your favourite figure and/or model?" or something) - the staff are paid to sell - so it's best to make out like you're a parent/uncle that knows nothing of these things and have just been sent into to get little Johnny a present).

Now, the reason I recommend this is that the two pots of paint you'll end up with have been formulated just for drybrushing - they have the consistency of mousse - which is a very odd thing to a seasoned painter - paint just shouldn't be like that - however, it does work really well.

Then, as I described before, you take your drybrush, get just a little of the paint on the ends of the bristles, then wipe it back and forth on a paper towel until it looks like no more paint is coming off, and only then do the same over the surface of the figure (obviously, using the bone colour on the bone areas, and the metallic colour on the metallic areas).

And remember - you can always easily add more paint - but it's not so easy to take it away - so when I say wipe the brush back and forth on a paper towel until it looks like no more paint is coming off - I really mean that - if you do end up wiping it all off, and none then comes off on the figure, you can always have another go - but, if you leave too much on, you'll get horrible big streaks of paint, which you don't want!

And, here's a video to show what I mean: http://www.youtube.com/watch?v=Tj9XNbwfwHo (but note, he's using normal, 'wet', paint (I couldn't find one that shows drybrushing with the GW dry paints) - with the dry paints you don't need to get quite so much on the brush to start with, and you can skip the waffle about brushes at the start (some of which I don't entirely agree with (and which he contradicts himself on anyway)) - but the way he brushes the paint on to the figure, the wiping the excess off, and what he says about using your hand to test whether you've got the right amount left, that all applies).
 

CptJake

New member
you may wish to make out that they're a present for your son, or a nephew, or some such

GW employee said:
Oh Really? What army does your son/nephew/some such play? Oh, you're not sure, well items X, Y, Z, et all would be great for him no matter what army he collects.


Point being: Just tell them it is for non-GW figures you use for a non-GW game and politely let them know you don't really need anything else right now... It is generally better to avoid a lie in my opinion, and in this case I doubt the lie would have had the desired effect anyway.

Additionally, go to Walmart or a craft store like Michaels and look at their paints. Especially if you are just going to use it for dry brushing, a cheep bottle of craft paint is going to give you much more product at a much lower cost than GW products, and frankly give you about the same results with a little practice. I use craft paints on everything and am pretty happy with the results.

Jake
 
Last edited:

KingZombie

New member
Actually, have thought about this some, and if you do want to give this a go, what you should do is find your local Games Workshop, go in and ask for "a Small Drybrush", "a pot of Tyrant Skull", and "a pot of Necron Compound" - that will get you 2 pots of drybrushing paint - a grey metallic, and a bone colour - and a brush to apply them with.
Thanks for the tip. I actually may be near one in a few weeks when I take my kids to Lego Brick World - Chicago. If I have time, I'll be sure to pop in to the mall where the store is.

I also wouldn't worry too much about them trying to sell me stuff. I'll turn around and try to sell them my stuff and have some business cards on hand. It'll confuse them. :snicker:
 

CptJake

New member
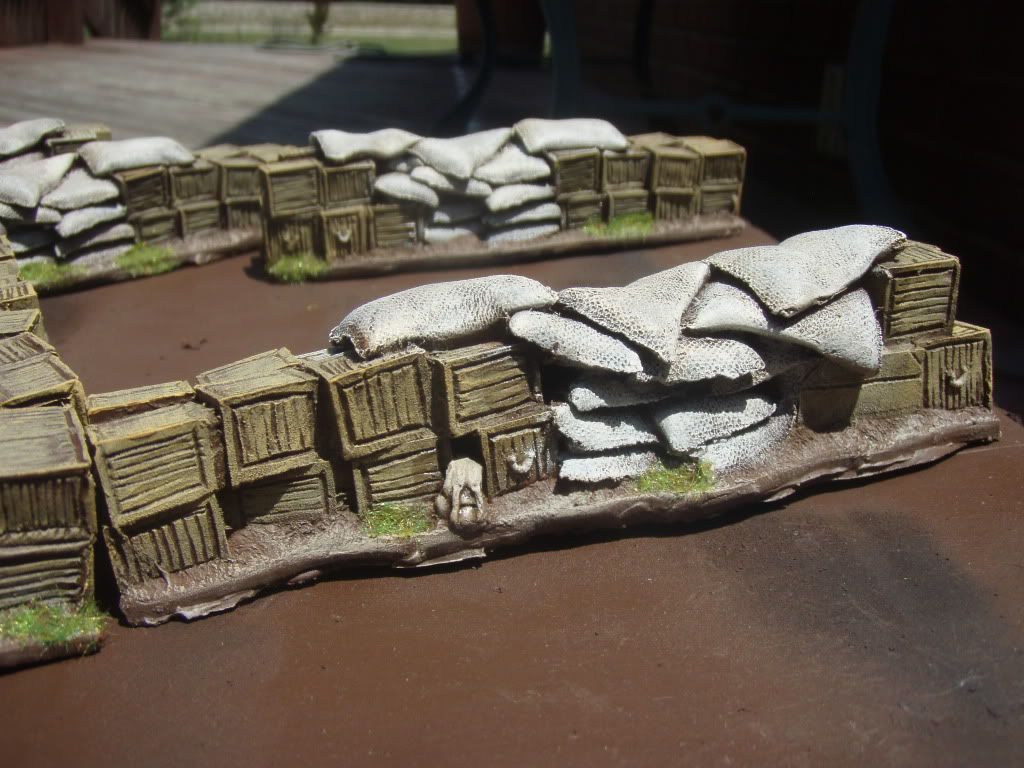
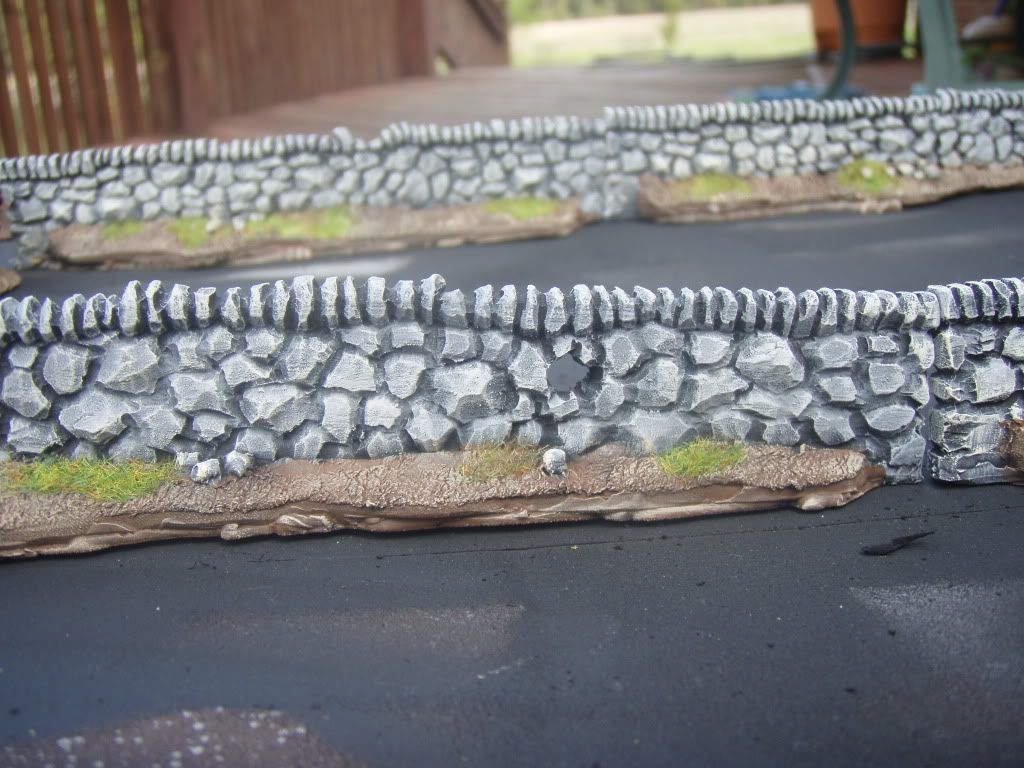
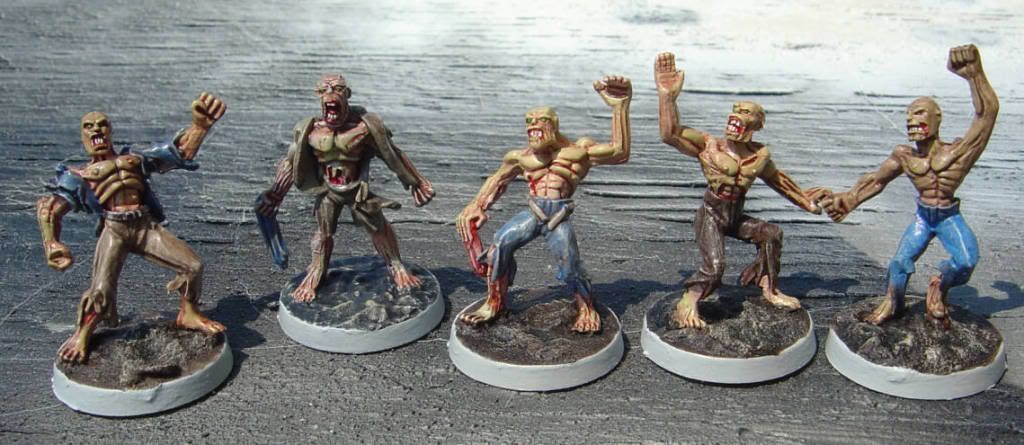
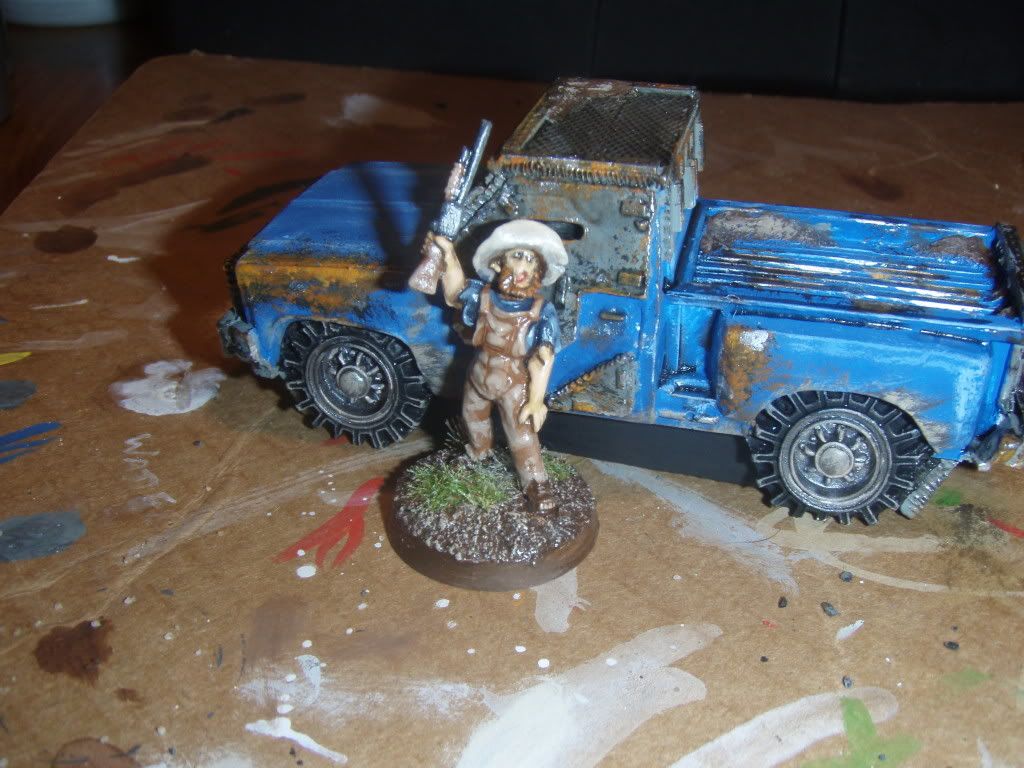
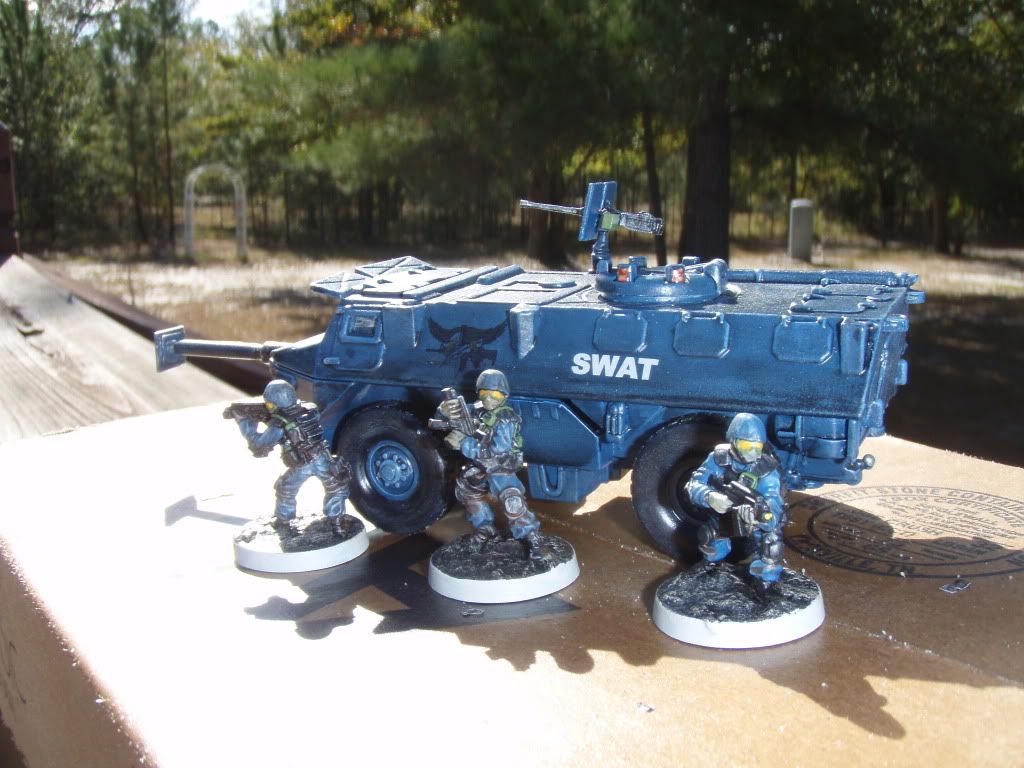
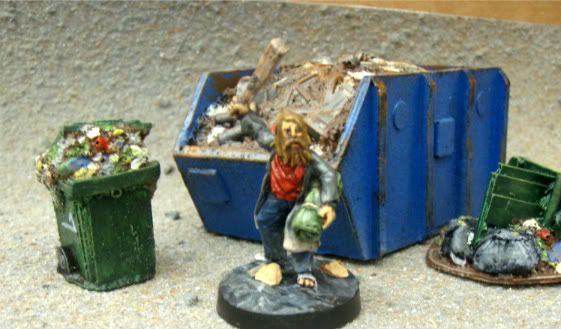
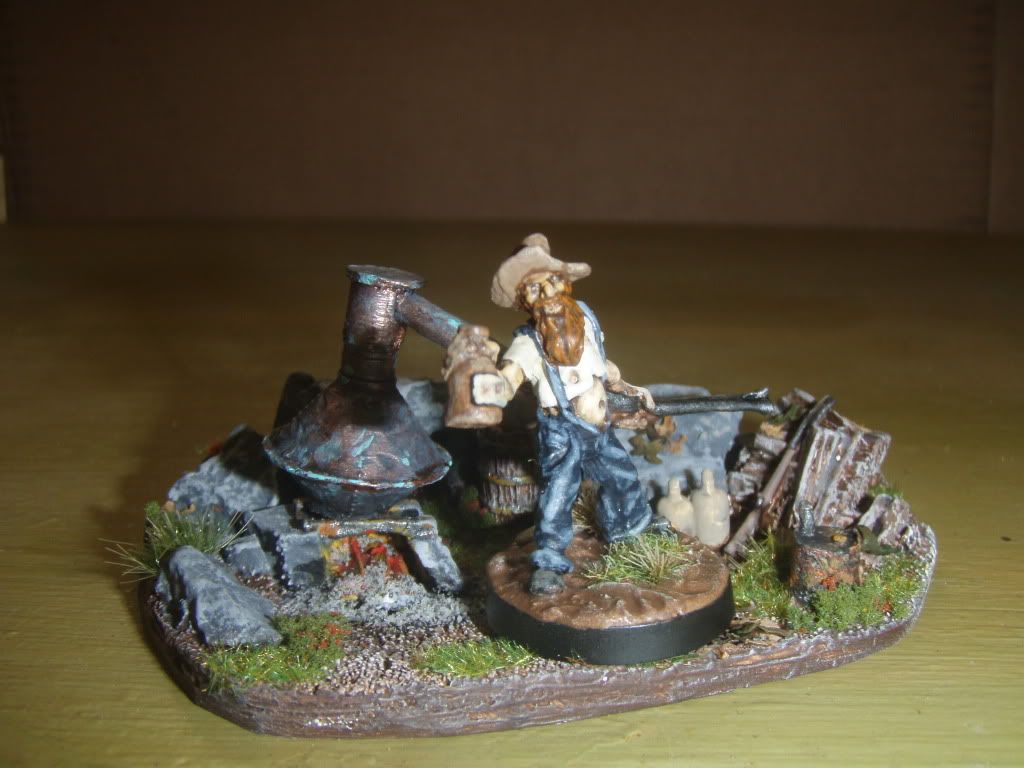
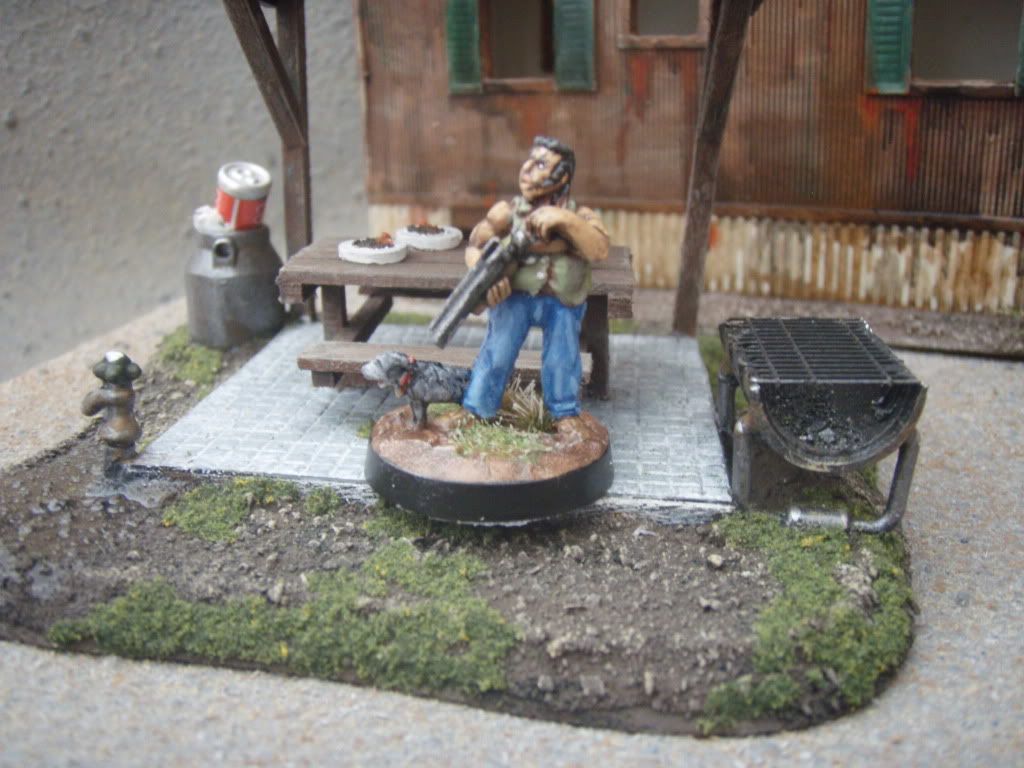
All of these have been painted with cheap craft paints, figures and terrain items. The barricades show simple washes (like the dip) and dry brushing can bring out a lot of detail in my opinion:


P5060005.jpg


P3240007.jpg

P2050004.jpg


DSC01436.jpg


PA100006.jpg


PB150003-1.jpg


P7030001.jpg


P1300008.jpg


P7030005.jpg
 
Last edited:

Scorpion0x17

New member
GW Employee said:
Oh Really? What army does your son/nephew/some such play? Oh, you're not sure, well items X, Y, Z, et all would be great for him no matter what army he collects.
Point being: Just tell them it is for non-GW figures you use for a non-GW game and politely let them know you don't really need anything else right now... It is generally better to avoid a lie in my opinion, and in this case I doubt the lie would have had the desired effect anyway.

What you say is irrelevent - the point I was making is that the staff will try and sell you stuff your don't want - that's their job - so you need to go in with a mindset of "I'm only going to buy what I want and will avoid giving answers to questions that give the staff a way to sell me more stuff".


I wouldn't worry too much about them trying to sell me stuff. I'll turn around and try to sell them my stuff and have some business cards on hand. It'll confuse them. :snicker:

he he! that might actually work! And it most definitely would confuse them!

Additionally, go to Walmart or a craft store like Michaels and look at their paints. Especially if you are just going to use it for dry brushing, a cheep bottle of craft paint is going to give you much more product at a much lower cost than GW products, and frankly give you about the same results with a little practice. I use craft paints on everything and am pretty happy with the results.

Have you seen or, more importantly, tried the new GW drybrushing paints though, CptJake? If not, you should try some out - and you'll see why I recommend that over cheap craft store paints - with the latter you have to learn to deal with the wetness of the paint, with the GW drybrushing paints they're already dry!
It removes what is the hardest part of dry brushing - getting the consistency of the paint on the brush right - I mean, if you watch the video I posted a link to, it's clear he knows a thing or two about drybrushing, and yet he makes the mistake of leaving too wet paint on the brush at one point!
They just remove the most tricky part of the technique and make it significantly easier to produce good results.
 
Last edited:

KingZombie

New member
All of these have been painted with cheap craft paints, figures and terrain items. The barricades show simple washes (like the dip) and dry brushing can bring out a lot of detail in my opinion:

Wow.... that is AMAZING. Speaking of dry brushing...... I'm am finished up the paint job on about 15 zombies.... what color would I want to use for dry brushing? They have different colored hair, shirts, etc.
 

Scorpion0x17

New member
Wow.... that is AMAZING. Speaking of dry brushing...... I'm am finished up the paint job on about 15 zombies.... what color would I want to use for dry brushing? They have different colored hair, shirts, etc.

The simplest is to use a pale version of the same colour, KZ - so to use your skeletons as an example - for bones the bone colour I suggested would be ideal - for leather a light brown - for the metallics a light-grey metallic paint.

If you can't find pale versions of the colours you've used, the simplest way to achieve it is mixing some white in with each colour on a palette (watch the drybrushing video I posted for an example of what I mean (he uses a light yellow-brown first, and then white later, which he mixes into his base colour to produce his highlight colour)).

You can get more sophisticated - using colours shifted towards 'warm', or 'complementary' colours - but that's advanced stuff and requires some understanding of 'colour theory' (if you do want to know more then please do ask, but I'll not bombard you with tons of advanced information at this point).
 

CptJake

New member
Wow.... that is AMAZING. Speaking of dry brushing...... I'm am finished up the paint job on about 15 zombies.... what color would I want to use for dry brushing? They have different colored hair, shirts, etc.

I agree witht he other answer. I tend to use an old plastic lid from a tub of margerine as a pallet, and add white (or an appropriate color) to the base to lighten it. Having said that, I have a big bottle of an off white/really light tan that works as a good 'generic' color for dry brushing too, if you do it lightly.


Jake
 
Back To Top
Top