WIP: Ambush in the sewers

DunErwit

New member
First thanks a lot for your help and especially for your search for a little rat pack, really great :)

Wouldn't hurt to lay down a layer of clear coat I think.
That's a good idea; I have some Enamel based clear coating left. I'll continue with that before glueing more greens to the ground.

I think the tape is sticky-side to the foam, and the foam provides support so the tape doesn't just push the tape off. Might not be a problem with the sticky-side to the model, but you may end up with a rough surface or tape glued to the realistic water.
Just a little misunderstanding:
Of course, I'll need some stiff, inflexible material as main border to which I have to fix the tape with the sticky side. Otherwise, I wouldn't know how to hold the tape in place... ;) But foam probably won't work as the diorama model's boarder isn't the diorama case's border, if you understand what I mean: There is a supplement edge of 3mm around the complete model intended to place the Plexiglas showcase onto later on (to protect it from any dust and dirt). You can see this edge on the latest picture with the greens on the ground.
And I fear that those 3mm won't be enough support to fix some lightweight foam onto it and to hold it in place as soon as there is some Realistic Water imposing pressure onto it from the other side - even if it's only 2-3mm filling depth per filling cycle.
That's why I probably will use some kind of 2-3mm hard fibre wood or plastic sheet with the packaging tape.

I went to put together a little rat pack for you, [...] If I find a better shipping method, I'll shoot you a PM.
Thx once again for that. I think finishing this diorama certainly will take still some time. So there's no need to hurry for the moment :)
But if you could just send me the links to the minis of the rat pack, I can see whether I can find them somewhere here around, too? Perhaps, I can even manage to find a vendor / shop which has good relations to the corresponding distributor or manufacturer, so packaging could become cheaper.
 

Benihana

New member
Oh, by rat pack I was referring to throwing a few rats of various size from Skaven (some of them look innocuous enough to pass as regular rats), like the giant rats that aren't all mutated. There are certainly packs from vendors like Malifaux and Reaper, but you might do better just trying to find someone to do a trade with on Bartertown.

http://www.reapermini.com/Miniatures/rat/latest/65047
http://www.reapermini.com/Miniatures/rat/latest/02353

Something like this seems ideal, if you can find one listed in the UK: http://www.ebay.com/itm/Skaven-HELL...940?pt=LH_DefaultDomain_0&hash=item4cf9d1bdfc

Edit: Err, Germany. ><
 

DunErwit

New member
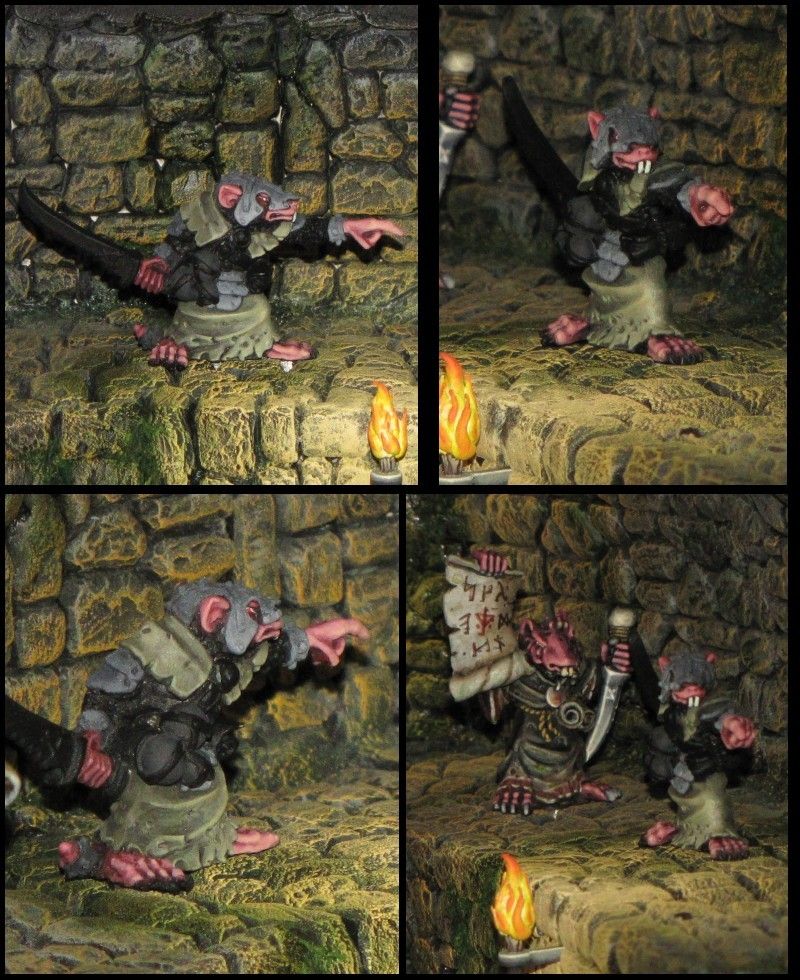
Were-rat chief started

Hi,

besides preparing my small test channel for the Realistic Water, I have started now painting the were-rat chief:

bersichtWR-AnfhrerFortschritt101.jpg


Of course, there's still a lot of black ;).
Grey on his armour is just some very-speed pre-shading for the TMM.

But I don't know whether the lighting of his robe fits already: Perhaps the left part should be more (high)lighted; perhaps the right parts are already too bright...?!? Gave him already a washing which corrected the transitions a bit, but... :dont-know:
Any suggestions welcome.


Finally, I have attached a complete overview of all (at least) partly painted minis of the sewer:

bersichtKanalGesamt1780.jpg


Larger version can be found here.
 

DunErwit

New member
More rats, a "decapitated" Deladrin rogue, and 7mm of Realistic Water

Once again, it took me 1/2 year to achieve at least some little progress... but better progressing in small steps than progressing not at all :D

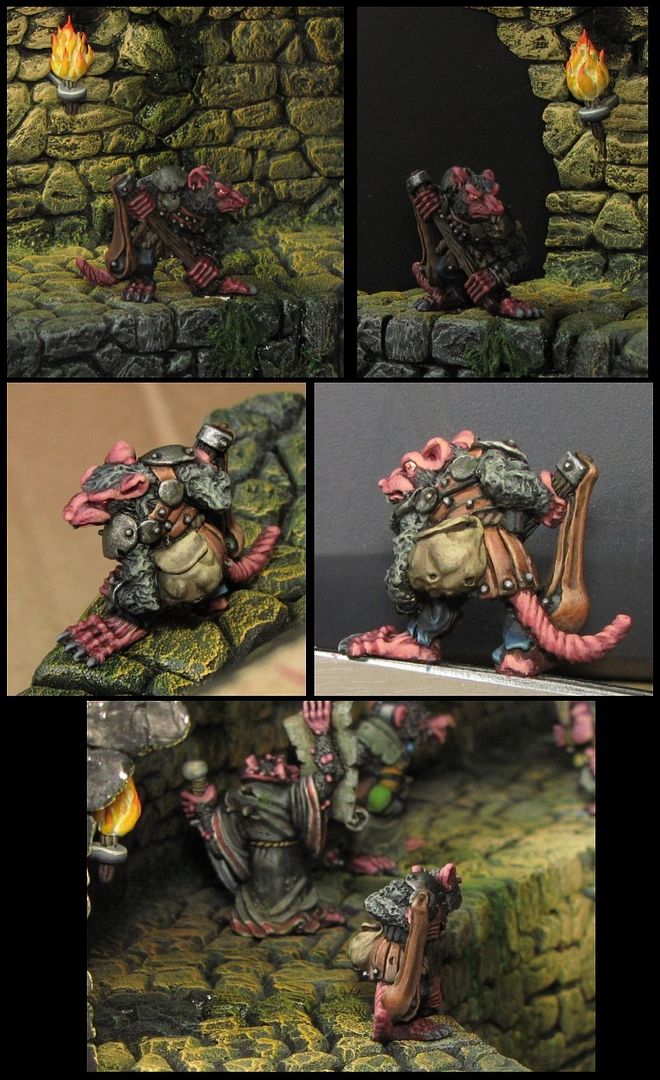
First, the staff slinger is done:

Stabschleudererfertig.jpg


It was quite difficult to make some good pictures from him standing in the sewer as the torch's light is coming from behind, therefore his front being very dark. That's why I had to take him off the dio for taking photos from his back.


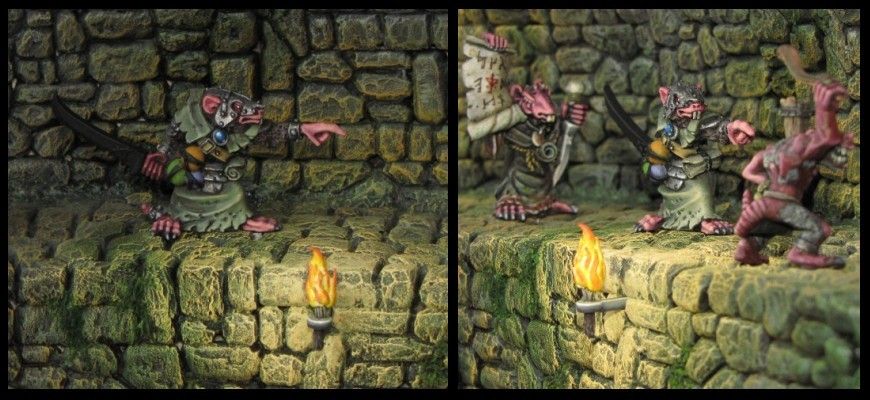
Second, the were-rat chief should be completed soon:

bersichtWR-AnfhrerFortschritt201.jpg


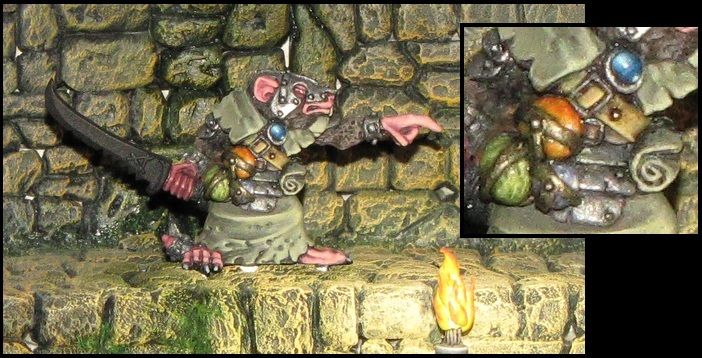
I intend to paint those three reinforced bowls/spheres/globes on his belt as if they were poison-filled glass spheres so he could throw them at his enemies and they would burst, releasing the poison. Not at least, as each sphere should contain a different poison, I have the opportunity to add some colourful contrast to the mini.
Problem is only: Though I read some threads and articles and started a couple of days ago, still I am not quite sure how to paint those glass spheres filled with poison liquid / or gas correctly... So, I only painted the mid-tone base colour so far.

Please feel free to comment and to give me some hints, suggestions, links. etc. Thx :)


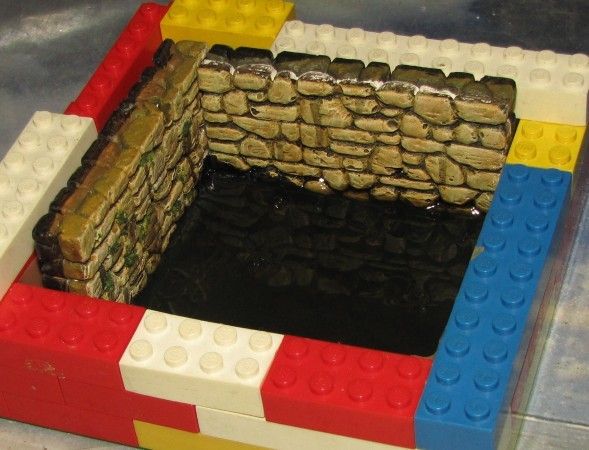
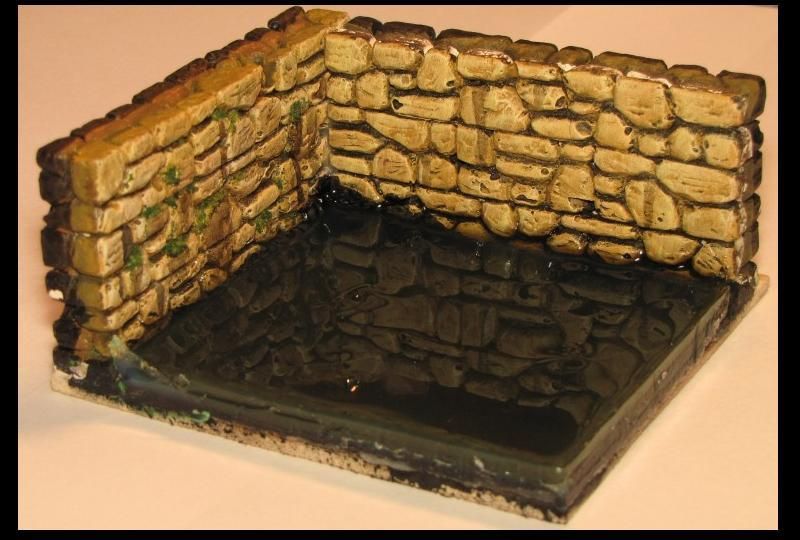
Besides painting, I finished my small test diorama for the Realistic Water. I did 2 fillings so far, in total approximately 7-8mm deep:

KunstWasser_Test_ca7mm_01.jpg


And I am glad I did this test dio...:
  1. The Realistic Water is reacting with the (wood) glue that fixes the plants to the ground. Changing the originally transparent "invisible" glue to some odd, white and ugly spots... :(
  2. And apparently though I primed the plaster, whereever the RW still finds some (small) gaps and cracks, it trickles down and reacts with the plaster, showing on the test dio two 1-2mm large orange spots - quite ugly, too.
Means I will have to improve the sealing of the sewer even more to avoid those problems.
I think I would have destroyed everything the sewer if this would have happened to it...


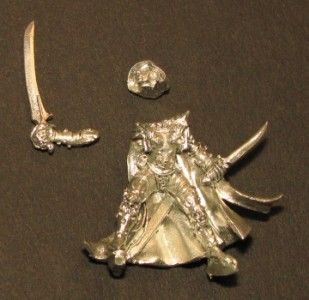
Finally, just a photo of "decapitated" Deladrin. As khavor wrote it certainly would have bugged me forever if at least I would not have tried to turn her. If ever I don't succeed for whatever reason, ok, then I'll order a new one :)

Deladrin_KopfDrehen_Start01.jpg
 

SkelettetS

New member
hah, lego! nice you did a tryout before the real thing. i almost destroyed the display base for my orks this way, the water flooded into the foamboard inside and reacted in a funny way (foamboard "disaperad" - not good) so it became hollow inside, and bent the wooden base under a bit. luckily the painted surface still survived. lesson learned, always make sure there is no escape hole for the water.

nice minis though, love those little rats. keep it up!
 

Sleipnir

New member
Great work so far!

Do not lose focus on this project and feed us from time to time (maybe twice each year?) with a little update :D
 

DunErwit

New member
Well, it’s really a pitty that I don’t have as much time as two years ago. But on the other hand, to be honest: I still use quite some time for playing games such as Oblivion, Spellforce, Drakensang, too… I probably could have progressed even more with this project if I wouldn’t have explored so many dungeons and saved fantasy worlds from chaos and destruction ;)

Then again, having mainly just approx. 1-2 hours per evening after a long working day isn’t very much to start laborious painting or modeling – for some shadings and blendings I need 2-3 hours, depending on how complex, large and “3D” the object is.

Nevertheless, once again I plan to do it better this year – I have so many other projects and ideas in mind I want to start, so I get more and more impatient to finish this sewer once and for all.

Thank you both for your encouragement.

Hope, my next progress won’t last for too long ;)
 

DunErwit

New member
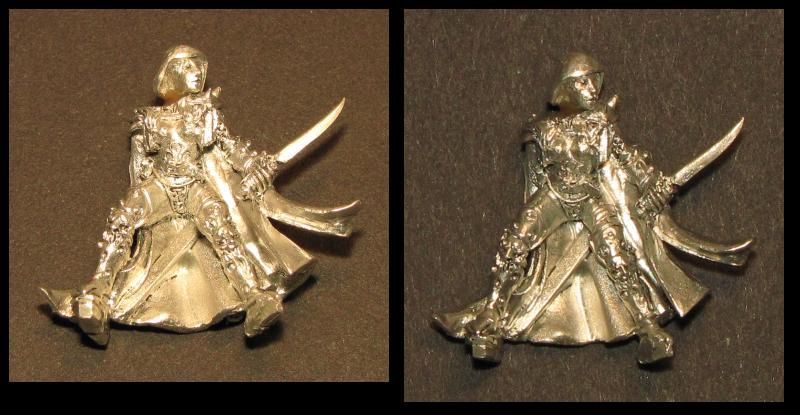
Well, Deladrin now got her head back:

Deladrin_KopfDrehen_KopfDran.jpg


"All" that's left now to do with her before re-starting painting is to re-model her face, hair, and hud. Will see how I will end up with that task - the face still is almost complete, but her right eye is "missing" as half of it was hidden by her hair in the original posture. Could become very tricky and fiddly as it should look like almost like her left eye, of course.


Then, I canceled my first water test before reaching the water depth of 2cm I aimed for: Apparently I already mixed to much "mud" (umbra-green washing) in the 4 layers I casted so far - and it is nearly black. Advantage: You can't see the white glue and the orange plaster dots anymore :laugh: But the ground and the plants have disappeared almost completely in this very, very muddy water - and probably everything else I have fixed to the ground in my original sewer would not be recognisable, too :confused:

But nevertheless, three other things I wanted to try out with it, worked fine:
1. Silicone is perfect for sealing the "water basin" - not a single drop did pour out.
2. The Realistic Water doesn't glue neither to the Scotch tape on the Lego bricks nor to the silicone.
3. And afterwards, the outstanding silicone can be removed very easily without destroying anything.

KunstWasser_Test_ca7mm_02.jpg


So at least some 50% success :D

I'll continue working on the right colour mixture just by filling different test waters in plastic cups; in multiple layers, of course, to simulate the final effect at least.
Should lead faster and cheaper to the desired results. After all: Less (colour) is sometimes more ;)
 

DunErwit

New member
Some more progress:

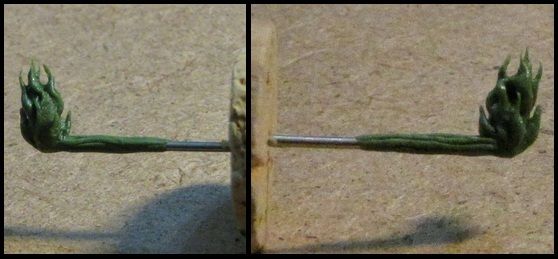
1. Last torch sculpted. Just needs some priming and painting.

Fackelgrn-bersicht.jpg


2. Finished the bottles attached on the were-rat chief's belt. I tried to give them some effects - orange and green one: poisonous gas; blue one: liquid with bubbles -, but not at least due to the "glassy" glossy finishing and my poor photographing skills, I fear it's not easy to see on the pictures.

bersichtWR-AnfhrerFortschritt301.jpg


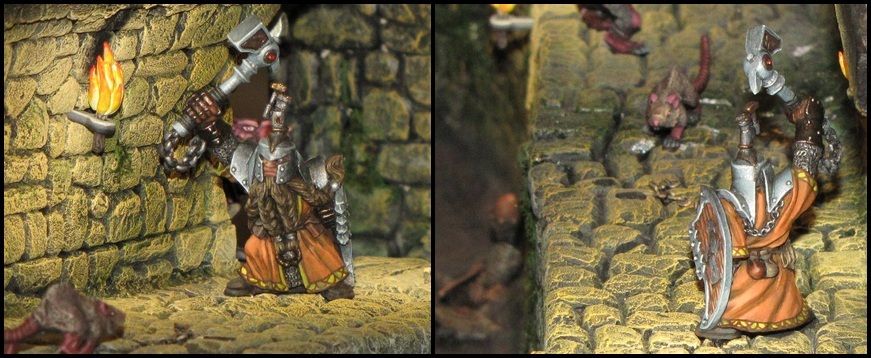
3. Finally decided to add some freehand to the dwarf's robe. It's not completely finished as the brown still needs some shading and highlighting. But the progress should be visible.

bersichtKagoinFortschritt401.jpg


Hope, it's a little improvement - and not the exact opposite;)
 

Master Splinter

New member
Some advice :

Your paint job looks like you want to paint contrasts on, which is called layering, even so you're metals e.g. on the dwarven axe are just lines layered on. If you blend wet paints and have the patience to dry them on together you will have a smoother transition.
My remarks are also based on the close-up of the rattatouille bombs & spheres. This is called progress :clover:
 

Count Duckula

New member
I've only just stumbled on this thread, and I would like to say that I like what you have done a great deal, it is very well done, and very atmospheric.

I know exactly what you are talking about when you say that your time is so limited.... I too have a years long project underway... not too far off finished, which also illustrates a 'typical' roleplaying scene... a band of adventurers approaching a 'haunted' house, occupied by Vampires, which come out to confront them... I have worked on it off and on for years, and have learnt a great deal from doing it. I know now that if I were to do this again there are many things I would do differently. I might put some photo's up on the forums sometime to get some feedback.

Anyway, keep up the great work, I really look forward to seeing it all finished!!! :)
 

SkelettetS

New member
what youre not done yet Dun? lazy? :D lol

seriosly i really dig this diorama, very nice painting and those fires are greatly sculpted :good: cant wait to see it finished
 

Garshnak

New member
That OSL is looking very convincing (no matter that it's too white for torchlight, it's still fine). So much even that it's causing the miniatures appearing to float or sometimes looking like they're photoshopped in! Are you going to paint in cast shadows eventually? It would be mighty tricky, but it'd make the effect ten times more convincing!

Great job so far.

I just noticed btw, but did you use metallic paints on the rats? Then why did you do the dwarf with nmm? Seems a little inconsistent, if not, then the nmm on the rats is very convincing. :p
 

DunErwit

New member
Thank you all for your encouraging words. It's really a pitty it doesn't progress as fast as I wish it would do... but well... one day...

@Master Splinter
I never really managed to use that wet-paint technique very well... I prefer 'feathering' with 5-10 layers of different tones, depending on the object's size, one by one, also going 1-3 tones back for corrections if necessary. And normally, it works quite well for my purpose. Of course, the smaller the object / painted surface gets, the more difficult it gets, too. And that hammer's handle as well as especially the rat's spheres do have quite small surfaces for what I intend(ed) to do with them.
Nevertheless you're right that I still might to improve my techniques compared to what one can see here on CMON in some cases... *WOW*

@Count Duckula
If this sewer only would be my only large diorama I have planned so far... better not to tell anybody right now already what my next WIP's will be, especially as size does matter! ;)

@SkelS
Well, my painting alter ego certainly was a bit lazy... but at least I was able to save some poor Oblivion, Gothic and Sacred people from some of those many dangerous threats fantasy worlds are always haunted of, once again... :laugh:

@Garshnak
Shadows: Had this in mind right from the beginning, and I already painted the shadow for one crate on the left side of the diorama, and you're right: It IS very, very tricky, already there, where I do have only one light source to consider. => Honestly: I don't have the faintest idea how to work with that many interfering torches in the middle of the scenery, near the bridge :question: Furthermore, if you think this out, I also would have to paint shadows items and minis cast onto each other almost correctly... :confused2:
Think this is too complex, that's why I probably will not do it - it could destroy the whole paint job.
Metallics: The were-rat priest and the archer are the only minis painted with NMM. All the others have TMM, whereas for the dwarf I considered him to wear some magically reinforced equipment (e.g. holy priest armor & weapon set). That's why I blended light blue into the iron metallic to differentiate a bit and not to have all metallics look only boring flat iron/silver.
 
Last edited:

Garshnak

New member
Yeah I hear you about the complexities of light. I do plan myself to one day make a diorama with multiple objects/figures and lightsources (with different colours as well!), but it will be a lot less big and more manageable than what you have here. I also still need to work on my blending technique first to make it more convincing.

But I do understand how that would work (as I apply that knowledge on drawing and digital painting), and how to simplify it so I have a head start at least. :p
The trick is to consider the light levels as values ranging from 0 to 10 (for example), 10 being fully lit and 0 being unlit. Then consider a gradual decrease in value in cocentric spheres/circles around the light source. With intersecting sections between lightsources adding up the two values. And areas that are obstructed (using thin wires to determine the rough shapes) are considered unlit (0), but can still receive light from other sources which aren't obstructed to reach that area (adding the appropiate values).

Not sure if I get what you're aiming at with the metal, but I guess it makes more sense if you see it real life.
It takes a lot of preparation and measuring work. But I think it'll work out.
 

Alexandra

New member
Shadows: Had this in mind right from the beginning, and I already painted the shadow for one crate on the left side of the diorama, and you're right: It IS very, very tricky, already there, where I do have only one light source to consider. => Honestly: I don't have the faintest idea how to work with that many interfering torches in the middle of the scenery, near the bridge :question: Furthermore, if you think this out, I also would have to paint shadows items and minis cast onto each other almost correctly... :confused2:
Think this is too complex, that's why I probably will not do it - it could destroy the whole paint job.

This might help you with the shadows:

http://www.idsketching.com/basic/toolbox-shadows/

It would be a pity, since you had all that work with the light points, not to do the shadows. It'll probably consume a lot of time since you have lots of elements on the dio, but hey!! perfection takes time ;)

How did you do the moss effect?? It looks great!
 

DunErwit

New member
Well, concerning shadows, I will see when everything else is finished. I doubt whether I would not destroy more than improve... Last but not least: "Easy" geometrical shapes such as from crates, sacks, stones or bottles lying on the floor might be done comparatively "easy" and quick. As Garshnak suggested, I already used thin wire to determine the rays of light and the shadow's shape with that crate that's already got a shadow. But how to do this with the minis? They have quite complicated shapes, and torso, head, arms and weapons tend to be comparatively "far away" from / above the floor... (as long as the character hasn't been slain ;)) Won't be able to use as much wires as I would need ;)


Type of Moss: Ziterdes Lichen, Green Mix > link.

1. Sorted and handpicked single elements (in terms of colour => as dark and brown as possible; only a couple of mid and light green fibres for the better lit areas)
2. Cutted them down to the desired size (nail scissors)
3. Applied sparingly wood glue (thinned a bit with some drops of water) and fixed the lichen with a pair of tweezers and toothpicks.
4. Arranged the lichen and tightly pressed (by the aid of toothpick, fingers) it closer to the walls and into the gaps / into the wood glue to avoid that too much would stuck out when dried (just would look unnatural for wet sewer moss which is supposed to stick closer to the surface due to its humidty).
5. Gave all moss a finishing with MIG Wet Effects / Damp Earth mixture once the glue was completely dry.
 

Alexandra

New member
Thanks!!

As for the character shadows you could use your one to have the jest of it: you'll only have to be accurate on the direction of it.

Because we are talking of fire light, it doesn't give a constast and uniform light as a bulb would. So, only the legs shadow will be more or less defined. As you move away from the floor ( in height that is ), the shadow becomes less clear and softer. Use you brush to see were the shadow will fall and then just draw a matching outline. It doesn't have to be precise, just has to mach the character.

If you are lazy like me :) ( talking is easy, making it is another thing all together ) use the camera. Put the lights you use to take pics in the direction that you want your shadow to fall, take a pics of it and voilá, you'll have a very accurate idea of what you shadow should look like. In case you want several shadows, take in consideration that the darker shadow is made by the closest light source.

Finally, if you don't feel comfortable with it, either try it first in something else or just don't do it. It's your dio after all ;)
 

DunErwit

New member
Everything ready for 1st water filling this evening !

Well - it feels like ages since I last posted any update of my project. It's really not easy any more to find the time for it...
But: Though it's not finished yet, I haven't given it up, neither.

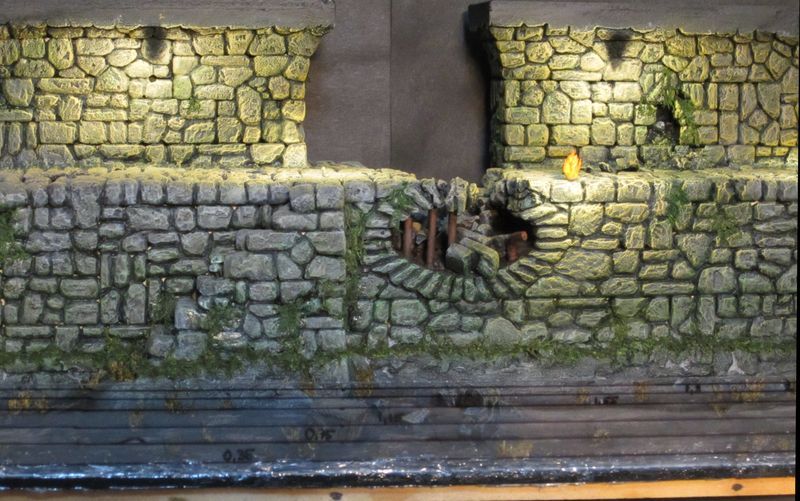
So here are latest pictures of the sewers, everything ready for the flooding !
The iron bars have been rusted, more lichen greens have been glued in height of the future water line, and I have put the partly uncoiled rope already, too.


I probably will start the 1st flooding this evening.

BTW: Meantime I quit the Woodland Scenics Realistic Water, since two out of a couple of other test castings ended up with a somewhat white-grey-milky turbidity... Don't ask me where it comes from, I haven't the faintest idea. Could be that it is only designed for very shallow water fillings, and mine have been to deep... don't know :confused:

Therefore I switched over to "classic" standard epoxy glosscoat (VossChemie High gloss coating resin). Not the cheapest solution for 1 ltr, but at least this one finally seems to work well according to the latest successful test casting I did.

Please keep your fingers crossed - I am quite curious whether everything works as planned... or whether I end up with a great disaster...
 
Back To Top
Top