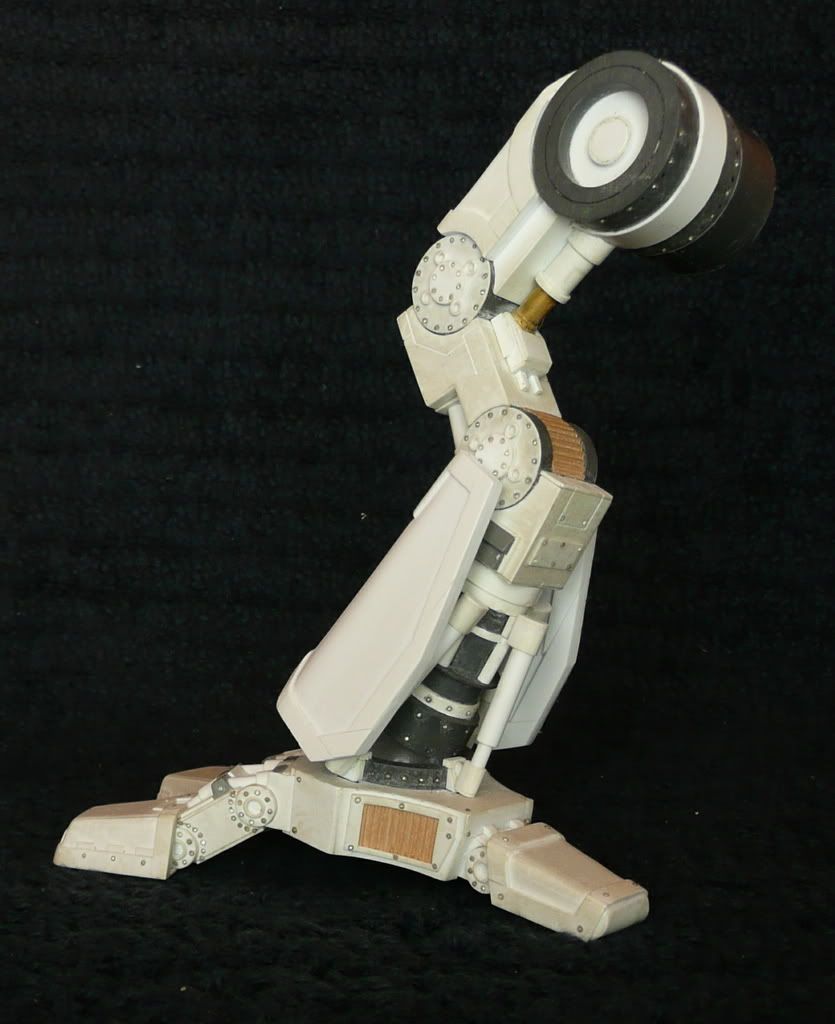
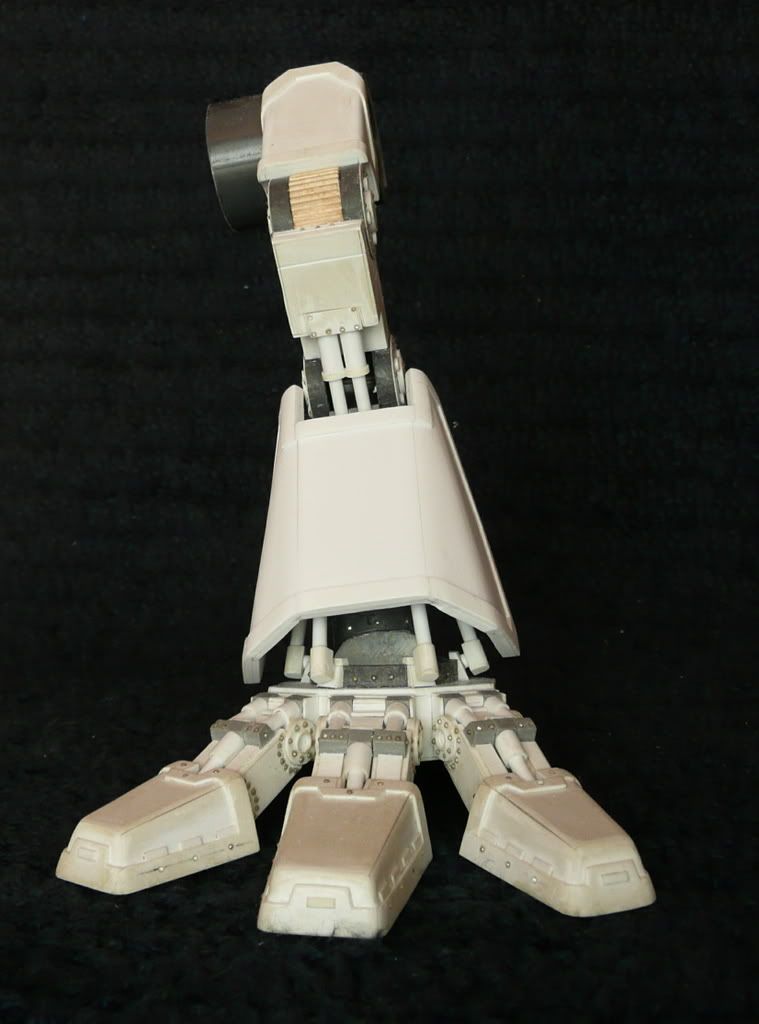
a TITANIC undertaking

fiesta0618

New member
The short story: I\'m designing and building a Warhound!

The longer story: I\'m a gamer first, but an artist as a VERY close second. I\'ve admired the blocky, masculine Lucius patter Titans for years, but can\'t countenance shelling out that much cash for a funny shaped piece of tree sap--common enough story, right? Anyway, the advent of Apocalypse spurred me into trying to build one on my own. Problem is, the artist in me just wasn\'t quite satisfied with the quality of Titan builds that I saw on Warseer and elsewhere. (I mean NO offense whatsoever to Lackofbettername\'s Titan--it is a truly marvelous piece of work. The thing is, I\'m chasing FW quality in this. In fact, I\'ve been using Lackof\'s template to help me with proportions and scaling.) Thus, I set to designing my own, heavily influenced by the Wolf and Jackal class Titans.

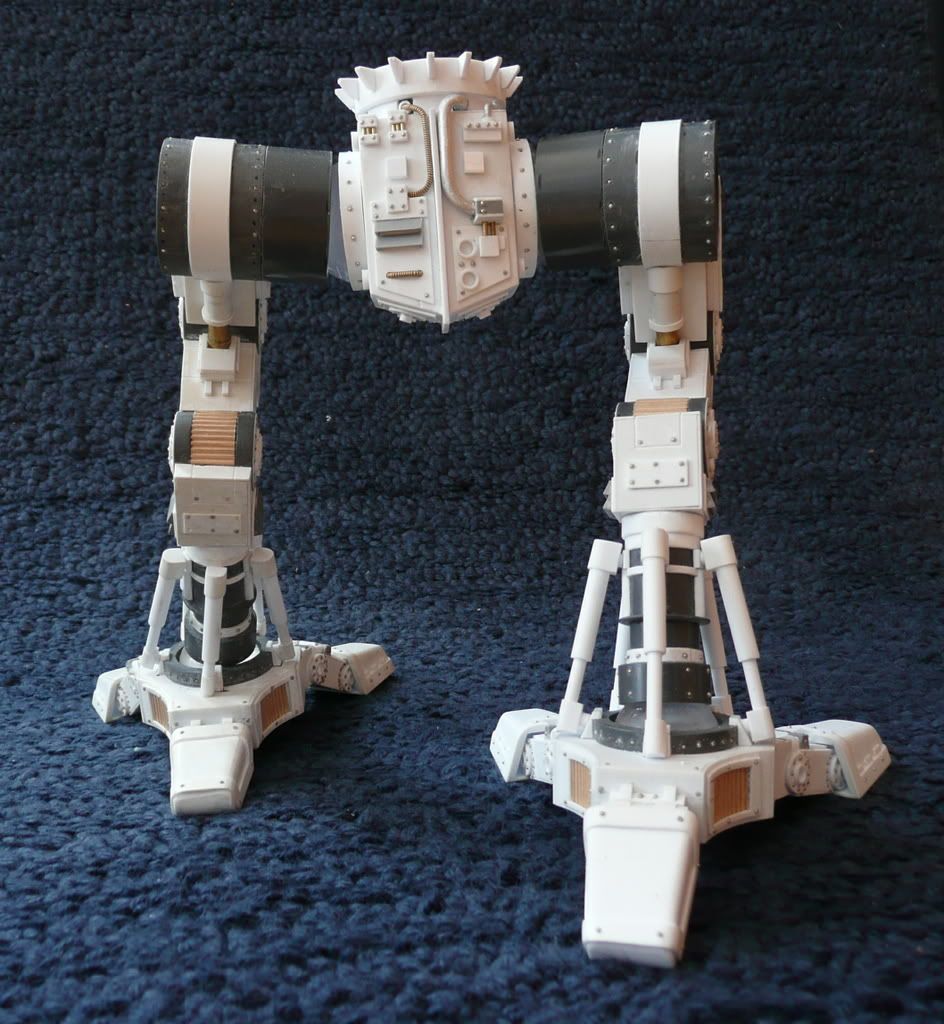
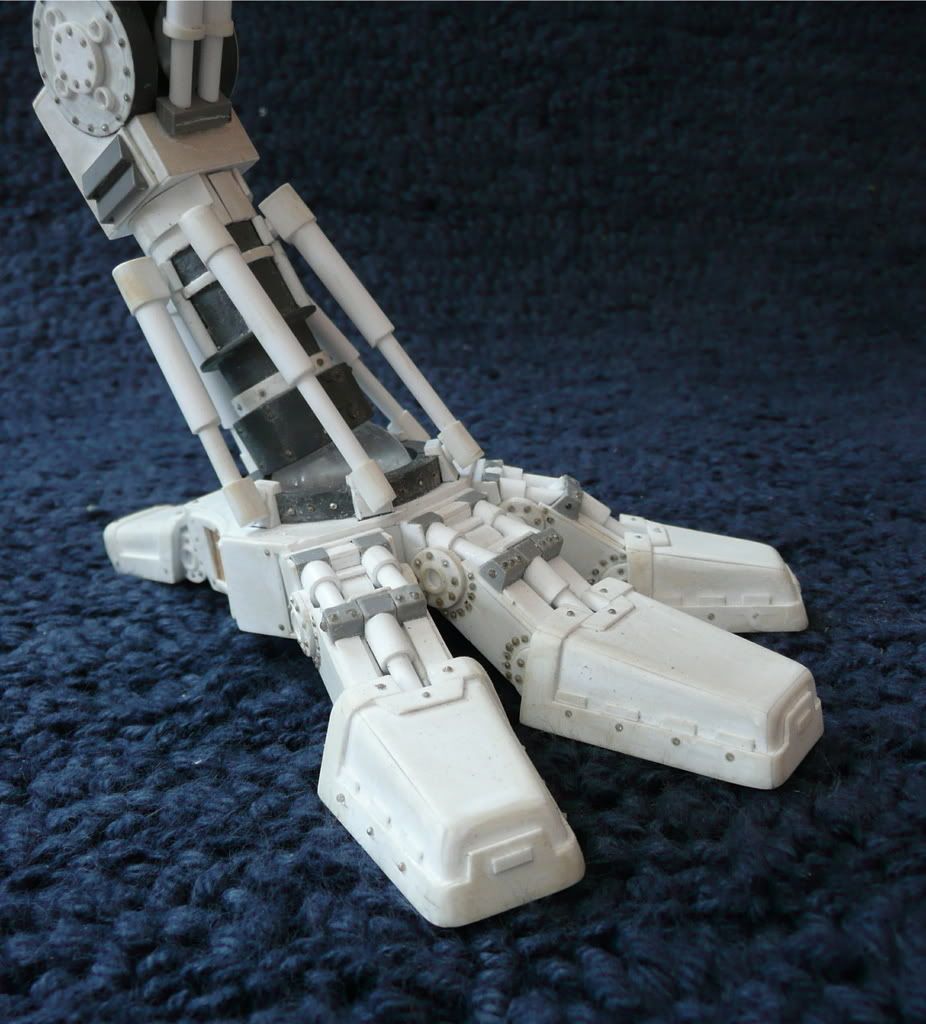
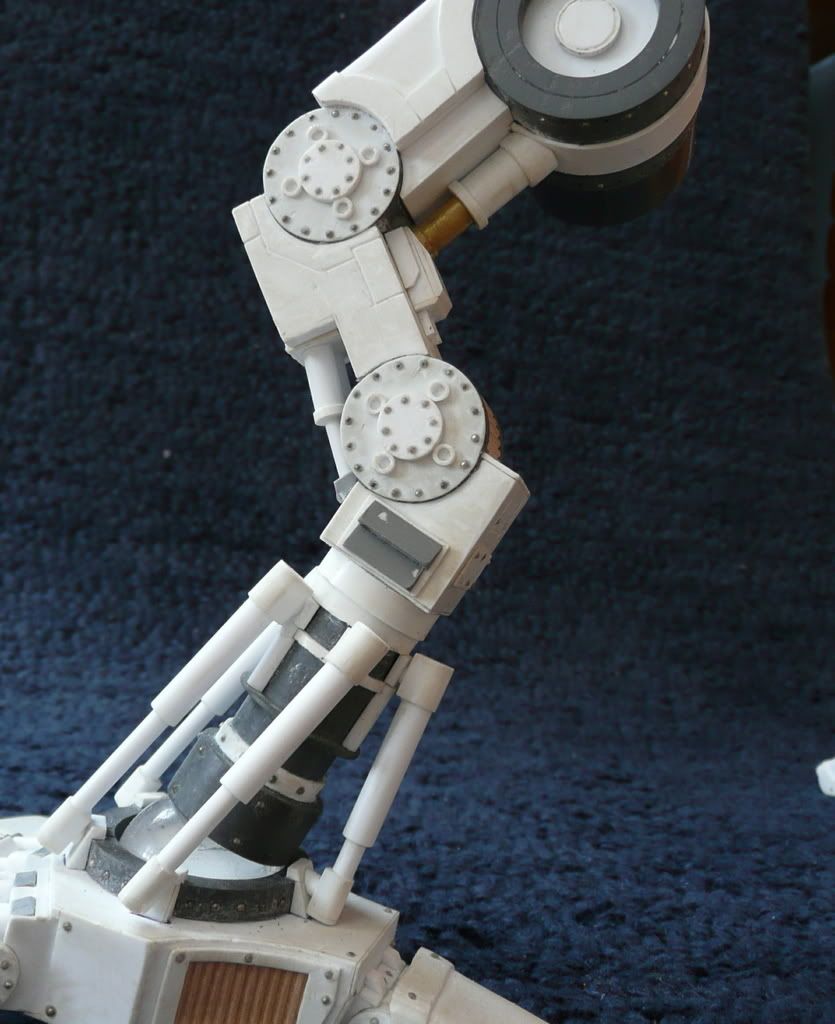
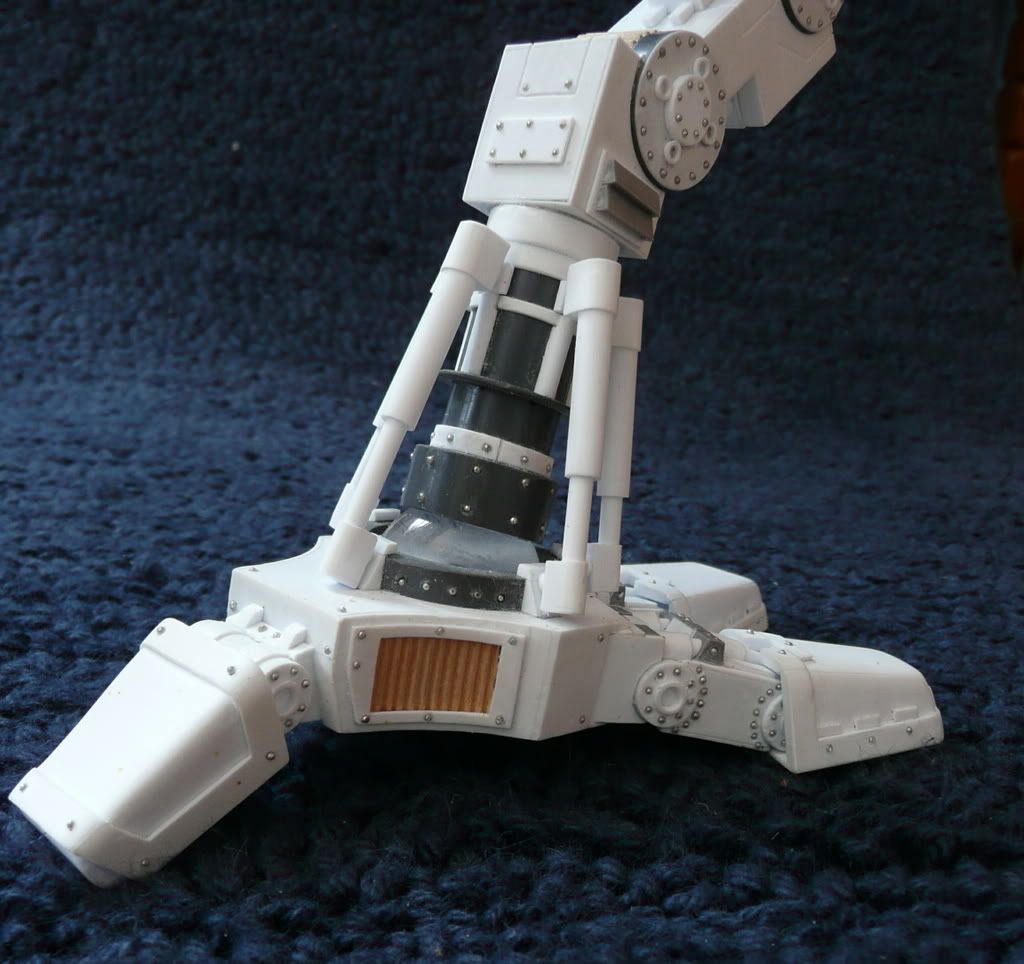
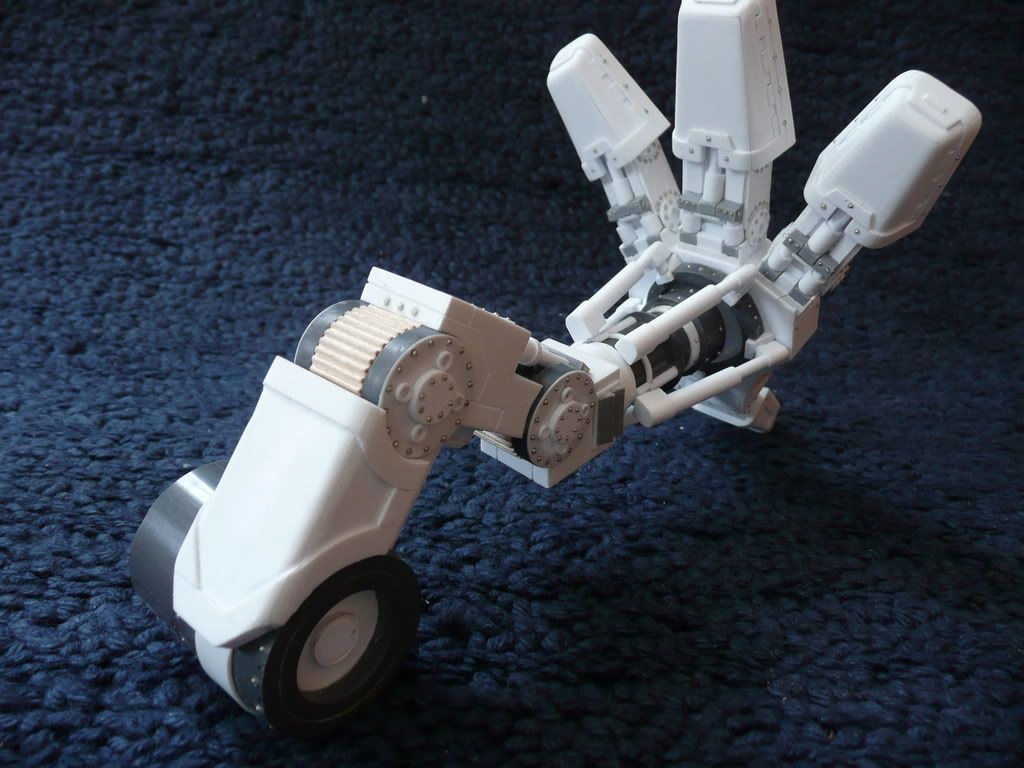
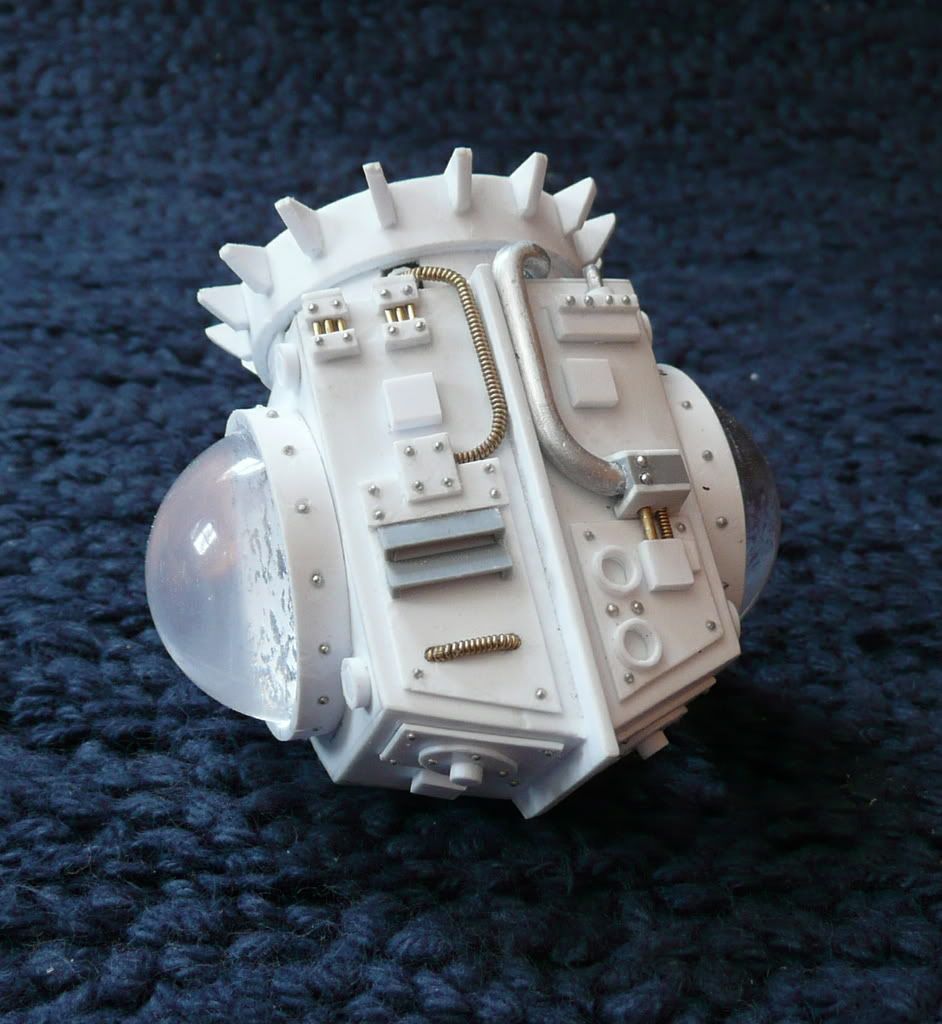
Anyway, I\'m about 400 hours into it and I\'ve got the worst part done: the legs!
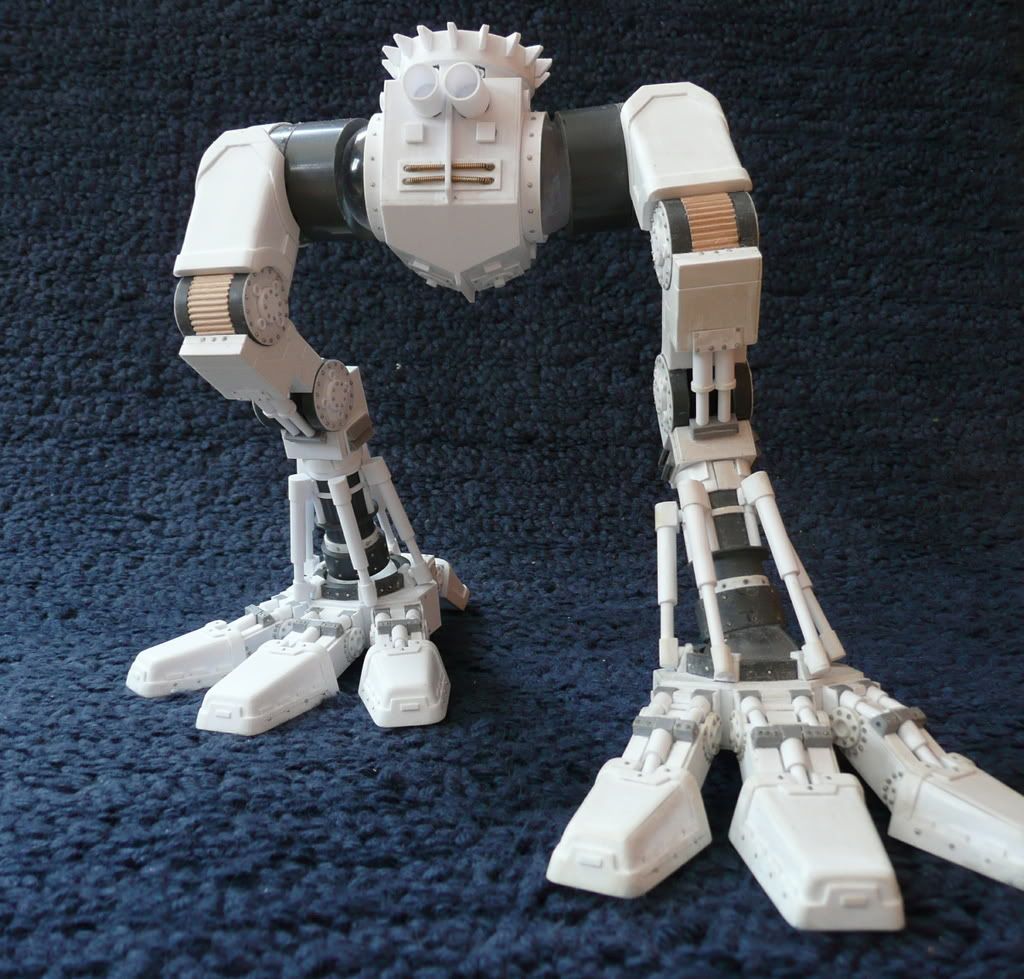

cmonphotos015.jpg

cmonphotos016.jpg

cmonphotos017.jpg

cmonphotos018.jpg

cmonphotos019.jpg

cmonphotos020.jpg

cmonphotos021.jpg


Please, be harsh critics! My goal in this is to make one of the best Titan scratches anywhere (and later on, paint it to an equally high standard) and I mean like GD quality.

Thanks, guys and gals!

--Fiesta
 

hestan101

New member
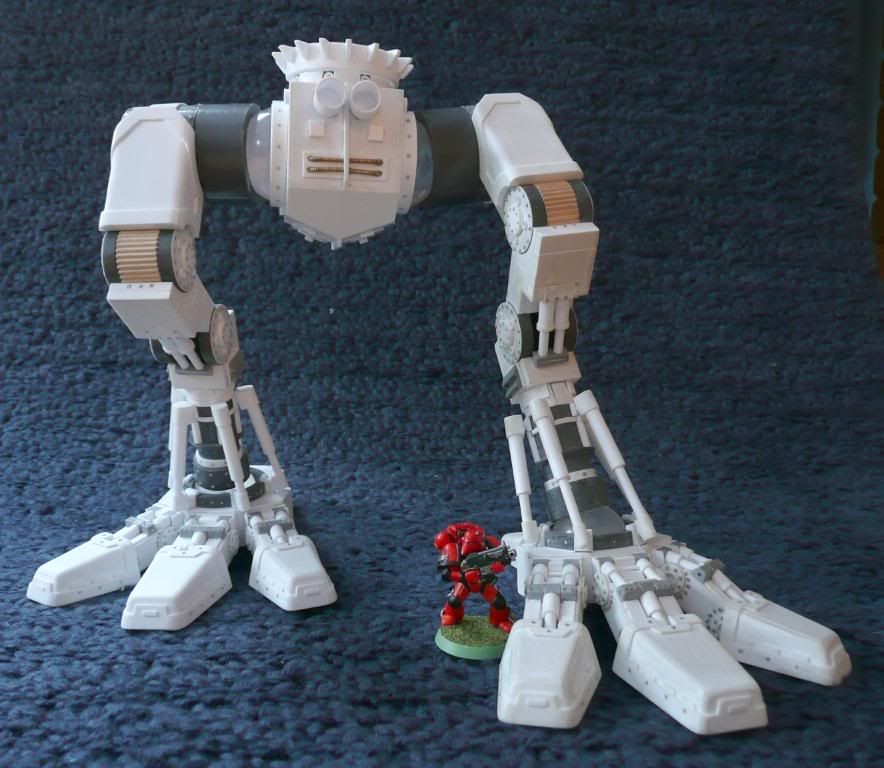
:eek:good lord man, thats beyond forgeworld quality. and the critic side, would it be possible to place something next to it for scale reasons? cos atm the legs look rather big
 

airhead

Coffin Dodger / Keymaster
R2, they\'ve taken me apart - again.....
(sorry couldn\'t resist....)


are the legs going to be permanently attached to those ball joints?

Are they going to remain clear?
 

fiesta0618

New member
Ah yes, scale, I forgot.


cmonphotos.jpg


It looked so big because of my upward-looking camera angle, I think. I thought they were too big myself, actually, but I looked it up--Titans stand 10-12 inches high, according to FW, and IMO the legs are about two-thirds of that. Mine stand about 7 inches, so I think size-wise I\'m OK. Like I said, I used Lackof\'s template for scaling help and his work really is excellent.

--Fiesta
 

fiesta0618

New member
@ airhead: Yes, they will be permanently attached in the end, and the typical three-piston hip joint system will be used at that point. The small, plain squares you see on the waist block are the attachment points. Also, some of my buddies have asked the same question about the joints remaining clear! I was planning on having the joint balls be oily steel, but I\'m open to other suggestions...

--Fiesta
 

delta 408

New member
Inspiring, absolutely inspiring. I don\'t quite like how wide the hips are ATM, but maybe that\'s just because we haven\'t seen the whole mini yet. :)
 

uberdark

New member
wow!!! now thats nice. i have no critiques yet.... hopefully your painting is as good as your builds. also what do you use for your rivets? pinheads? and if so what size?

cheers

uber
 

airhead

Coffin Dodger / Keymaster
Originally posted by fiesta0618...question about the joints remaining clear! I was planning on having the joint balls be oily steel, but I\'m open to other suggestions...

--Fiesta
I was wondering if they were attached via plasma ala the racers from star wars. With the clear balls and some paint on the interior, you could get a plasma ball thing going.
 

fiesta0618

New member
Hi guys, thanks for the input!

Originally posted by delta 408
Inspiring, absolutely inspiring. I don\'t quite like how wide the hips are ATM, but maybe that\'s just because we haven\'t seen the whole mini yet. :)

I hear you on that, and it caused me endless discomfort for quite a while--that and th HUGE waist block especially! I think it will be OK, though, because I keep looking to make sure and yes, Titans have really broad hips and really huge packages. Gender confused, you think?

Originally posted by uberdark
also what do you use for your rivets? pinheads? and if so what size?

Heh, that\'s the real secret to this whole project. Those are \"glass microbeads,\" .75 mm average size. Google it and you\'ll see. I found them in my campus store while poking around in the Architecture section and was immediately inspired. Honestly, I think it sets a new standard for scratch rivets! A very lucky find.

As for painting, check my gallery and you\'ll see I need to step it up big time for this guy, and that\'s when I\'ll REALLY need the help.

Originally posted by airhead
I was wondering if they were attached via plasma ala the racers from star wars. With the clear balls and some paint on the interior, you could get a plasma ball thing going.

I\'ll toy with that idea. I have some extra of those half-rounds to play with and see. Painting is still a fair way out, though.

Again, thank you all.

--Fiesta
 

hestan101

New member
beautiful, thanka for the scale pic. you should be truly proud of what youve achieved so far. as for plasma joints, from a back ground standpoint are pretty unlikely. the imperium is a religiona nd rivets culture and and nayhting like floating joints would be met wiuth a response along the lines of
\"WITCH!!!!!!!! Jenkins, where\'s my flamer?\"
 

stubert

New member
Looking fantastic so far. I think the best bits are the feet, they\'v got so much detail.

And if you want a good paint job try and buy the new FW Model Masterclass Book. Its a brillent book, and its probebly best to invest in a Air Brush.

Good luck with it and keep the pics coming.....stu.....
 

fiesta0618

New member
Originally posted by Jericho
Definitely airbrush this beast. Painting it by hand would be ... less than fun.
Hate to say it, but I think it will have to be brushwork. Thing is, I\'m planning to either engrave or freehand some kind of pattern or texture on all the armor plates (toe caps, shins, codpiece, shoulders, head). I haven\'t decided exactly what just yet, but it will happen. That\'s not to mention that I intend to give this a supremely large amount of love, as a potential GD entry.
Originally posted by freakinacage
looks brilliant. how do you get the shapes for the toes?
Toes are a five-step process ( I assume you mean just the armored part, not the joints?). I cut out the top and sides from my thickest plasticard, then bevel the edges so they meet flush at a specific angle (I have a small piece of cardboard cut at that angle to make sure I get it right). Then, I glue a piece of mid-thickness card on the bottom--one that is bigger than I need on all four sides--and cut/sand it down to the perfect size and shape once it sets ( a process I call \"capping.\") Once that sets I cap the tip of the toe. Then I add the trim and fill any gaps with liquid superglue. Finally, I sand down the sharp edges to a pleasing roundness, then smooth the whole thing with fine grit sandpaper. You\'ll soon see a much BIGGER example of this when I finish the first shin guard--should appear in the next day or two. Keep an eye out!

--Fiesta
 

fiesta0618

New member
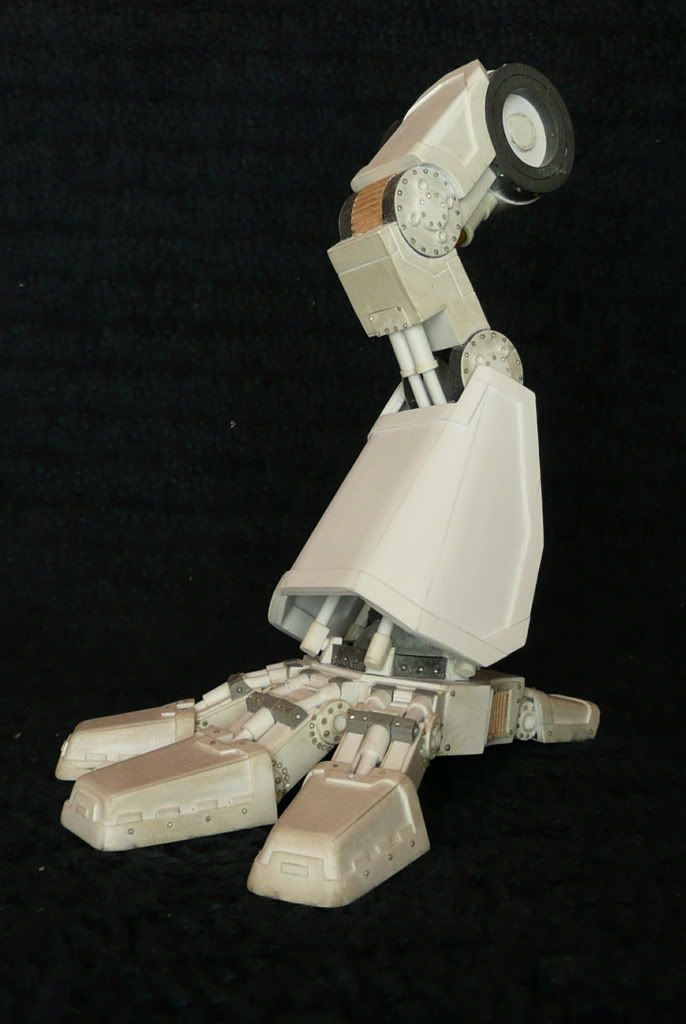
Yay excitement! I finished the prototype shin guard!

cmonphotos028.jpg

cmonphotos026.jpg

cmonphotos022.jpg


I\'m very satisfied with the angles and the shape, but I am a bit concerned that maybe the sides should extend back further...your thoughts? Anyway, I\'ll work on the codpiece in the meantime, that one should be easy.

--Fiesta
 
Back To Top
Top