Learning to Sculpt

Goblinho

New member
Bought piles of green stuff from eBay and I'm trying to develop my sculpting skill. I have tried a few small scale pieces before but this is the first time I've got anywhere near a finished mini that I'm happy with.

View attachment 14118

Hopefully you can recognize the mech from Battletech.
Still got the arms to do and somehow tidy it up in the areas that are not as neat. Once it has hardened is there any way to get the surfaces smooth?

Also do any of you have any tips for making the squared of sections? What i was doing with this was flattening a lump of green stuff the size I wanted then when it had hardened I was cutting it trying to keep right angles.

I also have been working on this one, which has kinda stalled because I think I made the backpack area too bulky. Again the main difficulty I find is in trying to get it symmetrical :(
View attachment 14119View attachment 14120
 

freakinacage

New member
If you wan't hard shapes, gs isn't the way to go really. It is possible but is very hard work. Best way to do it is to mix in some magic sculp (my preferred option) or some milliput. It will make the gs smoother, and harder when cured
 

atgill

New member
Totally agree with freakinacage. GS is great for organic shapes. If you're going for hard edges and plain surfaces, use milliput, apoxie or even plasticard! Try constructing a figure from thin plastic sheets, cutting and filing.
 

Goblinho

New member
Thanks for the pointers, bit limited on funds just now but as soon as I can I'm gonna try out both bits of advice. I plowed on as best I could with the mech. Pretty much finished it now. I've heard a few folk talk about wet and dry sanding to finish a mini, whats involved in that?

View attachment 14156
 

QuietiManes

New member
Greenstuff really does not sand well. The finer the grit you use the better it will work though. It's not impossible it is just darn near impossible to get that polished finish.

Dry sanding is just using sandpaper as per the norm. Wet sanding is using wet/dry sandpaper with water (you can use any sandpaper but the glue dissolves and paper disintegrates in water if it isn't made to be used with water, fairly quickly, which removes the whole reason to use water to begin with)...just dip the sandpaper in water, spray the object with some water, sand away. It removes debris better with water, sandpaper lasts longer, tends to sand a little better, more uniform, etc.

It is probably a better option to try smoothing it out before it cures. Use some lube or some water, and gently work it over until it's as smooth as you want it. If you're going to be cutting parts off you can also wait until it's partially cured and cut it off when it's just starting to get hard. Instead of waiting for it to be fully cured. It shouldn't deform the "right angles" if you use a sharp thin blade. When it is hard as can be, it can be cut quite nicely I've found, it's just a matter of taking very thin slices off, gradually. It tends to break and crumble if I try to take too much off at once.
 

Goblinho

New member
Thanks quiet, that helps a lot :) As I said I'm limited on funds but I went to my local poundland and picked up a craft knife set that will do for the time being. In some areas scraping the blade over the area has smoothed it off but I'll need to fire a thin base coat on it to see how it will paint up.

the next one I'm working on I will struggle with I think. The idea behind the sculpt is based on a scene from the film 300. Going to have a trooper on his knee hiding under his shield as he is peppered with arrows.

View attachment 14159

I've only done the frame but I'm pretty happy with the pose seeing as I've never tried a figure like this before. I has some mixed GS left over so I started the shield too.
 

moonmin82

New member
As Quietimanes mentioned you can cut your angled edges with a blade shortly before curing or after. You can also use the length of the blade to scrape any curved edges to make them smoother. Especially good if you've blended a section over two sittings.

I kow you've mentioned cash as an issue but kneadatite brown and Procreate are good for crisp surfaces.

Looks like you've made a great start if you just learning :)
 
Last edited:

Goblinho

New member
Quick update, my first attempt at a face and although its rough I'm pretty happy with the result. Apart from that all I've done is some work on the grounded knee and leg. In terms of the length of the boot I used too much GS so when it comes to sculpting the foot I will be trimming it back. Never really worked on it at all yesterday but I'll try and do a bit today.
View attachment 14195
 

atgill

New member
Well, looking at what you're doing, I feel I have to share with you something really useful learned time ago.
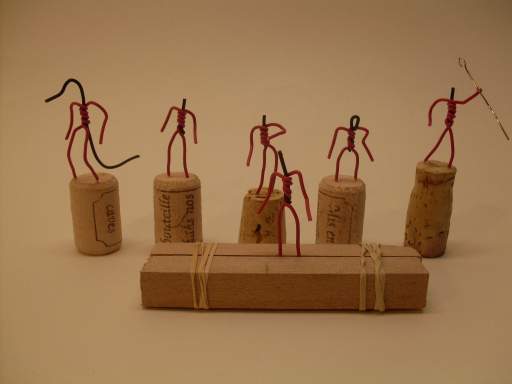
It usually begins with a wire skeleton or structure as you did:

wire-armatures.jpg


But BEFORE taking it to its final posture it is a good idea to make the main volumes. I mean, add material to the areas that won't articulate, something like this:

armature1.jpg


That is not the best example of how to do it, but I'm assuming you get the idea. The point of doing this in a standing pose is to gain control over the symmetry of the volumes, and proportion. Otherwise is very difficult to work it in a different posture.

Once you have this "articulated dummy" with its volumes, proportions and symmetry checked, take it to its definitive pose and fix the joints. Then go on modelling the surface, details, etc.

Good luck!

:D
 

QuietiManes

New member
That's a good suggestion Atgill. Just got to be careful, some of the more extreme poses you will need to adjust certain portions of an armature, and also, when you bend wires it changes their length as well. Again, more noticeable for the more drastic bends, but, something to keep in mind. In other words, bulking out an armature is best done on an armature that is close to its final pose (I think you, Atgill, do it this way).

Bulking up armatures is also a great way to use up the left over bits of mixed putties. Better than rushing through some detailed part of a figure, trying to use the quickly hardening putty before it turns to rock, just because you've got a bit left over.
 

Goblinho

New member
Thanks for the pointers guys, atgill that makes sense and will help with the symmetry that I have been struggling with. Quietimanes I'll try and watch out for that, I'm using paper clips for the wire frame, I'll maybe try making a few armatures then bending them to see what kind of distortion it leaves.

All in all I'm finding the sculpting really rewarding, there is a steep learning curve but with every bit of mixed kneadite I'm picking up something new :) I started throwing a bit of paint on the Mech to see how the finish on it was and I have to say I'm reasonably happy, plus there is something nice about the knowledge I made it myself using about 80p worth of materials.
 

QuietiManes

New member
Just wait until your friends see what you've done and the requests and adoration starts rolling in. That's it, you're sunk now mate, you're sculpting for life. :claply:
 

QuietiManes

New member
Oh, and about paperclips. They work great, just hard to double up since they're so stiff. If you can, you might want to pick up a roll of fine wire, in the floral/picture hanging/tool/automotive/fencing section of your local hardware/DIY/big store. I generally get aluminum, bright steel (small rolls from the floral section, great, thinner than the rest, super cheap) or galvanized (fencing and hardware), but you can generally find copper and brass too but I don't like them. Aluminum armature wire at the art stores is usually WAY overpriced, just FYI, at least, around here and every other countries online store seems to hold true to this.
 

Goblinho

New member
View attachment 14272View attachment 14273View attachment 14274
Quick update, learning that doing little bits at a time is giving me much more control over the form. Put a book on the shield, made a better job of the upper knee on the raised leg. Armour straps are on at the neck and behind the knee. Trimmed the boot to a better length. Hopefully get more done tomorrow, been a bit busy and just got a new job which I start a week on Monday so I'm really wanting to make a bit of headway next week.
 

Goblinho

New member

Hey folks, due to time constraints I've not been sculpting as much as I'd like. Still really enjoying working on the Militiaman, slow going but I'm making progress that I am happy with so can't really complain.

The photos don't really do it justice I feel so I thought I'd try something a bit different (god bless youtube) a quick video of the progress so far.

For anyone that doesn't understand my braw Scots accent basically I've done some work on the upper arm that's holding the shield, the hand on that arm too. I'm struggling with the foot but I'll try and work on that a bit today. I'm gonna put a thick leather belt to merge the chain vest and the trousers too, also ill make the start for the sword today.


I also finished my Hunchback and have started working on a Shadowcat mech. I'll try to get pics up tomorrow.
 

ChemicalFencer

Lost in the desert
Quick question for you . . .

Where are you getting your reference material from for your militia man? May I suggest www.magicsculpture.com. They have a lot of computerised models in various poses. The good thing about them is that they are in 3D - displayed through acrobat reader. There should be one in there that you might be able to use. From the model you might be able to create some concept art which may help a bit with your sculpts.

Hope that helps.

CF
 

Goblinho

New member
Quick question for you . . .

Where are you getting your reference material from for your militia man? May I suggest www.magicsculpture.com. They have a lot of computerised models in various poses. The good thing about them is that they are in 3D - displayed through acrobat reader. There should be one in there that you might be able to use. From the model you might be able to create some concept art which may help a bit with your sculpts.

Hope that helps.

CF

Hey Chem, thanks for the pointer :) Saved that page to favorites

Got a finished pic of my Militia Man and an update on my latest mech (Shadowcat)

View attachment 15326
View attachment 15327
 

cassar

BALLSCRATCHER
Been watching your progress so far so good......im gonna say it...green stuff is holding you back i know i know cassar whinin on about the virtues of milliput but hansome is as hansome does and milliput is far better to work with imo or if you dont like it then there are other products out there i suppose what im saying is dont be afraid to try something different.

The modular design of the mechs would lend itself to milliput a bench sander and some milliput blocks, supa glue and the detailing levels up to you.
oh a tip with working with milliput for small detailing work let it cure for a good half hour or more it becomes more like greenstuff to handle.
 

LeGrandzilla

New member
I am new here, and I have been trying to teach myself how to sculpt. I posted a youtube vid last week of a sculpt I did of the monster Demeking.. I hope I can learns some good tips here..
 
Back To Top
Top