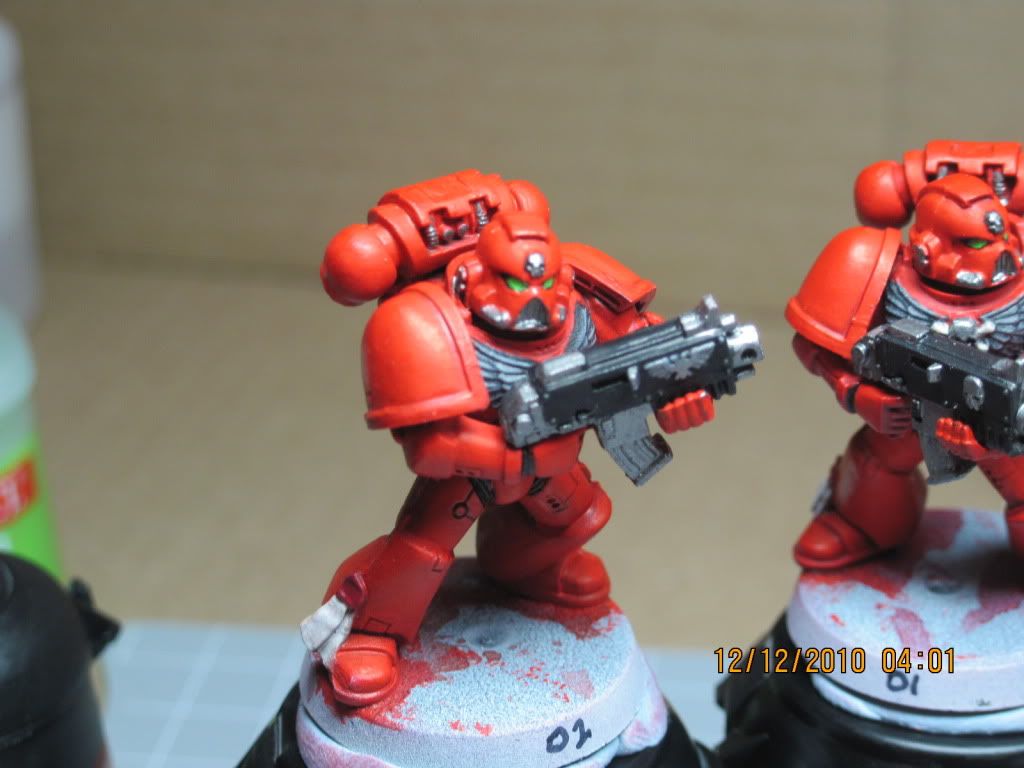
Two new Blood Angels Space Marines

-Ice

New member
Hey guys! I got bored with all the moping around I've been doing so I decided to start fresh with two new space marines to be sacrificed to the gods of miniature painting. I thought I'd do two of them start-to-finish just to have a "final product" done on the table.
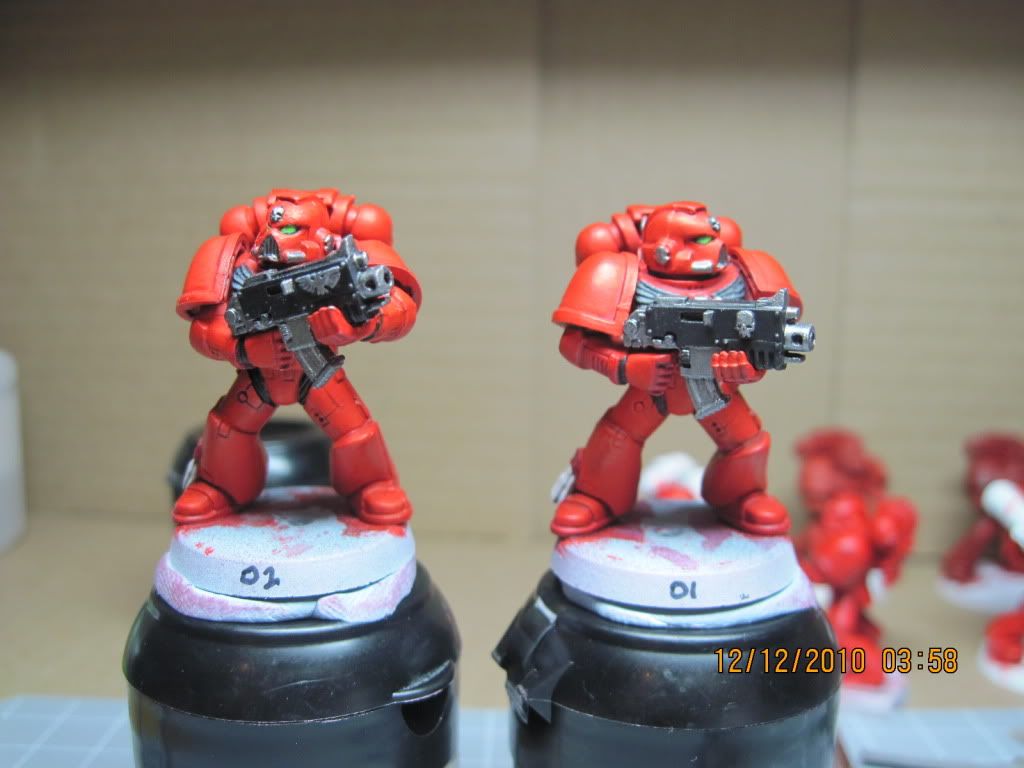
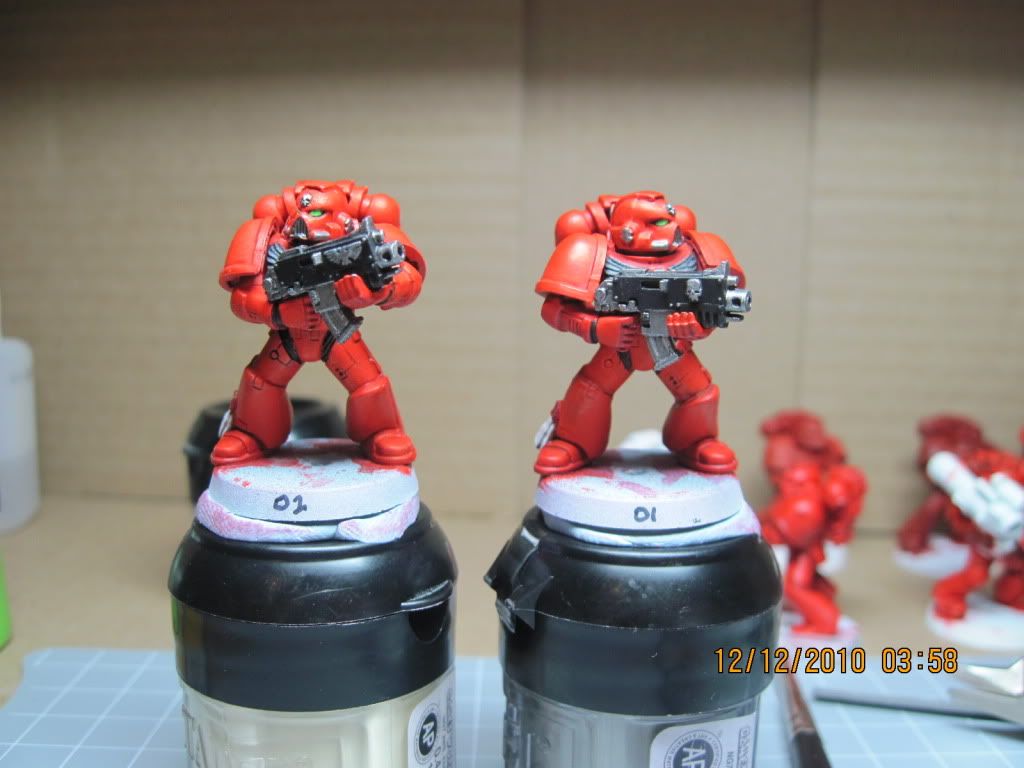
Space Marines proof of concept

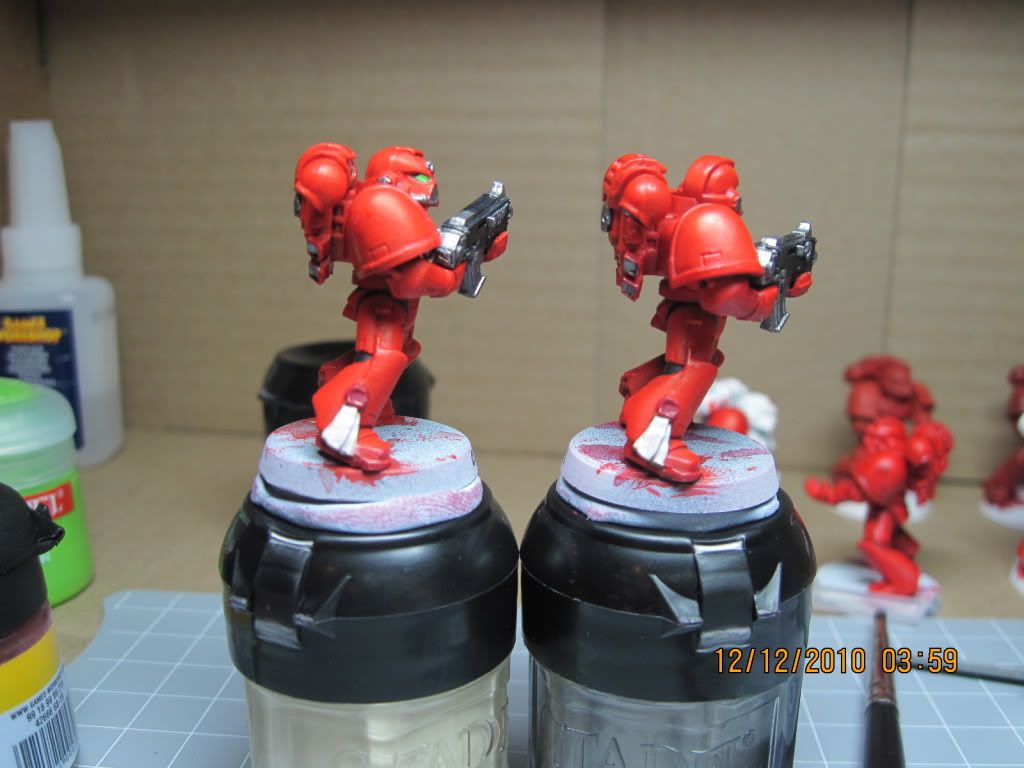
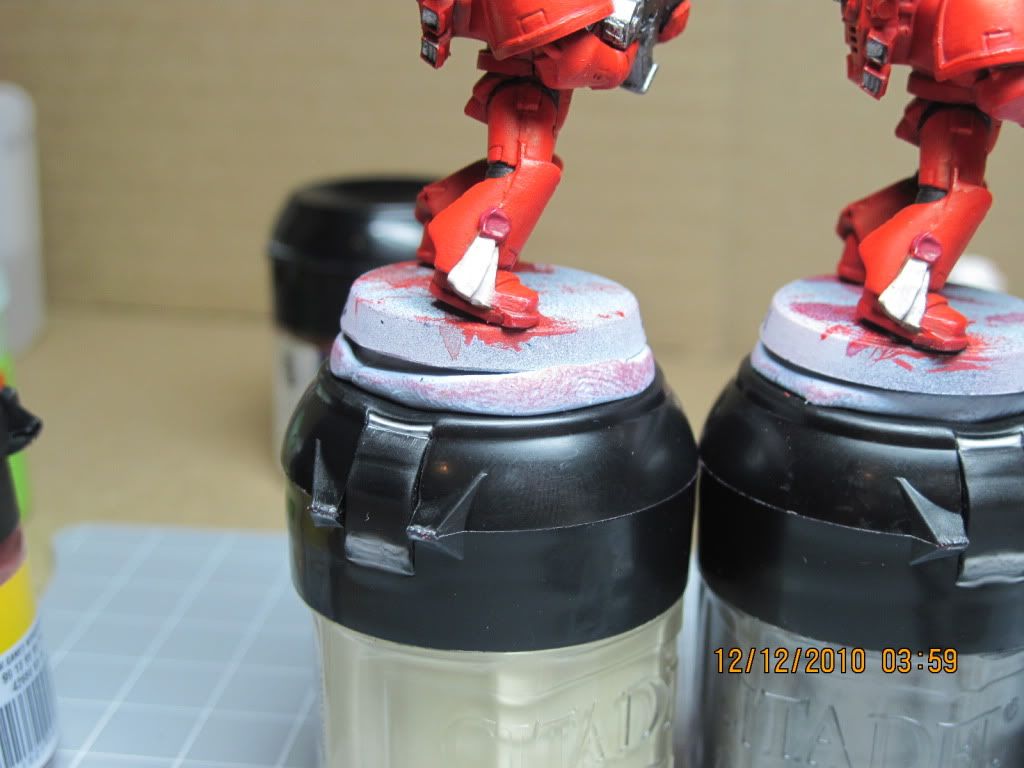
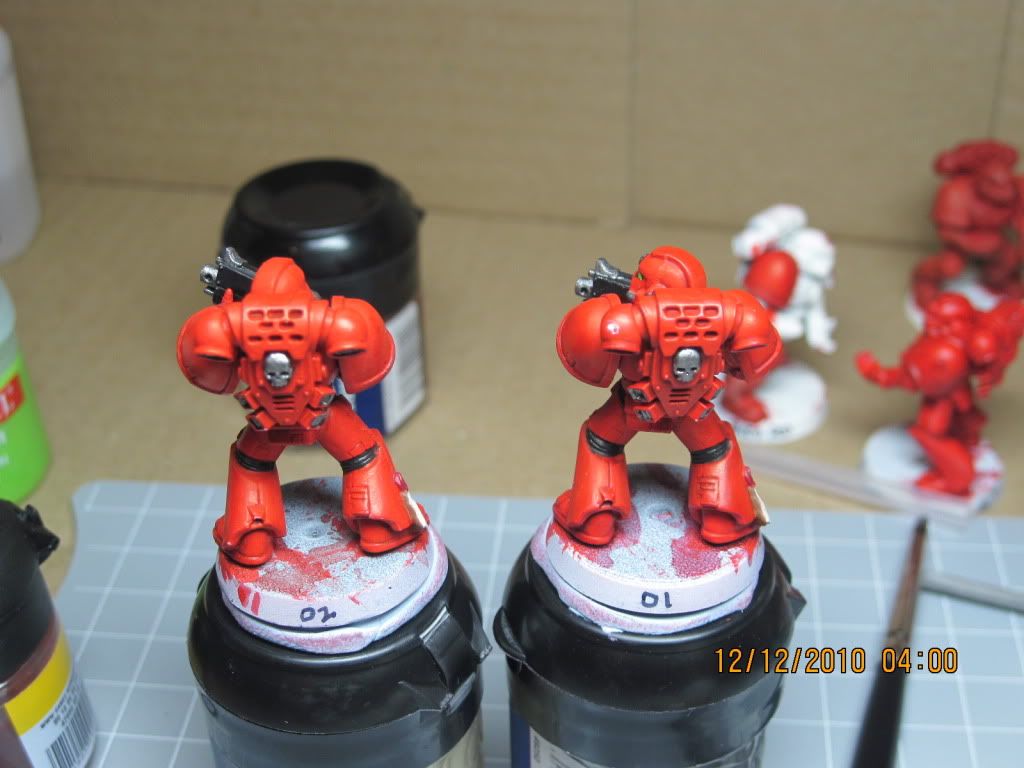
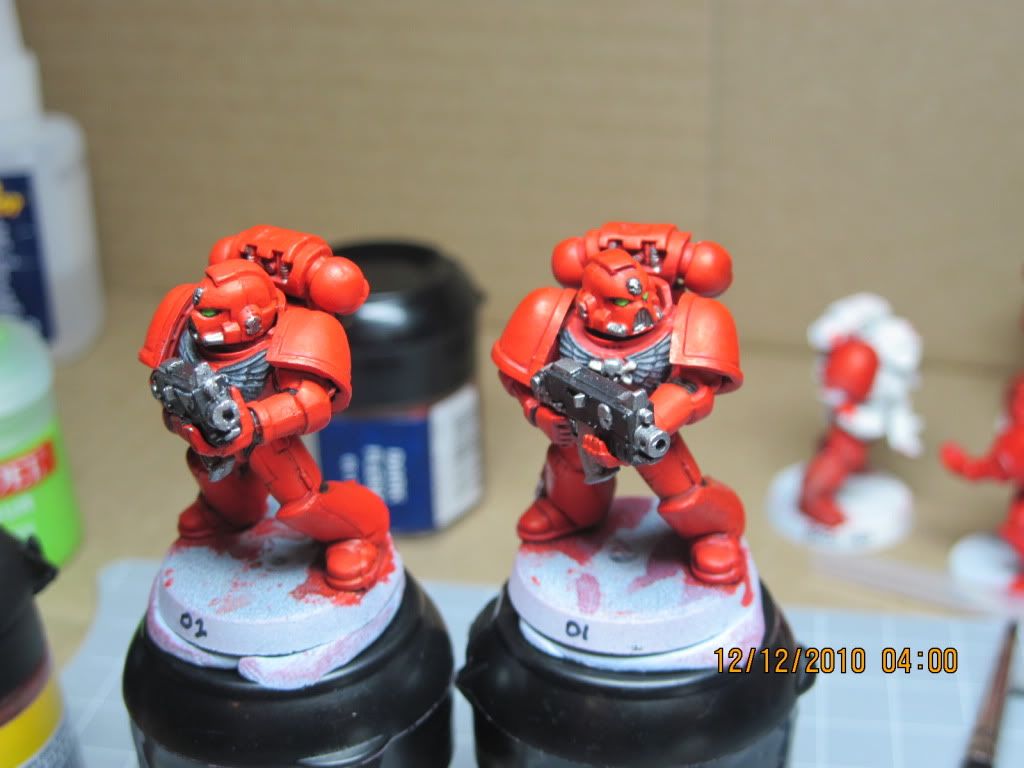
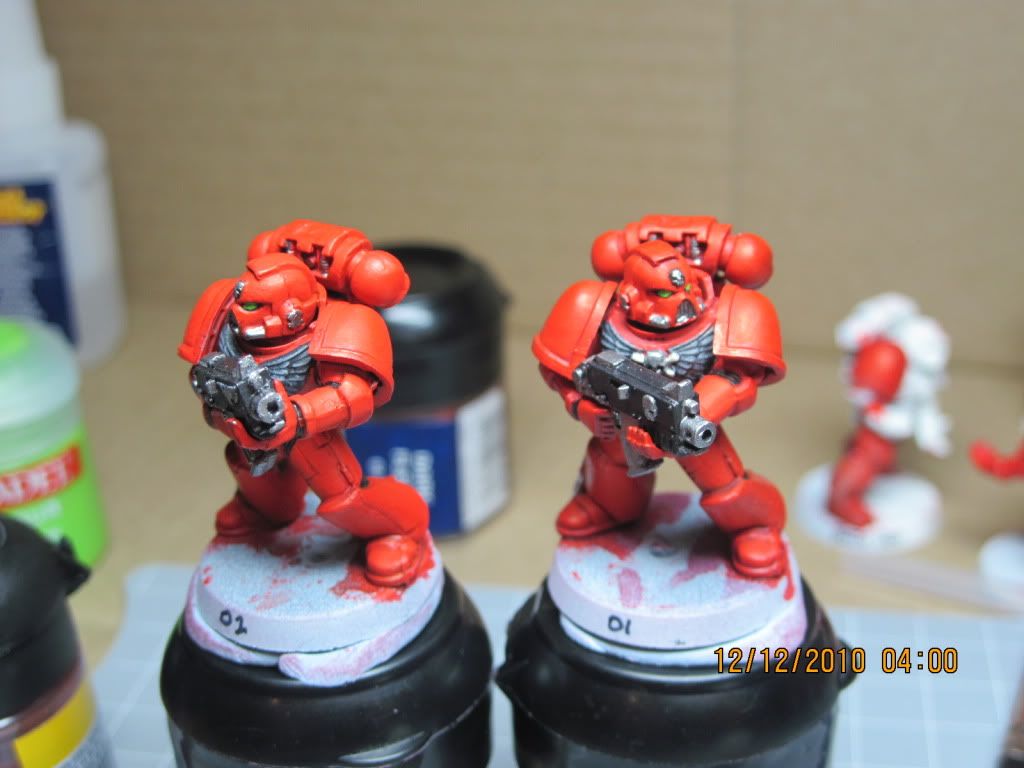
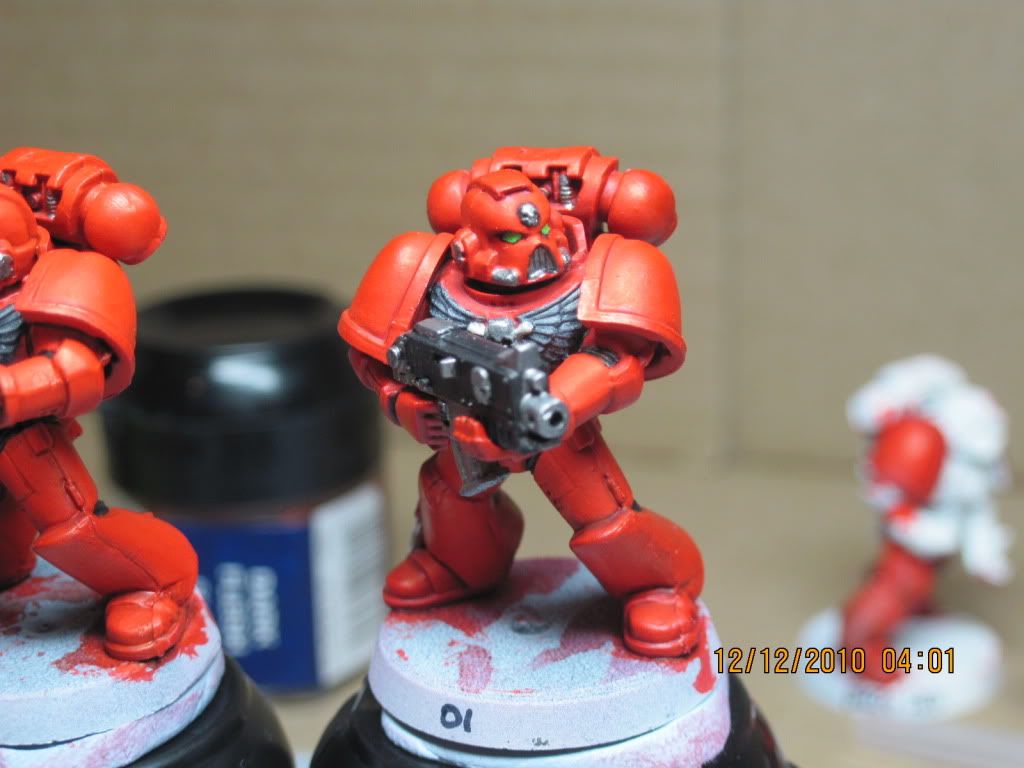
Both are primed white and basecoated blood red. 01 was given a wash of Baal Red while 02 was given a wash of 2:1 Dark Flesh - Varnish with lots of water (8 parts). Both models are then "re-touched" or cleaned up with the basecoat mix. The aquila was based with 1:1 dilution of Chaos Black, then drybrushed with Codex Gray. The skulls were based 1:1 Chaos Black then Boltgun Metal was applied pure. The eyes were based black (the entire ares) then Scorpion Green was applied pure, leaving a bit of black on the corners. The parchment was based with Calthian Brown pure, then given a coat of 2 parts Bleached bone and 1 part water and a final layer of 2 parts Skull White with 1 part water. The seal was given a dab of Red Gore pure. The gun was based Chaos Black in 1:1 dilution, then the metal areas were painted with Boltgun Metal.
Here are the two minis after an afternoon of painting:
Painting3ProofofConcept006.jpg


Painting3ProofofConcept007.jpg


A picture of the purity seals:
Painting3ProofofConcept008.jpg


Painting3ProofofConcept009.jpg


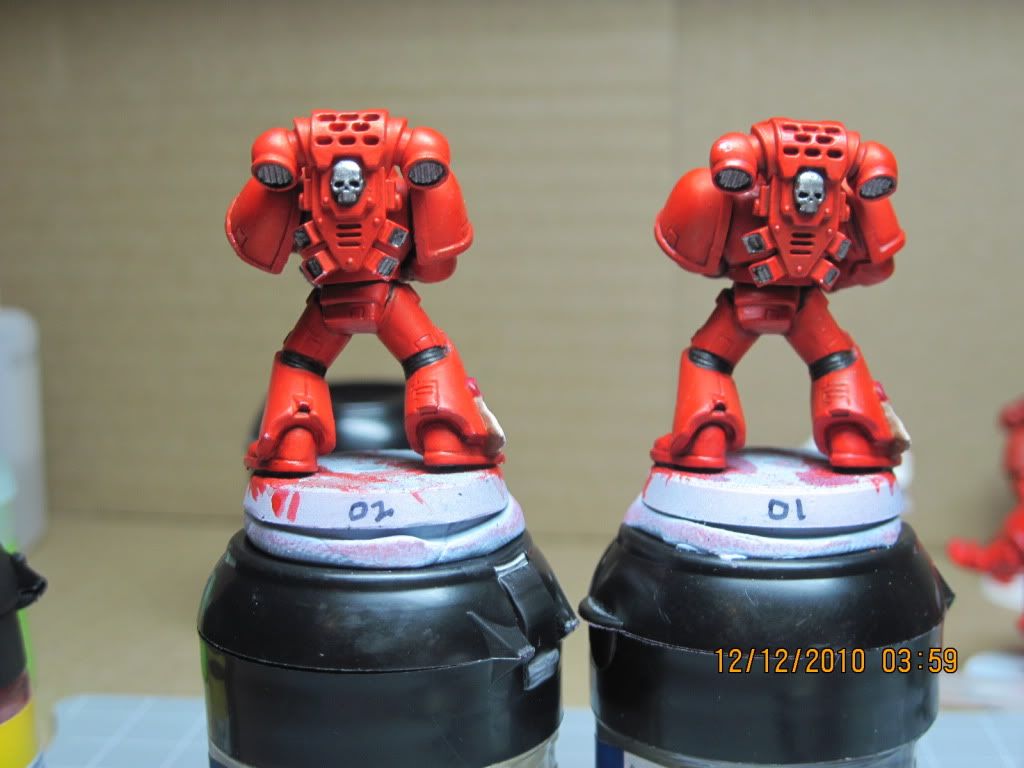
The back view of the minis:
Painting3ProofofConcept010.jpg


Painting3ProofofConcept011.jpg


Painting3ProofofConcept012.jpg


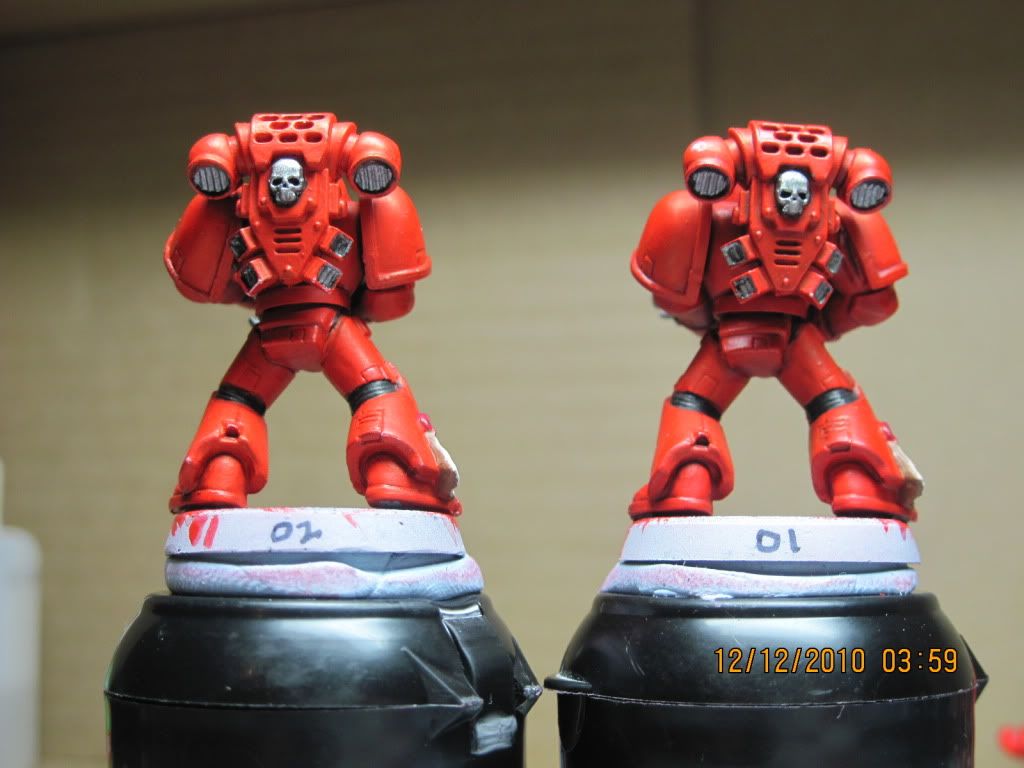
A side/front shot hoping to get a view of the aquila:
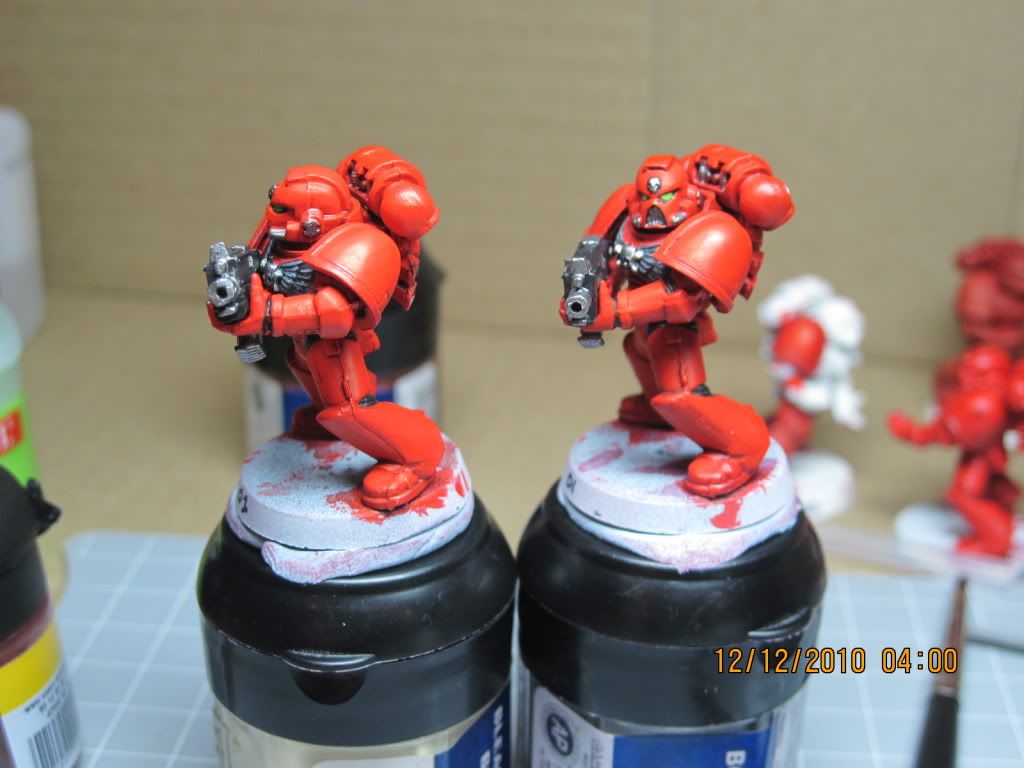
Painting3ProofofConcept013.jpg


Painting3ProofofConcept014.jpg


Painting3ProofofConcept015.jpg


Painting3ProofofConcept016.jpg


Painting3ProofofConcept017.jpg


*******************

Lessons learned:
1. Metallic paints do not do well with being watered down. Better to apply pure, but make sure it is on the brush properly.

2. Mistakes can be easily cleaned up by applying the basecoat color --- easy to do but takes lots of time and many coats. Better to be as neat as possible.

3. Drybrushing does have its uses. Due to a lack of a proper fine brush, I could not highlight the edges properly so I just drybrushed the aquilas.

4. Most of the mini was done with a GW basecoat brush. I'm currently in love with this brush and I'd get 3-4 more as soon as I have more money to spare. It has a nice body that holds watered-down paint; one "load" can basecoat half a mini no problem. It has a nice tip suitable for all but the finest detail work. Everything on these two minis was done with the basecoat brushes except for the metal areas which was done with a separate fine detail brush but the GW fine detail brushes are crap. And yes, I did the eyes with the GW basecoat brush, though I would kill for a decent fine detail brush for that job!

5. Even with the washes I've done, I still feel a lot of its application is guesswork. Sometimes it's on too thin and barely noticeable, like in my pictures above. Sometimes it goes on nicely and gives a nice effect. Sometimes it goes on too much and "pools" at the edges and I'm left with a "ring" of shadow as a result. Any tips?

.
.
.
Obviously, these minis are not anywhere near display-quality as I have done no shadows or highlights but I feel they are perfectly TTQ minis, if even a bit better than the average I see in the shops. Looking at a 1500-point army list, I cannot imagine doing shadows/highlights on each mini on that list, so I am setting my sights lower for now and just "getting things done" for now --- I figure I'd have more incentive painting when I actually learn more about how the game works and how each mini contributes to my strategy.

One thing I've noticed - the basecoat rubs off easily on the mini. Notice on the back views of 01's backpack and on the bottom left corner of 02's leg armor. I've had to re-apply the base color mix 3-4 times during the painting session as it would get wiped off due to my handling --- and that's even with the minis mounted on a pot/base! I'm worried that my paint work will rub off after a few games; how does one go about protecting the paint work?

Lastly, like I said, I only did simple basecoating on this mini and with such an army to go through, I'm not too keen on doing shadows and highlights on each of them. However, I was wondering what else I can do to "spice up" these minis a bit more? I know of line highlighting but doing so gives me more frustration than satisfaction at the moment (I dunno if it's lack of proper brush or lack of skill?) so I'm avoiding that for now. Anything else I can do?

Thanks for viewing and as always, comments and suggestions are greatly appreciated! Oh, and I'd appreciate a rating as well!

Cheers!
 
Last edited:

Shellshock

New member
Not half bad, they'll look great as a whole army side by side and yeah they are substantially better than alot I've seen at my local! You've given yourself a focus which is brilliant, get them all done to that standard and get gaming.

Give them a light coat of varnish, matte is imo best that'll prevent alot of chipping and damage during handeling.

What I'd do personally speaking once you've got them all painted is start anew with a commander, do your best you can then do a unit he will go with, then pick an elite unit or something and put your all into it, as you go you'll be building a higher quality force slowly replacing the old ones or just adding a variety of new units, by the time you've done the whole lot you should be very compitent at painting BA marines, that said I know it's expensive to replace units all the time but once your at a point with a nicely painted force and your gaming you can afford to put the extra time and effort in at your leisure as you already have said unit painted and gaming.

Your doing very very well, goodluck and keep going, expect to see pics of full units then the army in time :D
 

-Ice

New member
Thanks mate! You say "not half bad," I am now wondering what the "half good" would be?

Then again, yes, that is my point exactly, I cannot have time right now to shadow/highlight an entire army and hope to get gaming before I die of boredom. A little gaming will add some variation so that I can get more motivation. Painting a special unit like a commander, however, I can see myself applying all I have learned for that "special unit." The downside is that I'm coming to this hobby from the Dawn of War PC games (the first ones, not DoW2) and I really don't know how to use "elites" and "HQ" units so I have no love for them at the moment. No love = no motivation to make one.

Two questions on varnish - 1) where do you buy a "matte" varnish and 2) can you still paint on/work on a miniature after laying some varnish?
 

-Ice

New member
I've tried to clean that up as best as I could before priming. I was afraid that more shaving would take off more than I wanted to, apparently it could've done with a bit more passes.
 

HeavyBolter

New member
Hi Ice,

Nice to see how enthusiastic you are about getting going in the hobby. I'll share what i can from my experience...
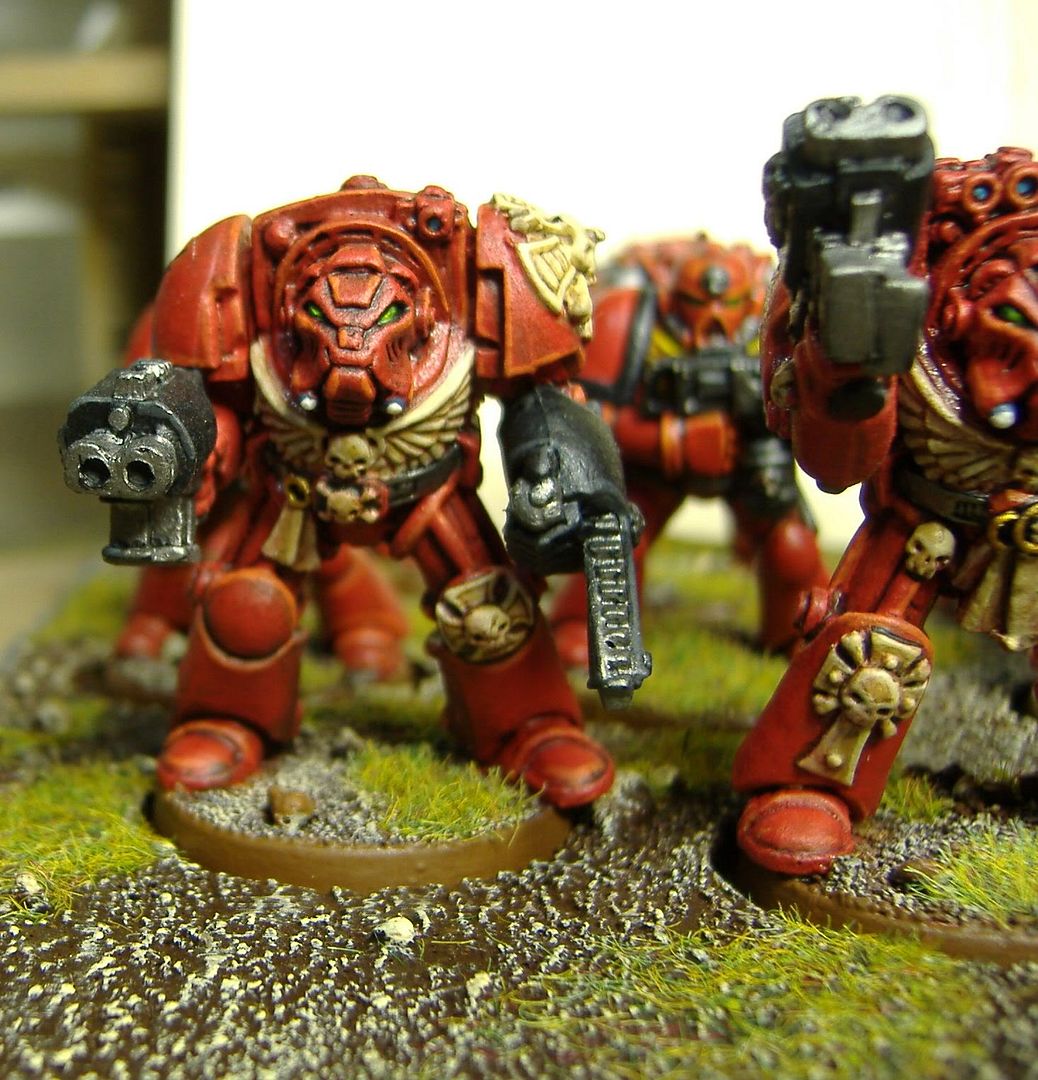
Your using the exact same technique I used on my first Blood Angel Termies ever
d7693a7d.jpg

I concur with Freak in that you should be spending more time in your prep, as in cleaning up those mold lines. You can see I made the same mistakes on my early works as well. It is a huge pain but the good thing about Marines is once you learn where the lines are its pretty easy to not miss any. Invest in a small file set. GW sells a set or most hobby /arts and crafts stores have them in there jewelery making aisle.
Now about brushes, I know you like the GW brushes and some of them are good for general stuff(washing and base-coating) but it would be worth your time and effort to invest in decent brushes like Windsor Newton Series 7 brushes from DickBlick.com. These are excellent Kolinksky Sable brushes that with the right care will last a very long time and I feel make a real difference in the quality of work. If your going to be doing line highlighting or really any highlighting these will work wonders for you. I use a 0 size brush for 90% of my painting and then use a 00 and 000 for super fine details. I got these http://www.dickblick.com/products/winsor-and-newton-series-7-kolinsky-sable-pointed-round/ recently and am very happy with. If your at a local art store and price is a concern you can get great synthetic brushes for fine detailing as well for great prices ( American Painter brands come to mind). A good brush tip is to keep from getting paint up in the ferul ( the metal sleeve that holds the hairs to the brush). When paint gets up there and dries it causes the hairs to split.

Your table top quality is solid. Your definitely ready to move onto shading. Washing is the way to go. I've used Dark Flesh as a wash on those old termies. You might want to try Gryphon Sepia or Devlan Mud GW wash as I find that they shade red nicely, Mud will give you a very dark shade, so I lean towards a few applications of Gryphon Sepia. The GW washes get deeper as you put more coats over a dried coat. Dark Flesh is a great color to wash red with but play with your water ratios as you may get better results with less water. If you see the washes starting to pool up siphon it off with your brush. Try just applying the wash in the spot you want shades, using the wash as a paint in a way.
Here is how i paint the chest eagles. In your case instead of basing the eagle in black and then dry brushing Codex Grey, I do it in reverse. I base-coat it in the Codex Grey, then apply either a thin black wash or your best bet would be Badab Black Wash. It will seep in and shade all the cool details of the eagle. After it dries you may just like it as is but you can go in and pick out the high parts with Codex Grey. This is also how i do the metallic bits like bolters, backpack skulls and the back of the knees, elbow joints and wrists, but I like using Chain-mail as the base color in those cases since the Badab Black darkens the tone of the Chain-mail nicely. The black seeps into those joint grooves with no fuss.

Blazing Orange is your best bet to apply highlights to your Blood Angles. Now for fast table top quality don't fall into the trap of lining the entire marine. It's not necessary. I find that for gaming just apply to focus areas going from head to toe. The Head should get the most attention. Use edge highlights around the eyes, mouth and that Mohawk strip down the middle of most marines heads. Then hit the edges of the Shoulder pads, the elbow pads, top of the knees, the ridges on the feet and the back parts of the boots. It really depends on how much you want to get into each one but I find lining every single edge makes the mini look overworked. Thin your Blazing orange just a little bit to get it flowing better and apply thin lines to the edges. Don't worry if you make them a little thick at first. I use a technique called "erasing" where basically you just go back with the base-color and trim the thickness of the highlight. You can get some nice thin highlights that way. Either use a 00 or 000 brush for this.

One last thing then i'll shut up =).. Clear coating. I use Testor Dullcote and Glosscote, exclusively. I've tried GW, Krylon and Folkart spray varnishes and they just don't compare(Krylon matte varnish comes closest to me). The reason I mention Glosscote is that for protecting minis from damage you may want to try a two step process. Gloss coating your mini will protect it the best as gloss forms a strong shield around the paint. Now of course running around with Glossy marines doesn't work for most people so after the Gloss dries, just zap your mini with Dullcote. You lose the shine but retain the protective shield of the gloss. And you can still apply paint on top of the Dullcote. I do it all the time. You cna get Testor Dullcote/Glosscote at any hobby stores that carry Testor paints. I actually found some at A.C. Moore arts and crafts store.

OK Ice, I've got more but my fingers are getting tired. Check out my favorite youtube channel, AwesomePaintjob, for some great information. I'm currently touching up my Black Templar army and will be posting some pics on my blog.

Keep on truckin and I hope my info helps you out.
 
Last edited:

-Ice

New member
Awesome reply there HeavyBolter. Thanks for the tips.

I'm really having trouble with the wash, I don't know what I'm doing wrong but I miss my target so often it's frustrating. I've decided to semi-speed paint a batch of minis in order to get playing quicker, then I can OCD myself to all that mold lines later on. At least with an army ready, I can play whenever I want a break from painting.

I'm currently in the UK so I still have to search for where to buy all that Dull Cote and other stuff. As I'm in the northern part of the country, my best option is usually online stores; I've assembled my PC this way as the local stores don't carry what I want for my PC --- point is: if stores don't carry something as "universal" as PC components, I doubt if I'll find quality paint-brush stuff locally as well.

Oh, and yes, I'd kill for quality 00 brushes right now. I'm amazed at how kind the GW basecoat brush is, but I'm also appalled at how crappy its detail brushes are.
 

HeavyBolter

New member
Don't consider the mold lines an OCD thing, since you really cant go back and fix mold lines after the mini is painted. I honestly think it detracts too much from your work. Probably takes about 2 minutes per mini to clean them up.

A quick Google search turned up this UK online shop http://www.antenocitisworkshop.com/materials-tools/varnish/testors-dullcote-spray.html

This place is the mother-load my friend.... They even carry Liquitex products that I use heavily, especially Matte Medium and Flow Aid which I use to make my own custom washes using Les's Wash Recipe, and Gesso which I use as a brush on Primer. Check out there brush section and break out the credit card!

You might want to try the Army Painter Colored Primer product. It would shave alot of time off of wokr as far as geting an army up and ready quickly. Heres the link to there red product

http://www.antenocitisworkshop.com/...imer-paints/army-painter-primer-pure-red.html
 

freakinacage

New member
Don't consider the mold lines an OCD thing, since you really cant go back and fix mold lines after the mini is painted. I honestly think it detracts too much from your work. Probably takes about 2 minutes per mini to clean them up.

couldn't agree more. if you want cheap but quality brushes, try rosemary and co. don't bother going below a 1 though as the points are usually so go, i don't use my 00 and 000
 

-Ice

New member
Thanks for the replies. Yes, I do have to get new brushes but I have to wait a bit to see if I have more money to spare this month.
 

Mourner

New member
Don't consider the mold lines an OCD thing, since you really cant go back and fix mold lines after the mini is painted. I honestly think it detracts too much from your work. Probably takes about 2 minutes per mini to clean them up.

for tabletop minis i usually spend about 30 sec on any part i take out of a sprue, just cleaning up mold lines (this comes down to about 2-3 minutes per model)
I've discovered sanding paper some time ago, and use it almost exclusively these days. I use 220gr for mostly everything, and 1000gr to really smooth out prestige minis (220gr leaves a rough looking surface, but you'd never say when painted)
I cut the sandpaper into small squares (about 1" square). you got 4 straight edges and you can fold it and you can bend it. you can even fold it around a file, a tool or even a piece of wood, and make a makeshift file. much cheaper than files.
The only thing i use files for, is to use a triangular file to clean things like plasma coils...

that said, other than TTQ minis, i also spend a couple of hours repositioning, converting and cleaning each model, so a couple of minutes on mould lines is nothing.
I also tend to clean up any part that is a serious contender for going onto a model (it gets cleaned, wether i use it or not)
Cleaning a model is also a great way to scrutinise the model, check for hidden details and figure how you want to paint it...

onto brushes:
I have a sh*tload of brushes (as, i bet, most of the people on here). But i use only 2-4 at any time.
I have an old GW basecoat brush that i use for watering down.
I have a nr2 synthetic brush (br: springer pinsel) that i use for laying down basecoats and large surfaces
I have a W&N s7 000 brush i bought 6 years ago. It's still the best brush i own, and i paint 90% of ALL my models with it.
A second W&N s7 000, haven't used it yet, but the older one might need replacing... finally.

Those Windsor&Newton series7 brushes are expensive (10e apiece) but if you consider that i have probably over 100e in brushes, but paint with about 20e worth of brushes, that's good money...
also, a good brush will improve your brushcontrol, not necessarily your painting... if i were you, i'd spend some time edge highlighting all the minis you've got so far... it's tedious, but it's practice... try and get the lines to be as smooth, straight and thin as you can.
One of the most educational minis i've painted was one where i used lines only, no transitions, just areas of paint. this really helped my brush control and showed me roughly where and how to highlight my coming minis.

you might be able to find brushes locally (i don't know, but the city where i live has at least 2 art stores that sell W&N brushes.
and computercomponents are a digital product, almost anyone that uses them is familar with internet. also, anyone knowledgable and confident enough to be able to install these components is probably willing to order online. artsy, older and less digitally oriented people (those who paint) usually like to see and feel the brushes they buy, so they'd like a store where they can do just that.
now, I'm not saying there's an artstore near you, but there might be, none of the stores near me advertise, have a website, or are even located in the busy part of town...

(my posts always end up being way too long)

so, keep painting, keep pushing and keep posting

Mourner
 

-Ice

New member
Awesome reply there Mourner, don't worry about reply length, I appreciate all the info.

I do have the GW file set but I've given up on using them since it leaves a very... messy result. I think I'll have the sandpaper idea a go --- although would you recommend sandpaper on plastic minis? I thought you only sanded down metal minis?

I'm a sucker for "quality equipment," my idea is "have the right tools, that way if you suck, it's your fault, not the equipment; if you're any good, at least the tools will help bring that out." So no need to sell me on quality brushes. I've just bought two GW fine detail brushes and both went haywire after a few minis so I'm not buying any more of them. I'm perfectly happy with the GW basecoat brush for general "applying paint to an area" but I do need a few fine brushes for detail work. Note that detail work includes the areas between armor like behind the Space Marine knee. The amount of cleanup I do on that area and the groin area is insane!

There are some hobby stores near me, in fact there is a HobbyCraft here, but having no car, I am not as "free to roam" as you may think. I do need to give that HobbyCraft store another swoop though. I'm sure there are W&N brushes there, though I doubt if I found any 0/00/000 brushes the last time.
 

Mourner

New member
I do have the GW file set but I've given up on using them since it leaves a very... messy result. I think I'll have the sandpaper idea a go --- although would you recommend sandpaper on plastic minis? I thought you only sanded down metal minis?

do you file metal minis?
then why not sand plastic ones... mind you, i don't actually "sand" the mini.
the plastic surface is smooth enough by itself, i only use the sandpaper to remove mouldlines or unwanted details.

the best thing about sandpaper is that it curves, you can sand round surfaces without risking flattening it (if you're carefull...)

....but I do need a few fine brushes for detail work. Note that detail work includes the areas between armor like behind the Space Marine knee. The amount of cleanup I do on that area and the groin area is insane!

Brush Control....

I take it you mess up on the clean-up :D:D:D
the seams on SM armor are always the last thing i paint.

have you tried what i suggested in my last post?

if you're afraid of messing up you shiny new blood angels, you could also try painting a rainbow (any colors, as long as they contrast). make each stripe about three brushstrokes wide (just as it says...) and try and make each edge as sharp as you can manage
no need for a mini by the way you can just use a piece of paper

I'm sure there are W&N brushes there, though I doubt if I found any 0/00/000 brushes the last time.

Have you asked nicely??
:D
 

-Ice

New member
do you file metal minis?
then why not sand plastic ones... mind you, i don't actually "sand" the mini.
the plastic surface is smooth enough by itself, i only use the sandpaper to remove mouldlines or unwanted details.

the best thing about sandpaper is that it curves, you can sand round surfaces without risking flattening it (if you're carefull...)
Like I said, I have yet to try sandpaper. I tried with the GW files and didn't like the result so I guess I just wrote it off.

I take it you mess up on the clean-up :D:D:D
the seams on SM armor are always the last thing i paint.
There are just two possibilities = crappy brush or shaky hands. That's why I'm keen on getting quality fine brushes. That way I eliminate one and can therefore focus on the other.

have you tried what i suggested in my last post?
What part exactly?
 

Mourner

New member
What part exactly?

The part about edge highlighting all the models you've got painted...

this, or the rainbow idea would have you train your brush control (the rainbow would let you do it without risking a perfectly good paint job)
you might also try just painting straight lines, or try varying the two.
excercises like this one taught me brush control... and left me a couple of interesting minis... (i'll try and take some pictures, to show you what i mean)

There are just two possibilities = crappy brush or shaky hands. That's why I'm keen on getting quality fine brushes. That way I eliminate one and can therefore focus on the other.

shaky hands is easy, keep your hands together.

try this:
take the mini in your left hand (preferably mounted on a holder) and rest your right wrist on the inner pad of your left handpalm.
keeping your hands together and keeping them touching each other means both your hands and the mini shake together, keeping them still in regard to each other. (reverse if your left handed ofcourse :p)
 
Last edited:

-Ice

New member
Ah, like I said, I need quality brushes for the edge highlighting technique anyway. Even though my GW basecoat brush is great, I don't think I can use it on edge highlighting. It holds too much paint and curves too much at the body.

Regarding my hands, to be fair, I have my hands braced against the table at the forearms, the hands themselves are "locked" by the fingers (usually pinkies). The problem I'm having with brush control is that the body of the brush is hitting areas of the mini --- like the brush hitting the groin armor when I'm doing the black areas between the groin and the legs. A smaller, less "bulky" brush may be the solution. Why do I say so? Because I can line the armor edge and the eyes nicely with my basecoat brush. In other words, I "think" I am okay brush-control-wise, I just can't compensate for a big-body brush in tight spaces.

At least that's my excuse until new brushes prove me wrong.
 

Mourner

New member
If I understand correctly, the smallest brush you currently own is a GW basecoat brush...

That would clarify a lot :p

I figured you'd have something like a 0 or a 00 brush lying around...

so, the first thing you need is'nt quality brushes, but some variety in brushes...
(ofcourse, you can by quality)
get a small brush and see how you progress...

and best be prepared to pay for quality....
not to scare you, and i know you know, but good brushes are expensive...
and it'll probably take some time (and a number of brushes) to find your favorite...
about half my brushes are < 0, but none of them feel right..
I still buy brushes if I find anything interesting...
 

-Ice

New member
Glad the threads help you Id! Mourner, I have a bunch of brushes, all of them GW. I got two fine detail brushes, both crap, I got two basecoat brushes, one for red and bright colors, one for black and dark colors. I got two big drybrushes, one for when I was doing drybrushing and another to brush the "dust" off of a mini during prep, I have one medium and one small drybrush, I got a standard/starter brush as well. But the best brush that I'm happiest with is the GW basecoat brushes, like I said, they hold a nice point. Can't get to tight areas properly, I think, but are great even for detail work like eyes.

I hope to get some quality brushes (Raphael maybe?) soon-ish.

What's the deal with "pay for quality"? Care to attach a figure/price range for that? I've looked at a 000, 0, and a 1 from Rosemary&Co for less than £10, IIRC, and about £17 for the same set of Raphael brushes. Is that considered "expensive"? And yes, I know the bigger Kolinsky brushes (size 12s) cost a lot but I don't think I'd use them in this hobby so that's not a concern.
 
Back To Top
Top