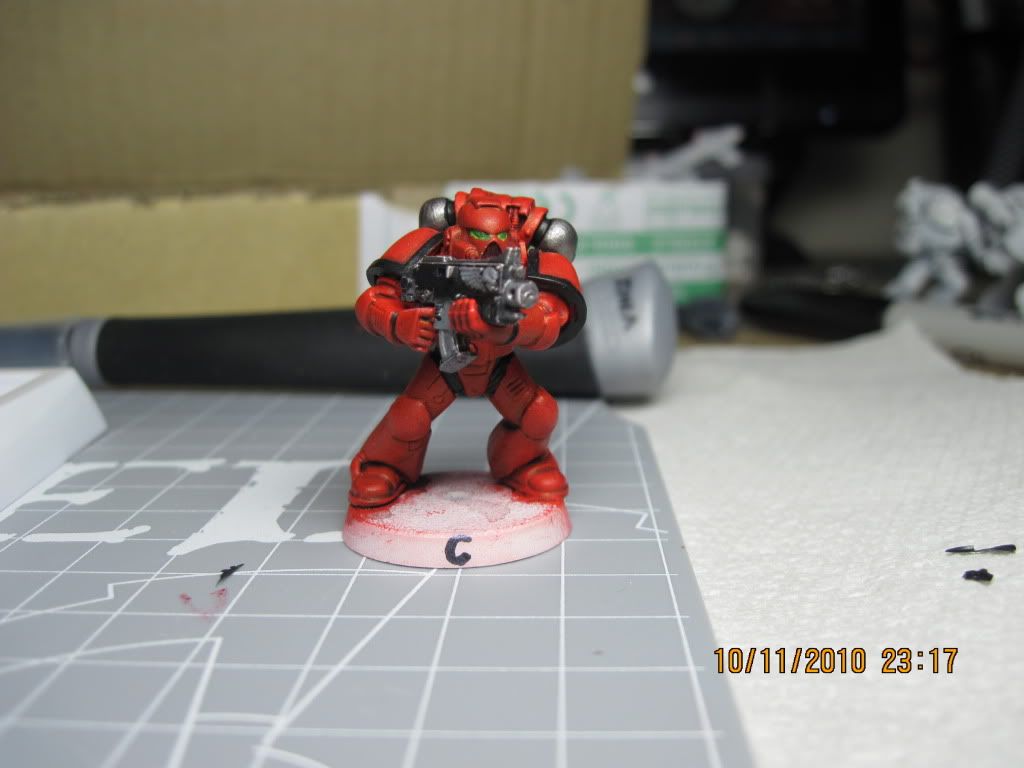
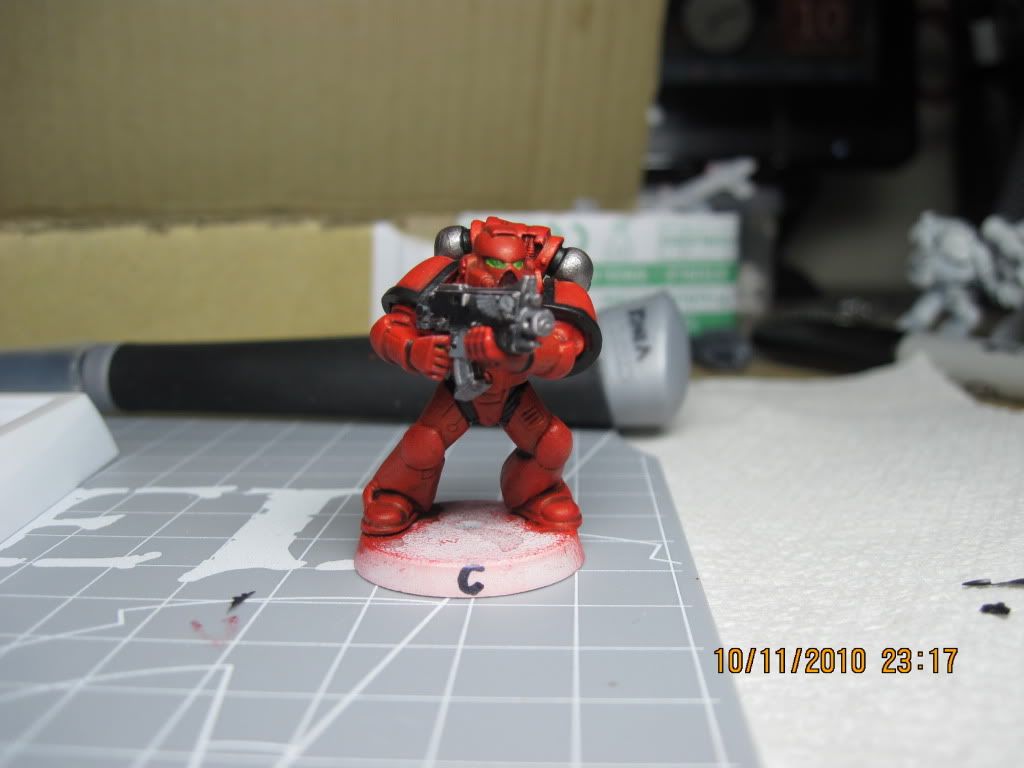
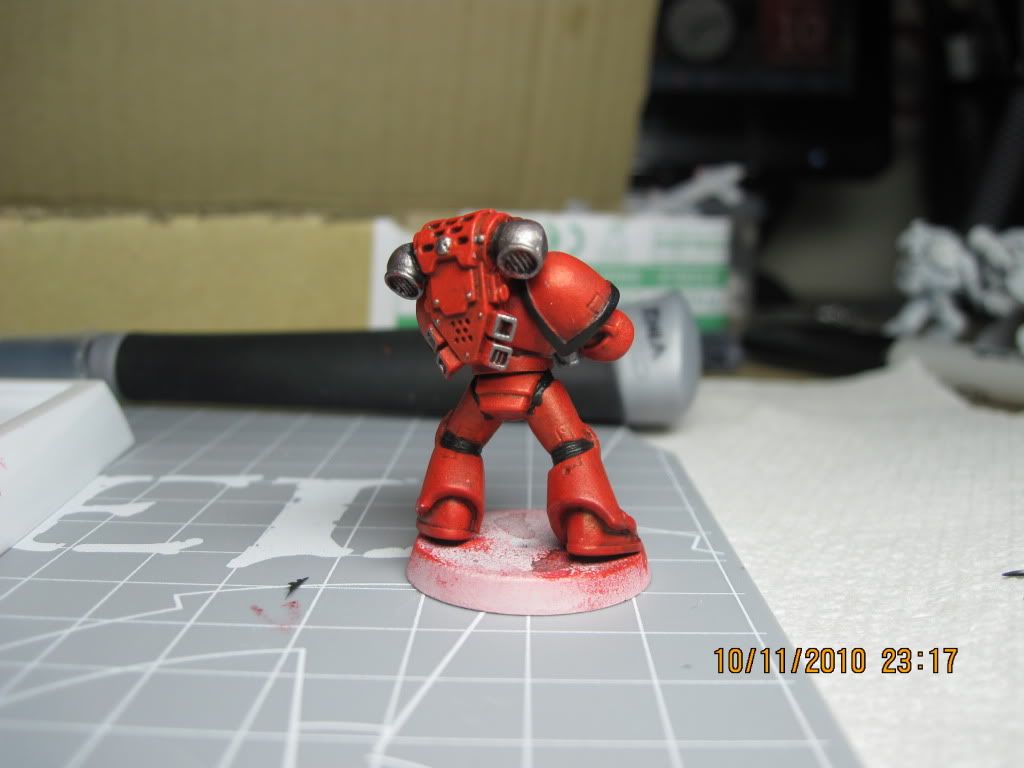
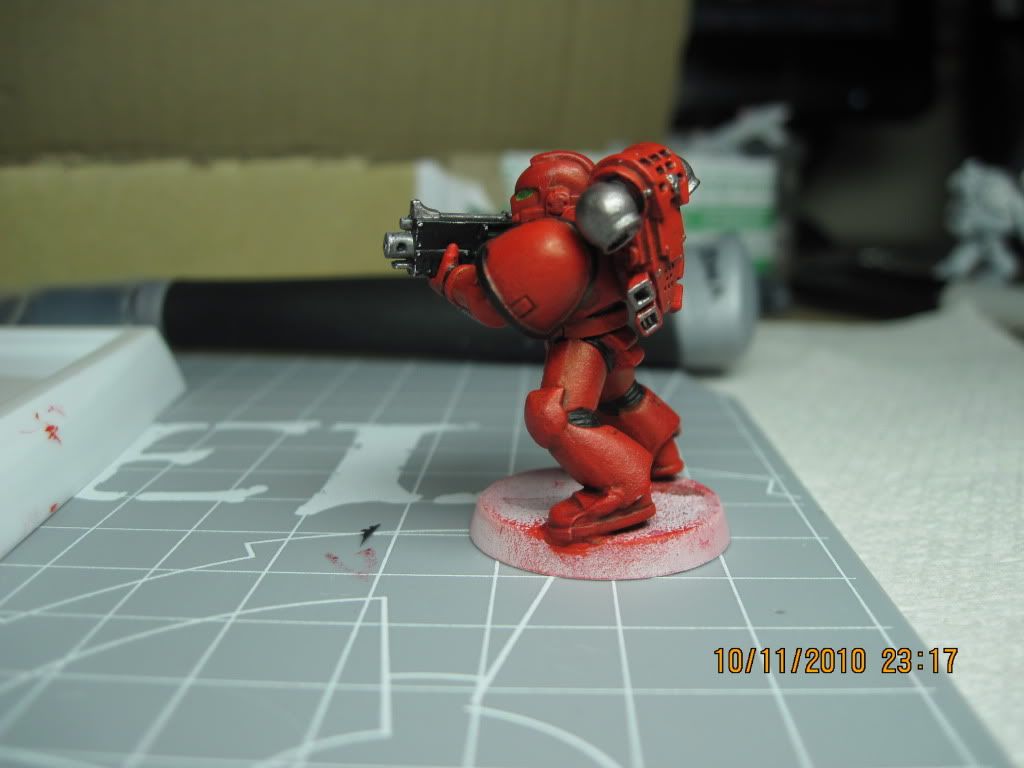
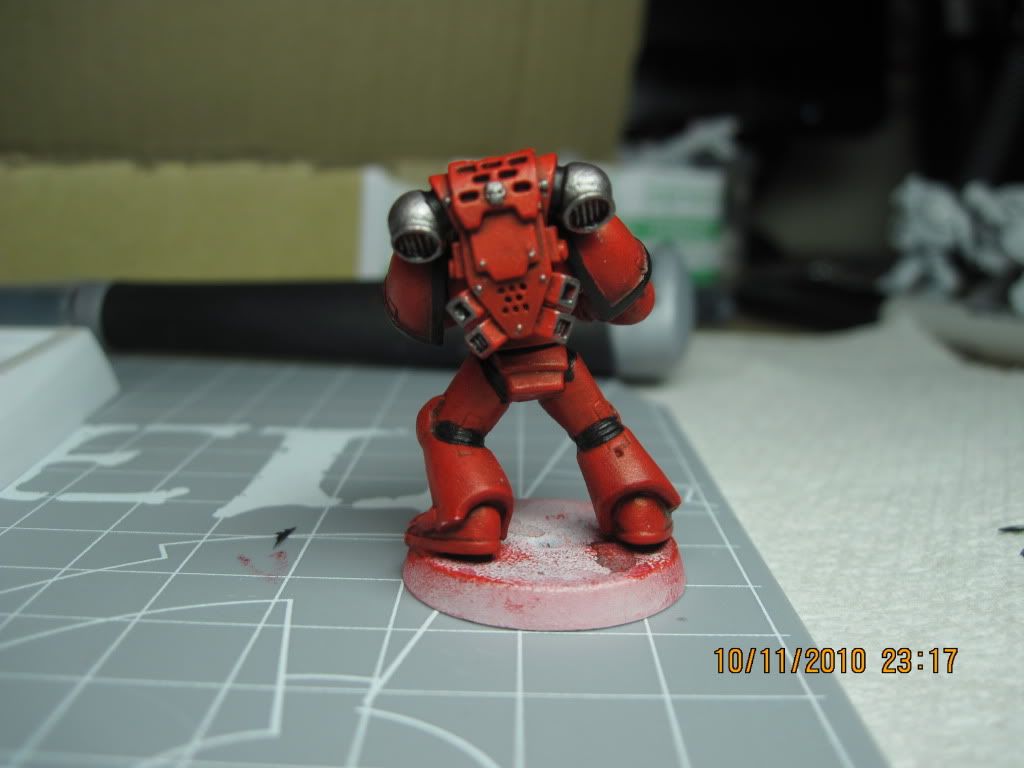
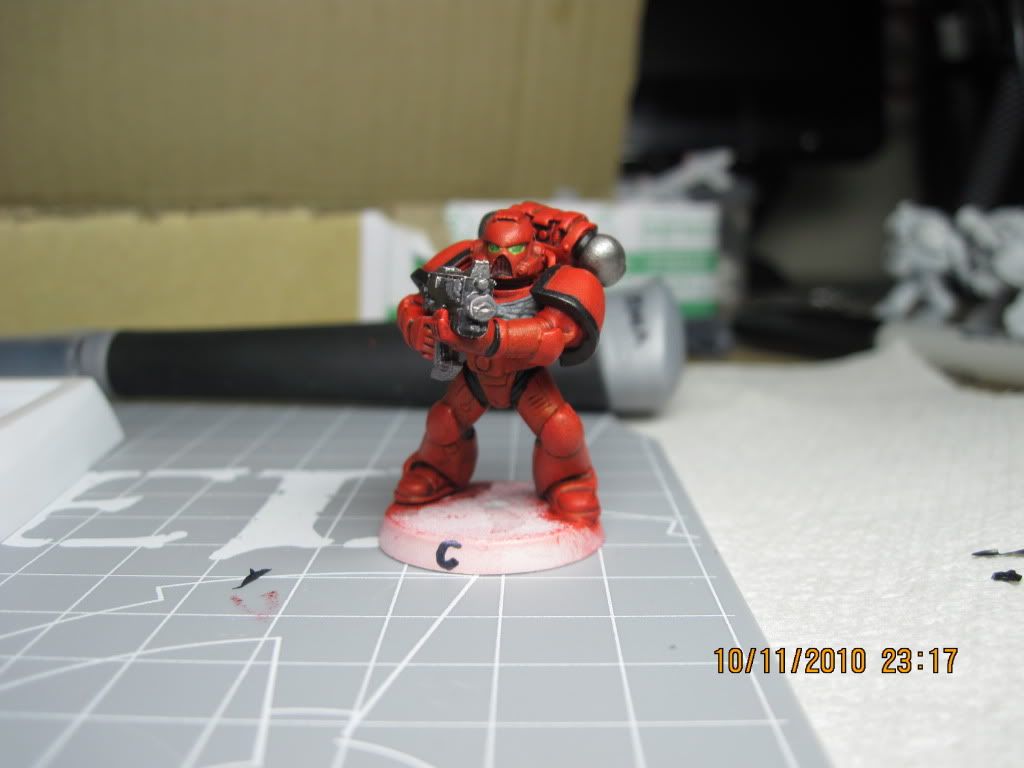
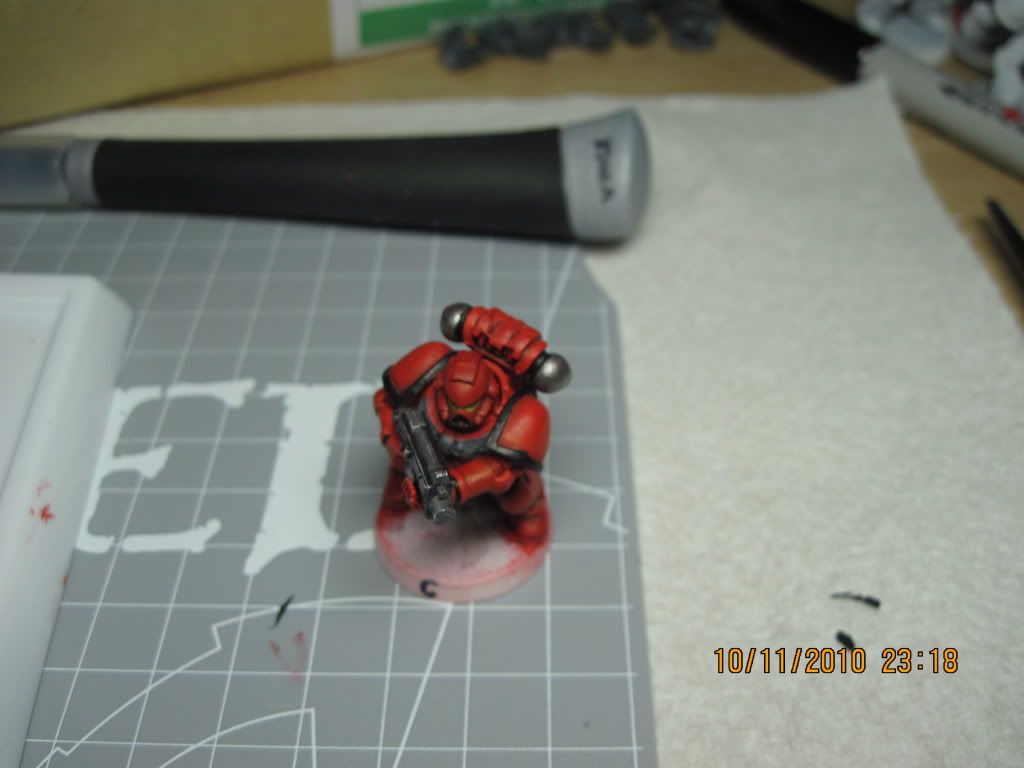
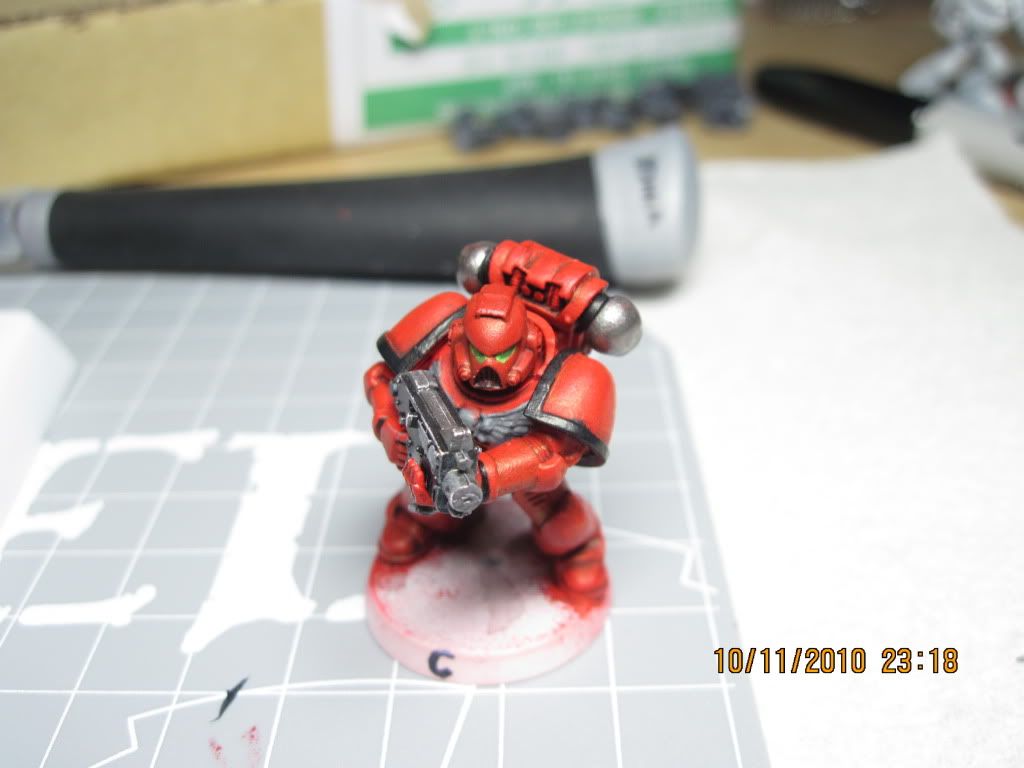
My first completed Space Marine

-Ice

New member
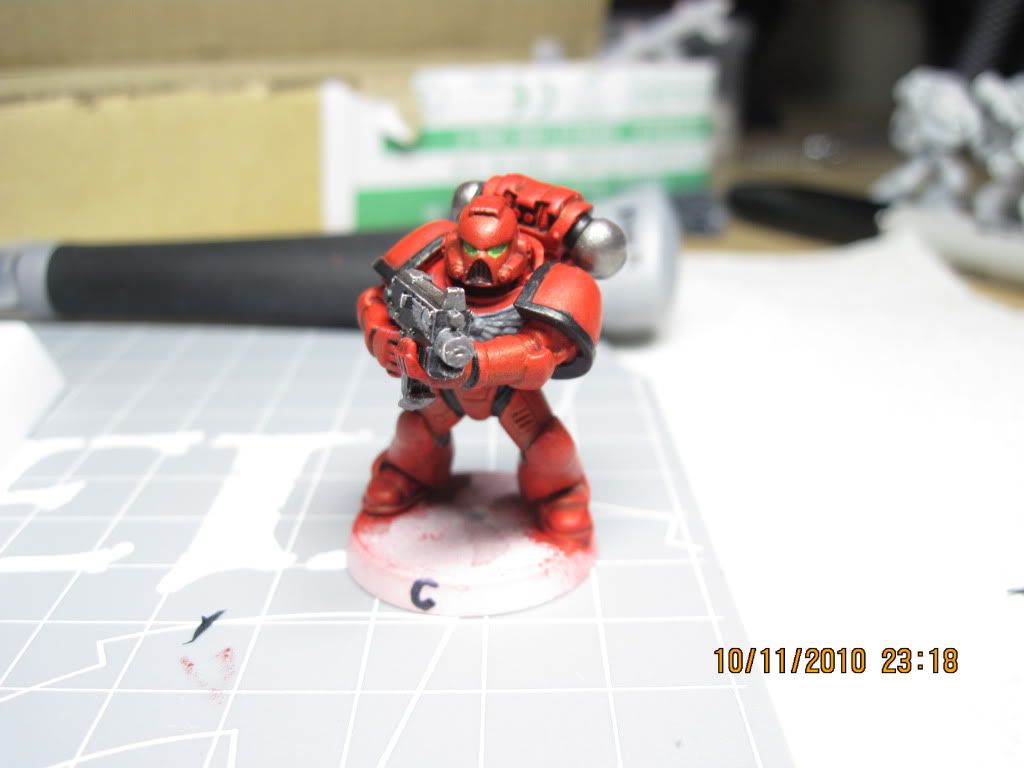
Hi guys! I've finished this space marine a few days ago. I'm not too happy with the textures and I need to work on my fine-brush control. I did this mini with lots of overbrushing, a base of blood red, baal red wash, dark flesh + chaos black wash, and then overbrush/drybrush blood red and a little blazing orange.

I tend to work on the entire mini first (as defined by the steps above) then concentrate on the details. Just the gun, shoulder pads, eyes, and backpack boosters in the case of this mini.

In any case, comments and criticisms or both painting and photos greatly appreciated!

1sttest009.jpg


1sttest001.jpg


1sttest002.jpg


1sttest003.jpg


1sttest004.jpg


1sttest005.jpg


1sttest006.jpg


1sttest007.jpg


1sttest008.jpg


Thanks!
 

Aulbath

New member
Pretty good for a first try, you are off to a good start. Now you should go for shading and highlighting the thing, as it lacks almost any kind of definition. The pictures will actually help you deciding where the lighter and darker areas should be (using classical tabletop lighting, with the lightsource being somewhere above the miniature). What you wanna do is take your mid-tone (in your case blood red) and step by step brighten it up by adding orange and / or white and layering it where the light hits. Shadows are the same thing, except that you darken your mid tone with a shadow color of your choice. For dramatic effect you could try mixing in some other tones like purple for the shades (carefully though, too much will be - well - too much).

I mentioned it before, but you can achieve the whole redbasing and shading part MUCH easier by basecoating the mini in Armypainters dragonred followed by a top spraying of Pure Red (if you are insisting on GW colors, try finding someone who owns the GW spraygun, dillute your GW colors and prime your minis that way). If done right you will have a very smooth and thin finish and a good foundation to work from which leaves you with just the darkest shadow areas, recesses and highlights to take care of (in my opinion these are the fun parts, basecoating is dull and not very fun).

Color priming is something you are going to look into sooner or later if you want to actually finish an army in your lifetime or need to reach a deadline for a paintjob. Also, it helps you with batch painting, because you get an identical base to start from if you spray for example 10 marines in a row. You will realize the greatness of this once you have the first minis in the same squad that look different in tone due to wrong mixing ratios too little or too much water and so on.
 
Last edited:

-Ice

New member
Oooo... shading... highlighting... big words!

Kidding aside, I'm not even sure I want to go down that part. Not until I have at least an army painted consistently, even without definition. I'm having hard enough time painting with even coverage, I'm not sure I am ready to tackle shadows/mixing/blending yet.
 

airhead

Coffin Dodger / Keymaster
not bad. The paint is all in the right places.
Clean the mold lines a bit better around the gun barrel.
If you really want to up the cool factor, get a pin drill and drill down the barrel just a bit. Otherwise, hit it with a bit of sandpaper so it is flat across and give it some matt black. Like you did the flash hole on the side.


Finish the base.. That will make it look a lot more "done".
 

Aulbath

New member
Well, those are pretty much the next step from basecoating (and that is pretty much what you did here). You got your basecolor from which you start working, the above mini is but the very first step in a series of (seriously time consuming) steps to reach your 8.0+ score mark.

Using colored primer, I churned out 160 miniatures painted at your level over the course of one weekend with the help from a friend. If you just want "blocked out" minis, there is no reason using tons of diluted layers of red... grab a can of red, spray the thing red, block in the details. Shouldn't take you much more than 15-20 minutes per Miniature.
On the other hand, for my Space Wolves which are rated a high-end 6, and some even 7 on here I needed 3 months for the whole army consisting of just 30 troopers and 5 vehicles.

Anyway, some easy things that you could do to improve your miniature; wash all the metals with Badab Black. Wash the recesses and parts were the armor overlaps in Badab Black, Wash the Aquila on the chest with Badab Black. (you can also "paint in" the Wash, back in the days people used diluted inks for this) , this will act as simple shadow and make the miniature pop more - you could also use a Micron pen and draw in these shadows (I would shade the bottom part of the eyes too), making it look very defined. It's little effort but a great effect.
Basically, this is always the second step after basecoating according to even the oldest GW painting guides (loads of people here will probably tackle it completely different, I am sure). The whole procedure is basically, paint your midtone -> wash-shade it -> restore the midtone on the raised parts -> highlight the most raised parts -> awesome miniature.

You will instantly see what a bit of darkness surrounding your raised details can do for making them pop. Adding a few carefully painted edge-highlights (kneepads, "nose", the beginning of whatever it is that's on the top of his helmet as well as some of the edges of the backpack) you will have a nice looking mini that will easiley put most of the stuff your friends will be putting on the table to shame - and then you haven't even started on the stuff the people around here do.

And again, there is nothing wrong in using a can of colored primer to get a good, even and consistent start. Especially when painting troublesome colors like red (did they tell you it's one of the more/most difficult colors to work with?).
 
Last edited:

-Ice

New member
airhead, thanks for the feedback! I never realized there was some mold lines on the barrel itself. Nevermind, this mini was more of "what I can do with paint" rather than prepping it. Looking at the backpack, I realized I tackled that mini with my files rather than with a hobby knife. Oh well. I like the barrell suggestion as well, but I'm all out this month and any other "hobby purchases" will have to be done after the next paycheck. A drill is next on the list, as well as more paints and brush assortments. Damn, this hobby is expensive!

It took me a while to realize what you meant with the flash hole, and even now that I realize where it is (the side of the gun where the shell casings get ejected, correct?), I still don't understand your suggestions regarding painting the muzzle. Care to elaborate?

Aulbath, seriously dude, this is just step one? I am a total newb!! What do you mean regarding the 8.0+ score mark? To be honest with you, I am quite pleased with this mini. It is nowhere near where I want to be, but at least I know where I'm starting from and can work my way up from there. I don't think I like washing with badab black... I tried it on a previous mini and it turned out darker than I wanted to. As you can see, I want my minis bright colored, that's why I'm priming with white. While I do appreciate your feedback, I feel most of it is over my head --- I do understand the words but I don't know how to do it or what the effect of such technique will be. I'm sorry but you make it sound so simple but I'm too new at this (can you say "less than a month"?) for it to make any sense. Details would be appreciated!

As you can see, I'm not aiming for your average GW TTQ mini, I don't mind spending time painting each mini (so long as they all turn out the same color and have cohesion) and I would probably end up having more fun painting than playing.
 

Torn blue sky

New member
Yeah, checking for mold lines is a pain in the arse, but necessary =( We all still manage to miss them from time to time, at least it's something you're conscious about. Paint isn't slapped on thick, always a good sign, looks like you're getting to grips with washes, also a good sign. I'd say you're on all the right roads! Have fun with it, look forward to seeing how you get on in future ;)
 

-Ice

New member
Torn, yes, scraping all that mold lines is a pain. I just assembled 5 assault marines, the ones with the jump packs... and I'm thinking boy! do they need some green stuff on the jetpack!

Washing down paints with lots of water (1:5 or 1:7 for me!) is a surprise for me, I thought it was just a dab of water on maybe 2 dabs of paint. However, this mini wasn't done with washed-out paints but rather some extensive drybrush/overbrush. Obviously a lot of care was taken to ensure the paint wasn't thick enough... the shoulder pads and armor creases were painted with straight-from-the-pot black paint, the gun was the same, and the silver areas took about 2 coats of boltgun metal for proper coverage, but all were straight-from-the-pot. I expect with learning how to water paints now, I'll get better results and more details showing with even paint coverage.
 

Torn blue sky

New member
Generally with blocking in areas like the black parts you did, I tend to water it only slightly to get decent coverage, but enought so it's not thick. After that initial colour is down then you can start going over it in watered down shades building up lighter as you go to the highlight. Seems like you're doing just fine =)
 

-Ice

New member
Generally with blocking in areas like the black parts you did, I tend to water it only slightly to get decent coverage, but enought so it's not thick. After that initial colour is down then you can start going over it in watered down shades building up lighter as you go to the highlight. Seems like you're doing just fine =)
Okay, what does "blocking in areas" mean again? I'm lost with your reference to shades and highlight again. Thanks for the compliment on my work, however, I feel that if I don't understand what you're saying, I may have done the "good work" by accident and don't know what/how/why I did something right.
 

airhead

Coffin Dodger / Keymaster
...It took me a while to realize what you meant with the flash hole, and even now that I realize where it is (the side of the gun where the shell casings get ejected, correct?), I still don't understand your suggestions regarding painting the muzzle. Care to elaborate?
The flash suppressor has holes in it in GW world. Those are the two holes on each side of the barrel near the end. You've painted them a bit darker (wash?) and they look good. The end of the barrel should be a hole for slug throwing type guns (bullets). So you should see a chrome/nickle barrel with a large hole in the middle of it. If you are not going to drill out the barrel, then paint the end black so it looks like there is a hole there. (simple?)

Here is an example of a drilled and painted gun barrel.:
http://www.coolminiornot.com/262617
No comments on the rest of the mini.

****
Blocking in refers to taking an area of color and working that one area to get it right - then moving to the next "block".
Again, this refers to at least 3 colors for an area. Shadow, base, highlight. The easiest way to get them with large flat space marines is to base coat (you've done well there) and then a wash of darker color to shadow down the creases and corners. This only doubles the amout of time you'll spend on a mini, but it sure makes them much better than just 'tabletop' single color guys.
***
Get comfortable with painting - it looks like you are well on your way there. All lines neat and paint where is should be. Use 2-3 thinned layers to build up the color instead of one thick layer. (it looks like you've done that.).
Once you are comfortable, then begin the washes.
Later, start highlighting. Tougher to do on large smooth areas like sm armor.
 
Last edited:

Torn blue sky

New member
Simplified, blocking in is basically laying down a solid colour you want that part to be (IE; black, yellow, red) This is usually a darker shade of the colour you want to see at the end. This is where shading and highlighting come in to play.
Highlighting is the process of gradually blending the paint up to a lighter colour and applying it in layers at each stage. For example; Take the dark red base you used, add a little bit of the red you want to see as the end result so the dark red is now a slightly lighter dark red. Apply this to the mini leaving some of the original colour visible. Then mix a little more red in to make an even lighter dark red and apply it so the original colour and the lighter dark red you used first are visible. The aim is to keep doing this and effectively having these slight colour changes in "bands" untill you end up with the colour you'd like to finish with. The end effect should be a nice blend from dark to light. The key is obviously making sure the transitions in colour "bands" are smooth . This does take time to do, so don't worry if you think it's going too slow. Practice with the dark red you have and Blood Red, in time you;ll get used to it (Usually there's that sort of epiphany moment) And you can experiment with adding more colours etc.
Shades are (for all intent and perpose) "shadows" Where the light would be darker, the colour is darker. Pretty simple stuff. Takes a while to get it right in your head, however. You can go back and shade a part by making a Wash or Glaze (ACHTUNG! More technical terms!) But I wouldn't worry too much about that at this stage ;)
 

Aulbath

New member
Aulbath, seriously dude, this is just step one? I am a total newb!!

Aye, I think it's best to realize early on that quality painting is actually tough and takes time (my first mini I uploaded here was around 5.8 I think... it took me 2 and a bit years to just raise my average score to around 6.8 - the next step is getting actually ABOVE 7 - which will take me just as long as getting TO 7).


What do you mean regarding the 8.0+ score mark?

Let me quote you from that other thread of yours: "I've really admired the pictures of the minis in the books and even though I know this comes with years of experience (and lots of talent), I want to paint to a standard as close to those pictures as I can. That is my goal."

All the fancy stuff from the books would probably score between 7-8 on the CMON scale, and the examples you posted later on were also "display-quality" pieces scoring at least an 8 on the CMON scale. The CMON scale is basically a user-rating telling you how awesome you paint and how much of the publics taste you are meeting with your mini. So, if you are aiming for that kind of quality like you said, there are many acrylic wonders to be seen and learned.

To be honest with you, I am quite pleased with this mini. It is nowhere near where I want to be, but at least I know where I'm starting from and can work my way up from there.

Aye, we all like our first painted mini - it's a start and if you are actually still excited to go for more the better. However, we provide you with a lot of infos here that will make your second Marine so much better than your first one.

I don't think I like washing with badab black... I tried it on a previous mini and it turned out darker than I wanted to.

Well, you don't want to shade the whole mini (well, you could - that is how I did my Space Wolves), but what I was talking about above is to take your brush, take a bit of wash and apply it were hard shadows would form (e.g. overlapping armour). Don't spill wash all over the guy, but apply it where shadows would happen. If you spill some, you can go back and fix it up with red. If black is too dark for your taste (even if it brings out the bright red quite nicely) go with Devlan Mud Wash. In fact, that's what I use for shading red as well, and it's good stuff. It's more a very dark brown rather than black and thus adds to the red nicely.

As you can see, I want my minis bright colored, that's why I'm priming with white.

I have grown up on Warhammer 40K 2nd Edition, and let me tell you, you are far away from bright colored ;)
I am pretty sure any oldschool Space Ork player will agree with me.

Seriously though, it's all fine with having a white undercoat and bright colored minis - but still, even on a bright mini there will be shadows and definition. It actually helps to make the brightness stand out even better.

I'm sorry but you make it sound so simple but I'm too new at this (can you say "less than a month"?) for it to make any sense. Details would be appreciated!

And Details there will be, got a bazillion oldschool Marines laying around - need to test my latest red colorprimers anyway... if you don't mind, I will do a little phototutorial over the weekend. Nothing grand, just a little bit of fun and you will see that making above average Tabletop Quality minis isn't really Rocket Science - once you got the principles down to do those you can concentrate on the serious painterly stuff for display pieces.

As you can see, I'm not aiming for your average GW TTQ mini, I don't mind spending time painting each mini (so long as they all turn out the same color and have cohesion) and I would probably end up having more fun painting than playing.

I know you are aiming for above average TTQ and have your mind set on display quality, that's why I (and the others too) gave you quite some tips to improve from where you are now towards your set goals.

Having said all that, I can only repeat myself - you are off to a good start, now you need to get comfortable with the brushes, develop a feeling for them and how the actual painting works all the while trying to incorporate new things into your painting style as it develops.

So, paint some more minis like the one you posted above to get a feeling for the basic brush/painting. Once you are comfortable with that, you will be wanting some more definition on your minis - I am sure about that. THat's where shading and highlighting will come into play. As I have said, if you like - I can post a little "intermediate" tutorial over the weekend.
 

-Ice

New member
The flash suppressor has holes in it in GW world. Those are the two holes on each side of the barrel near the end. You've painted them a bit darker (wash?) and they look good. The end of the barrel should be a hole for slug throwing type guns (bullets). So you should see a chrome/nickle barrel with a large hole in the middle of it. If you are not going to drill out the barrel, then paint the end black so it looks like there is a hole there. (simple?)
Ah, so that is the flash suppressor. No, that's not a wash, I just painted the entire gun black (flash suppressor included) then the muzzle was painted with boltgun metal.

Blocking in refers to taking an area of color and working that one area to get it right - then moving to the next "block".
Again, this refers to at least 3 colors for an area. Shadow, base, highlight. The easiest way to get them with large flat space marines is to base coat (you've done well there) and then a wash of darker color to shadow down the creases and corners. This only doubles the amout of time you'll spend on a mini, but it sure makes them much better than just 'tabletop' single color guys.
I think I know what you're saying now... so about how many blocks does a SM have? Is each leg a "block" or is it divided into upper and lower "blocks"? I think I can wrap my head around blocking an area but working on such a small scale, I cannot really imagine how it translates to minis. Tanks maybe, with like a front/side/back/top/bottom blocks but SM?

Get comfortable with painting - it looks like you are well on your way there. All lines neat and paint where is should be. Use 2-3 thinned layers to build up the color instead of one thick layer. (it looks like you've done that.).
Once you are comfortable, then begin the washes.
Later, start highlighting. Tougher to do on large smooth areas like sm armor.
Ha! Fooled ya! Though that marine was done with 2-3 layers of basecoat, it was with straight-out-of-the-pot paint and applied via an overbrush method and just "thinned" out the paint on the mini by going over and over and spreading it around. I've had about 2-3 minis that were "ruined" with too much paint slapped on so I was really careful there. I suspect watered down layers would look better, but that mini was done BEFORE I fully understood watered-down paints.


Simplified, blocking in is basically laying down a solid colour you want that part to be (IE; black, yellow, red) This is usually a darker shade of the colour you want to see at the end. This is where shading and highlighting come in to play.
Okay, now I'm confused. Is blocking different from "layering" (ie, putting on one color, then another)? Or is it dividing an area into "blocks" to be painted?

Highlighting is the process of gradually blending the paint up to a lighter colour and applying it in layers at each stage.
Again, confused. I know highlighting as in "extreme highlight" or putting a line on a upper part of a model using a lighter color to simulate light hitting that part. Extreme highlight uses a stronger line but highlighting uses weaker, more blended-in sort of application. From what I understand from your example, you are referring to "layering" (um, page 8 on How to Paint Space Marines), correct? Please do correct me if I'm wrong anywhere.

Shades are (for all intent and perpose) "shadows" Where the light would be darker, the colour is darker. Pretty simple stuff. Takes a while to get it right in your head, however.
Shading I can understand a bit more especially since the example for this is usually cloaks or other fabric on minis... if the fabric were blue, the "shade" would actually be painted a darker blue. Is this correct?

You can go back and shade a part by making a Wash or Glaze (ACHTUNG! More technical terms!) But I wouldn't worry too much about that at this stage ;)
I've read that washes are actually difficult to get right --- something like the effect is dependent on how much wash you apply and actually controlling that amount is easier said than done. Do people really use wash or is it better (for consistency and control purposes) to just do your own shading?
 

-Ice

New member
Aulbath, thanks for explaining that rating. I guess if 'Eavy Metal minis are a 7-8, that's something solid to shoot for!

I don't think I've done a Devlan Mud wash yet, but I'm surprised you said you don't apply the wash over the whole mini. I've been told you basically took a brush and went to town with the mini with regards to wash, are you saying a wash has to be applied in a more controlled manner? I do apologize for keeping on reiterating about bright-colored mini but the guys at my local shop always emphasize the "realistic, gritty feel" and I want more of the effect I see from the Blood Angels codex and though there are some weathering effects and such on the tanks, I think the minis themselves look pristine.

I do look forward to your tutorial and please do make it kinda like an idiot's guide. While I am not an idiot, I am close to one as far as painting is concerned so a step-by-detailed-step would be greatly appreciated. Oh, and are you making a picture tutorial or a video tutorial? I vote for a video one!
 

Mourner

New member
first of all, welcome to the hobby

second, WOW, that marine looks way better than my first mini

third, sorry... but this post has gotten a bit longer than i planned :p

and now that we've got the formalities out of the way:

how to improve:
1) practice and keep pushing yourself
2) keep visiting this page (there's so much knowledge and advise on here)
3) find others near you who paint and get together
4) searc youtube, there's loads of tutorials on there
5) as others have said, you need more depth, shades and highlight.

shading is actually quite easy, one neat trick you might like to try:
take the marine you've painted, dip it into a glass of clean water, put it down and study where the water pools on the mini.
where the water pools (and takes longest to dry) is where the paint should be a "shade" darker.
now take a wash (black, brown) and paint only the parts of the mini where the water took longest to dry
for the next step up in skill you might want to dilute the wash and give it several coats, gently decreasing the area to which you aply the wash

and of course you can apply a wash onto an entire model, but you'll darken all of it, meaning you have to paint the mid-tone again. applying a wash only where you want it makes much more sense

Highlighting isn't hard either (actually, it is, but you'll learn to blend eventually :p)
there's an easy way and a hard way, first the easy way, edge highlight:

take a color 1 shade lighter than your base mid-tone, take a small brush and paint a thin line onto any sharp edge you see.
you're done :D

to make it a bit more interesting, go another shade lighter and paint only the most prominent points

the next step would be to add a transition to the line,
this works pretty much the same as above, just with more moisture.
i use paint straight out of the pot, diluted by licking my brush
i than place an edge highlight, starting at the most prominent point, making sure my brush leaves behing a little bit less paint with every milimeter, repeat until it looks good XD
now do the same with a lighter color as described above.

the hard way would be to paint the upper part of a block with a highlight color and the lower part with a shading color, with a nice smooth transition between these colors and the mid-tone in between
but that would be blending, something you'll learn when you're ready :p

5) something elde that's sorely lacking is you basing skills, i guess you like your blood angels to fight over a bloody frozen planet of ice, but i'd pick something more dramatic
just kidding, but a base makes a mini, it adds a background story

that said, here's another tip: don't drybrush :p
of course, everybody sins XD
I used to drybrush pretty much everything, but it's too imprecise. these days i only use drybrushing to paint TTQ metallics (quick and easy) or just a really light dusting of boltgun metal onto a black primed miniature, this makes the edges shiny, bringing out all the details.

one of the best things i've ever done was to paint an entire mini without drybrushing, just mixing lighter and lighter shades of color and applying them to smaller and smaller areas. taught me a lot about blending and brush control.

Keep on painting,
Mourner
 
Last edited:

Torn blue sky

New member
I'll try and break down your questions in stages pertaining to the points, respectively.

1. Blocking in colour is basically painting it the flat colour you want that part to be. For example, you want the armour to be red, so you paint it a dark red colour. You want the gun to be black, so you paint it black. The block colour works as the base to the rest of the work. The first layer of "layering. if you will.

2. "Layering" is the process of highlighting. I think your perception of highlighting so far is what would be referred to as "final highlights". They are the very last touches of the lightest points.

3. You're correct in the understanding of shading, yes.

4. Washes (and glazes) are very handy tools for shading and changing the hue of a mini. They can be hard to control, but that comes with practice. Eventually you'll know exactly what you're doing to the point you don't think twice about what you're doing really. A lot of people (if not most) use washes and glazes to achieve varying depth or hue in their work. Personally i'd recommend using them. It can make a huge difference to a piece.

Hopefully things are a little bit more clear. Any more questions just ask away ;)
 

-Ice

New member
I am amazed at how ignorant I am. A wise man once said "the more I know, the more I know that I don't know"... or to put it simply "ignorance is bliss". My thanks to all your patience.

Mourner, thanks for the welcome and for the input. As to #3 and #4 of your tips, I work full time and that limits my free time a lot --- so it's easier for me to post here than to go to my local shop or to go to someone's house. Also, that limited free time means I don't have time to comb YouTube. While it is a fine resource, you'll agree with me perhaps when I say that 49 out of 50 times the videos are lacking in either content, clarity, or purpose. As I aim to learn as much from each painting session I do, that means I need to spend my free time wisely ;)

Thanks for the water trick though, I'll keep that in mind. At the moment, I'm still getting to terms with my basecoating abilities and I'm too scared to venture into washes and shading... I'm still coming to terms with the idea that washes are not "washed" onto a mini but rather painted on like normal paints... as for your highlights instructions, I've read those before (no offense) so the steps sound familiar. The "look" however is something I am lost on. A picture is worth a thousand words, so a video is worth a couple tomes I wager. Any chance of pictures there? Or maybe a video?

With regards to the base, I know there are lots of ways to get creative with bases but I'm more worried about my painting skills for now (which I can easily carry over to bases later on) so I'm leaving artistic basing to the sidelines for now.

And yes, thanks for the tip on NOT to drybrush. Funny how people here speak against it but both my local GW employees and one of the local "good mini painter" keeps on pushing drybrushing/overbrushing. Consider drybrushing gone from my repertoire for now. Thinking about it though, how do you paint the chest eagle properly though? Isn't it basecoated with a base color, then the shades are, in theory, drybrushed on to it?


Torn, so is blocking kinda like "working with one color at a time" rather than "working on one section of the mini (the leg perhaps?) at a time"? Because if it's the first layer of layering, then isn't that called "basecoating"? Sorry if I'm nitpicky here, I'm not trying to be an ass, I'm just trying to understand things here. I'm wondering at this point if blocking and basecoat refer to the same technique (one method being called two names)?

I got lots more questions but it's been a long day for me and I'm working overtime tomorrow so I better shut up now before I confuse myself beyond help. :)
 

Yuggoth

New member
I do apologize for keeping on reiterating about bright-colored mini but the guys at my local shop always emphasize the "realistic, gritty feel" and I want more of the effect I see from the Blood Angels codex and though there are some weathering effects and such on the tanks, I think the minis themselves look pristine.

Well, lets just say that for some people "realistic, gritty feel" is just an excuse for not beeing able to paint in lines or do smooth blends. You can easily hide lots of mistakes under tons of scratches and mud. That said, a realistic and gritty mini can be a thing of great beauty if done by someone who knows what hes doing. but if you are more comfortable with bright, clean colours stick with it for now. Personally I like them more too (thats why I collect High Elves).

Torn, so is blocking kinda like "working with one color at a time" rather than "working on one section of the mini (the leg perhaps?) at a time"? Because if it's the first layer of layering, then isn't that called "basecoating"? Sorry if I'm nitpicky here, I'm not trying to be an ass, I'm just trying to understand things here. I'm wondering at this point if blocking and basecoat refer to the same technique (one method being called two names)?

Basically yes. It is a rather loose term, not a golden rule. It is used to denote the fact that you do basecoats for different parts in different colours (even if you sometimes do them on top of each other, like "blocking in" the black basecoat of a gun after you basecoated the entire mini in red before).
So why does this term exist after all?
I guess its because "basecoating" can sometimes be missunderstood as "just doing the main colour of the mini" (in your case red). This is especially the case if you use a spraycan or airbrush for basecoating your main colour like Aulbath has suggested (personally I don`t feel comfortable with this method, but thats a matter of taste I guess) Some do all the "blocking" (i.e basecoating each part in the colour you will work from when doing highlights and shadows) before they do any other work, like shading and highlighting. Others do shades and highlights on main armour and maind clothes first, then blocking in the colours for smaller details. Both methods have advantages. Again, a matter of style and personal taste
 
Back To Top
Top