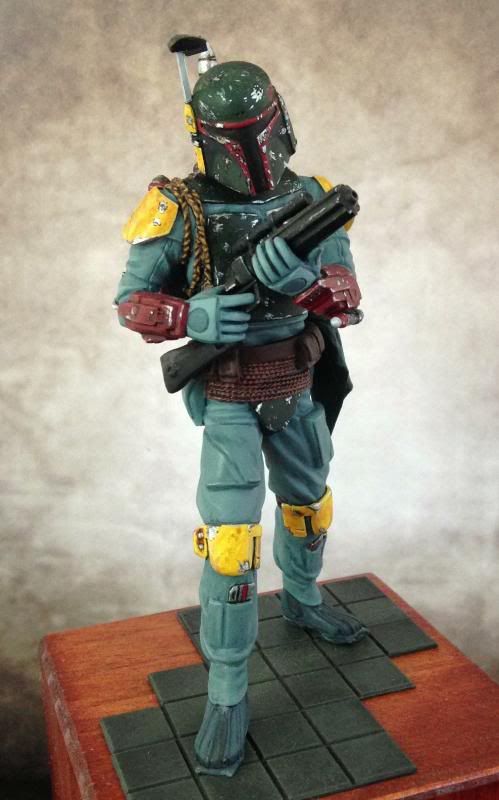
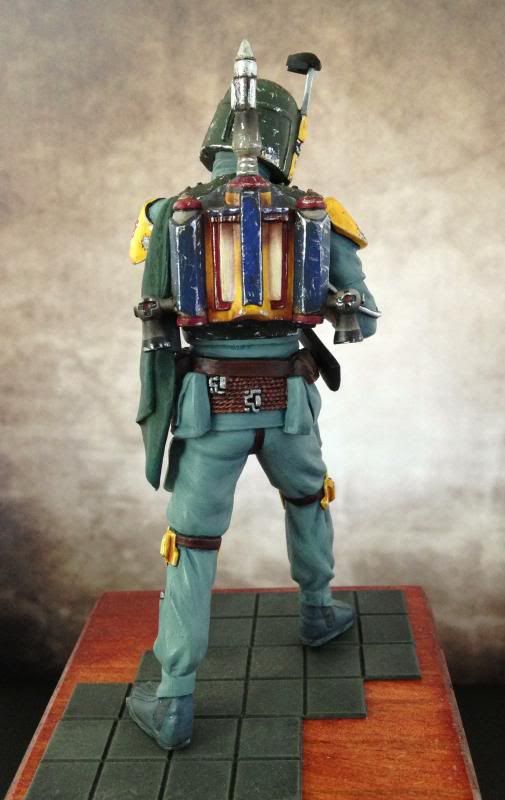
Boba Fett - Weathering on Jetpack

Boseafus

New member
I primarily paint 25-30mm miniatures but recently began working on a larger scale (maybe 1/10?) scale Boba Fett resin garage kit (about the size of an action figure). I'm really enjoying it but not all of the same painting techniques translate perfectly. I would love your advice in how to weather part of this kit. I'm currently working on the jetpack and while I'm confident in giving it the damaged look, I'm not sure how to get the weathered/faded look of the rockets exhaust as well as well as the faded dirtier parts of the jetpack. I'm using the full sized jet pack from this link as my inspiration. http://www.thedentedhelmet.com/f25/slave1pilot-paints-manofwar-rotj-jetpack-33936/
I've blocked out the colors and it's now ready for weathering. I was thinking of using multiple washes to create that faded look but wondered if there was a better way to pull that off.
Suggestions?
Thanks.
 

Einion

New member
All parts of that look easily doable but I don't see a lot of fading. There are 'fades', graduations in colour, but a lot of it is to a slightly dirty effect. Anyway, this is probably best achieved with careful layering, working thinly over the clean base. Very fast to do the basics of this (or all of it) with an airbrush but it's easily doable by brush too, will just take a lot longer.

Since you're new to working at this sort of scale I'd recommend you use a large brush for this - likely a lot larger than you're thinking in fact. I'd spray most of this myself but if I were doing it by brush I'd probably do the bulk of it with a 10-15mm flat or filbert, with a little backup from a number 6 round.

Presume you're set on how to do the scratches?

Einion
 

Boseafus

New member
Good stuff. Thanks. Yes, the dirty fading is what I'm talking about (especially on the yellow). An airbrush was used on the full sized jetpack but I wasn't sure I would get the precision on the one I'm working on (I'm not that confident with an airbrush). I will give it a shot with a brush.

I have done scratches but would love your input.
 

Einion

New member
Boseafus said:
(I'm not that confident with an airbrush).
Ideal time to practice then! Seriously, not much use in having one if you don't make use of it ;)

It shouldn't prove too difficult to do at least some of this by spraying, airbrushing ain't brain surgery after all. Just takes a light touch. Obviously it would be better to practice on a piece of scrap but if you go slow, work lightly and lean back to check your progress on a regular basis you shouldn't go too far wrong.

Regardless if you end up doing some or all of the weathering with a brush* one thing I would definitely recommend you get into doing is at least some basic shading with your AB, if not go the whole hog and use it for zenithal highlighting. This is one of the things they're ideal for and the larger the scale the more help this can be - might take a tenth of the time, and give smoother results.

*Also worth considering using pastel dust or pigment.

Boseafus said:
I have done scratches but would love your input.
Well the simplest way is just to use a fine brush and paint them on obviously. But if you prepare in advance you could do it in reverse, using masking. You'd paint the thing silver (with added shading if you want to take it one step further), carefully apply the masking liquid (foam, cocktail stick, fine brush or whatever), paint the top colour (with highlights and shading) and then pick away at the masking* to reveal the silver.

*Or pull at it with sticky tape.

Einion
 

Boseafus

New member
Just thought I would update ya on my model and thank you for the advice. Here's a link to the figure (Btw...the scale was 1/15)

bobafettfront.jpg


bobfettback.jpg
 
Back To Top
Top