You are using an out of date browser. It may not display this or other websites correctly.
You should upgrade or use an alternative browser.
You should upgrade or use an alternative browser.
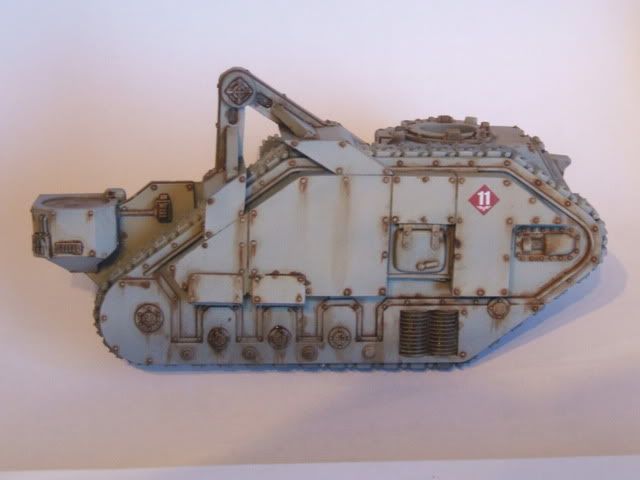
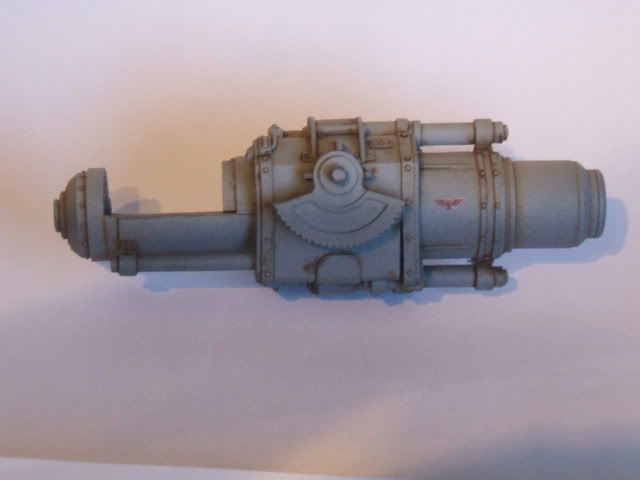
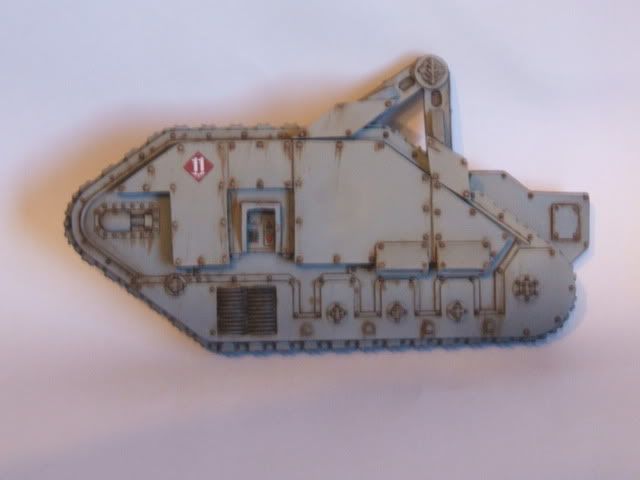
And yet more tanks
- Thread starter Cherub
- Start date
freakinacage
New member
looks good, you planning on doing any paint chips? with that amount of rust, i would imagine there would be some
Originally posted by freakinacage
looks good, you planning on doing any paint chips? with that amount of rust, i would imagine there would be some
I was thinking about it but I have yet to find a way to make good paint chips that I like.
Einion
New member
I\'ll second the call for chipping. Even if you don\'t go for the current vogue for lots of it (and not all in spots that make sense!) some chipping, rubbing or scraping off of paint is inevitable with use - just look at bulldozers for example.
What is it about the methods you know about that don\'t give results you like?
Einion
What is it about the methods you know about that don\'t give results you like?
Einion
Painted on with a brush: I can never get it to look right it always looks likes it been painted on with a brush.
Salt weathering: It leaves all exatly the same chips size and shape chips. And they are usally all square.
Hair spray: like salt weathering this has to be planned in the painted stage and when I have done it, it always seems to life more than I wanted so I end up with chips that are far to large.
Dabbed on with a sponge: I find this to be the closest to a natural look however I am still working on it and I cant get a natural look.
The only thing I havnt tried is doing the chips with a pencil. Hmm you have me thinking now. I got in a groove and finished it but maybe I will go back and try a couple of things out on it.
generulpoleaxe
New member
use a torn off piece from a blister pack sponge.
test it on your thumb nail first so that you can get the right amount of paint on the sponge and set to work.
highlight on the botton of the larger chips as well as adding some brown into them as well.
think about where the most areas of wear and tear will be, this is where the chips will appear (mechanics walking about near hatches, engine etc, the front part of the sides where it scrapes through dense foliage)
less is more, most of the weathering we see on models currently is so over the top, the vehicles would be fit for the scrap heap and not put any where near a battle field.
freakinacage
New member
couldn\'t agree moreOriginally posted by generulpoleaxe
use a torn off piece from a blister pack sponge.
test it on your thumb nail first so that you can get the right amount of paint on the sponge and set to work.
highlight on the botton of the larger chips as well as adding some brown into them as well.
think about where the most areas of wear and tear will be, this is where the chips will appear (mechanics walking about near hatches, engine etc, the front part of the sides where it scrapes through dense foliage)
less is more, most of the weathering we see on models currently is so over the top, the vehicles would be fit for the scrap heap and not put any where near a battle field.
Einion
New member
Okay, that\'s a thorough answer. Lemme see if I can help...
First off if you\'re applying the chips to a pristine paintjob then I\'d advise having a dampened brush ready to wipe off anything that doesn\'t go right. I\'ve found this particularly necessary when dabbing with a \'sponge\' because of how random the paint can go down.
You\'ll nearly always want to use an opaque paint or mix that gives very good coverage in a thin coat for applying chips, regardless of how you apply it. The last thing you want is to have to try to apply a second (or third!) coat to get ample coverage.
Above all, don\'t necessarily use just a brush...
Again, don\'t be afraid to combine it with other methods, it can definitely help get results - use the salt resist for the basic chipping, then go at a few edges with dabbing and/or brushwork, to add chips and refine what you get (join a few existing chips, enlarge others etc.)
Might be the case that doing the dabbing mostly with one and a little with another kind will give the best results. Work slowly and be prepared to brush away anything that you don\'t like.
One thing you didn\'t mention is also a negative effect (like salt resist) but you use masking fluid. Basecoat in the chip colour, then apply the masking by dabbing on with a foam, by painting it on or applying with the tip of a cocktail stick or whatever, or any combination of these. Then apply the paint colour (highlighting and shading if you like) and then dab with adhesive tape to reveal the chips.
This often leaves very fine raised edges that catch the light nicely, which can look good but see what you think yourself.
I think most people agree that even subtle chipping/scratching looks better when the chips are highlighted and shadowed. Another thing to consider is two-level chipping, where the primer layer (in a different colour) is exposed on some chips and on the edges of others, which can give some nice variation on a single-colour model.
Hope that helps!
In the future they probably wouldn\'t need to make even the outer layer of armour from steel so no rust, but still rusting looks nice so it\'s often included. Given access to interstellar levels of raw materials (essentially limitless) or the ability to convert energy to matter, most armour - if it\'s made from metal at all - would probably use palladium or another of the platinum group for some or all of its mass... how\'s about that for a painting challenge?!
Einion
First off if you\'re applying the chips to a pristine paintjob then I\'d advise having a dampened brush ready to wipe off anything that doesn\'t go right. I\'ve found this particularly necessary when dabbing with a \'sponge\' because of how random the paint can go down.
You\'ll nearly always want to use an opaque paint or mix that gives very good coverage in a thin coat for applying chips, regardless of how you apply it. The last thing you want is to have to try to apply a second (or third!) coat to get ample coverage.
Practice! It is difficult to get this to look good and I bet most people\'s first attempts weren\'t nearly as good as later on. As with most painting tasks practice does make you a lot better. It also helps loads to work directly from references (of real-world stuff or painting minis, whatever it is you want to match) rather than trying to make it up as you go. Work slowly and meticulously, using the largest sharp brush you can (teeny brushes don\'t hold nearly as much paint and it dries out much faster as well).Originally posted by Cherub
Painted on with a brush: I can never get it to look right it always looks likes it been painted on with a brush.
Above all, don\'t necessarily use just a brush...
This is a hard technique since you\'re so at the mercy of random chance, but experience does help.Originally posted by Cherub
Salt weathering: It leaves all exatly the same chips size and shape chips. And they are usally all square.
Mix grades of salt. Use a fine grit and rely on clumping to make any larger chips.
Again, don\'t be afraid to combine it with other methods, it can definitely help get results - use the salt resist for the basic chipping, then go at a few edges with dabbing and/or brushwork, to add chips and refine what you get (join a few existing chips, enlarge others etc.)
Most of this is done with foam, not sponge in reality, although you can use sponge too of course. There are many different kinds of foam, with different structures and cell size(s). Keep your eyes open for foam in various kinds of packaging and try \'em all to see what you think works well.Originally posted by Cherub
Dabbed on with a sponge: I find this to be the closest to a natural look however I am still working on it and I cant get a natural look.
Might be the case that doing the dabbing mostly with one and a little with another kind will give the best results. Work slowly and be prepared to brush away anything that you don\'t like.
FWIW I don\'t think just using a pencil really gives a good effect. Graphite pencils do work great for showing fresher wear on edges (the shiny effect contrasts nicely with the matt grey or brown the chips were done in) but alone it tends to look a little weak. But do try it yourself, it could depend on the colour of the paintwork as much as personal taste how well you like it.Originally posted by Cherub
The only thing I havnt tried is doing the chips with a pencil.
One thing you didn\'t mention is also a negative effect (like salt resist) but you use masking fluid. Basecoat in the chip colour, then apply the masking by dabbing on with a foam, by painting it on or applying with the tip of a cocktail stick or whatever, or any combination of these. Then apply the paint colour (highlighting and shading if you like) and then dab with adhesive tape to reveal the chips.
This often leaves very fine raised edges that catch the light nicely, which can look good but see what you think yourself.
I think most people agree that even subtle chipping/scratching looks better when the chips are highlighted and shadowed. Another thing to consider is two-level chipping, where the primer layer (in a different colour) is exposed on some chips and on the edges of others, which can give some nice variation on a single-colour model.
Hope that helps!
While I agree that often with this kind of thing less is more I think we should remember this is fantasy and taste can be the only deciding factor. After all the vehicles themselves are mostly unrealistic; with their chunky, cartoony design even in pristine condition they probably wouldn\'t last five minutes in the field! So the painted effects don\'t have to be realistic in the normal sense, like we\'d use for a miniature of a real vehicle.Originally posted by generulpoleaxe
less is more, most of the weathering we see on models currently is so over the top, the vehicles would be fit for the scrap heap and not put any where near a battle field.
In the future they probably wouldn\'t need to make even the outer layer of armour from steel so no rust, but still rusting looks nice so it\'s often included. Given access to interstellar levels of raw materials (essentially limitless) or the ability to convert energy to matter, most armour - if it\'s made from metal at all - would probably use palladium or another of the platinum group for some or all of its mass... how\'s about that for a painting challenge?!
Einion
So I used a foam from a blister pack and just did a few places where it would wear, edges and the 2 hatches and where I would walk if I was gaining access to those hatches.
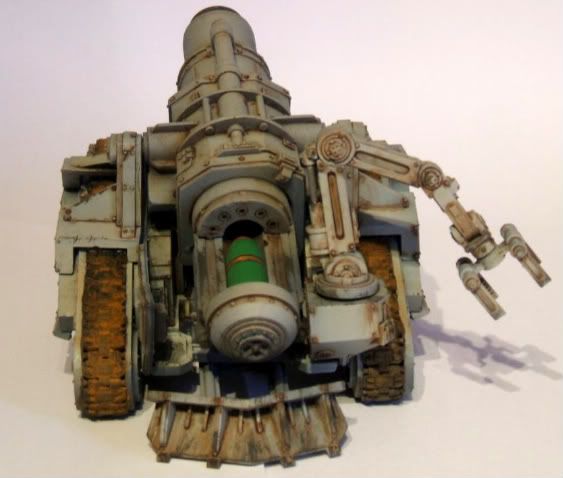
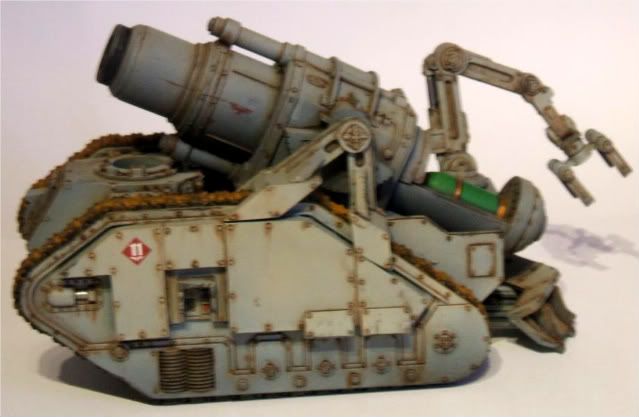
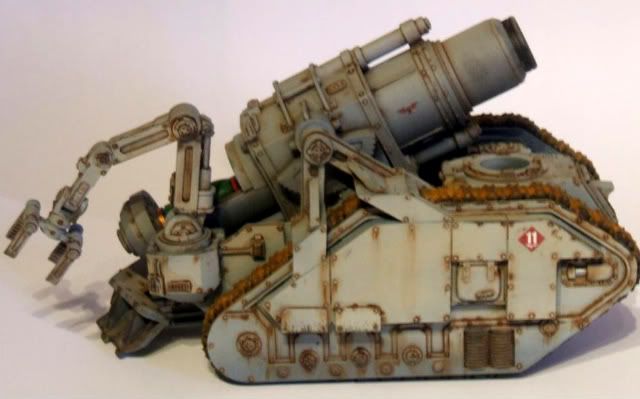
Of course looking at the pics I see that most of it doesnt show up. Picture taking is not my strong point. I think I am going to call this one done and place it to my display cabinet and start on the next one with a plan to include more chipping.


Of course looking at the pics I see that most of it doesnt show up. Picture taking is not my strong point. I think I am going to call this one done and place it to my display cabinet and start on the next one with a plan to include more chipping.
generulpoleaxe
New member
The fact that it is hardly showing up is good. Hyper detailing is about adding the extra touches that effect the atmosphere and are only notiable when viewed up close. That\'s when the real character of the piece is revealed.
Its a heavy long range artillery piece, to me that says its driven into place and parked there until its eaither destroyed or the enemy is beaten. The next one Im doing is the same, a heavy long range artillery piece, so it will have just a little more wear on it. The third one I have planned and am working on the mock up for as paint dries is a hellhound, so that means it is close range flame tank. It will have battle damage, alot of wear and tear and just a bit of mud on it 

